 by
by 
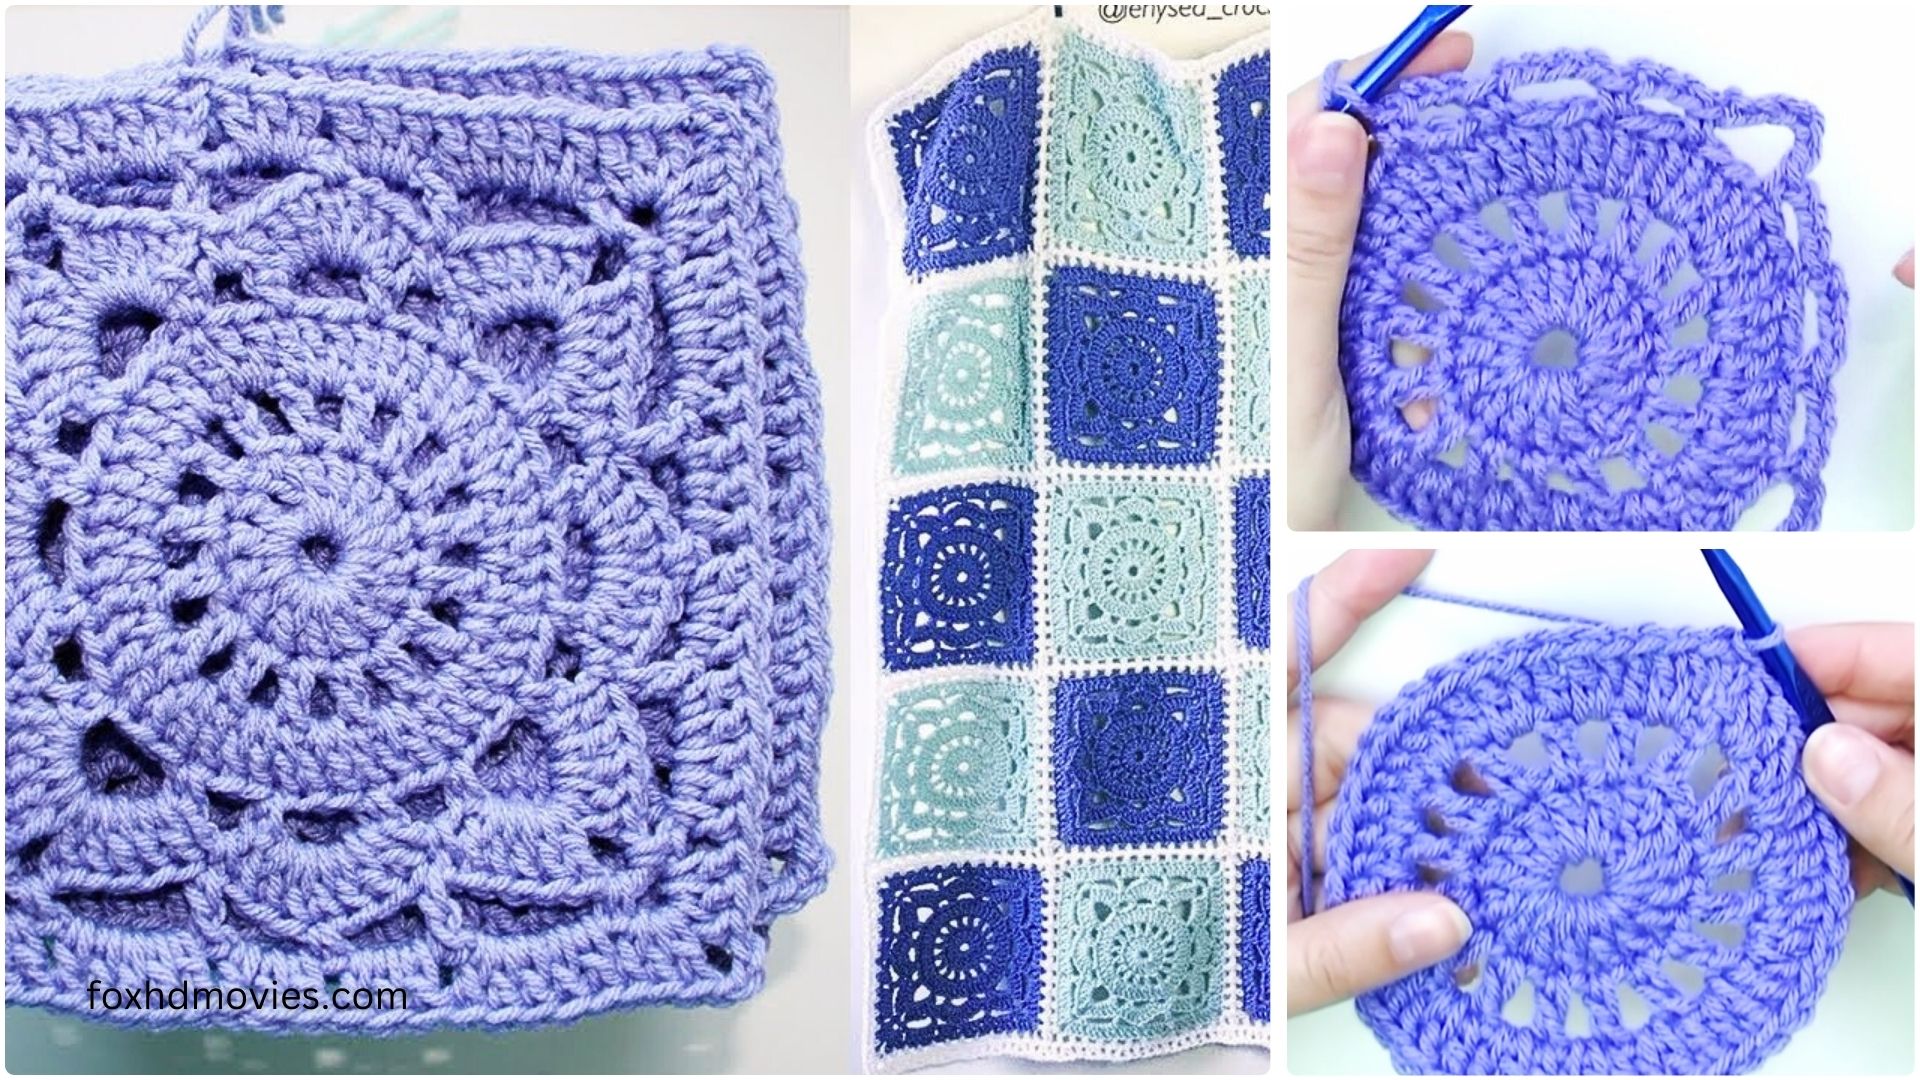
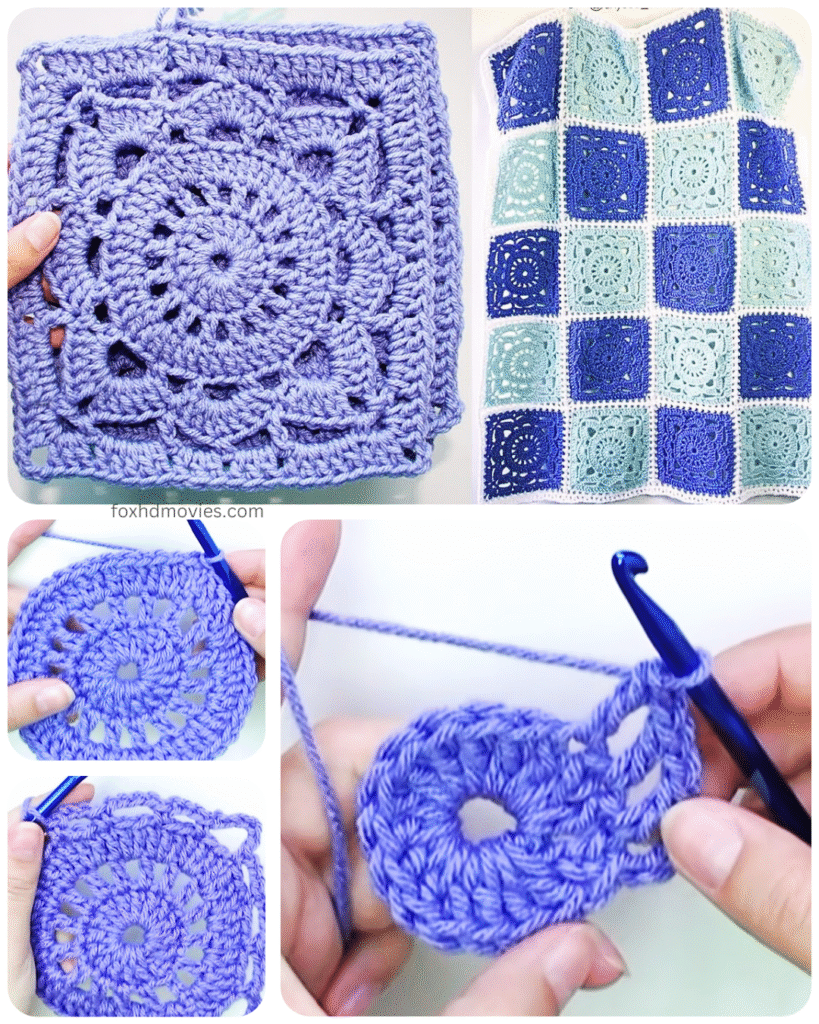
The Willow Square is a beloved crochet motif known for its intricate texture, created by clever post stitches and clusters. It’s a fantastic square for blankets, cushions, bags, and anything that benefits from a rich, dimensional fabric. While it might look complex, it’s surprisingly straightforward once you get the hang of the special stitches.
This detailed pattern will guide you through each step, helping you create a stunning Willow Square.
Skill Level: Intermediate (familiarity with basic stitches and post stitches is helpful)
Materials:
- Worsted weight yarn in your desired colors (you can use one color or multiple for a variegated effect)
- Crochet hook size H/8 (5.0 mm) or size needed to obtain gauge
- Yarn needle for weaving in ends
- Scissors
- Stitch markers (highly recommended for marking corners and beginning of rounds)
Gauge:
A completed Willow Square using worsted weight yarn and an H/8 (5.0 mm) hook should measure approximately 6 inches by 6 inches after Round 5. Adjust your hook size if needed to achieve this gauge.
Abbreviations (US Crochet Terms):
- ch: chain
- sl st: slip stitch
- sc: single crochet
- hdc: half double crochet
- dc: double crochet
- tr: treble crochet
- fpdc: front post double crochet (yarn over, insert hook from front to back around the post of the indicated stitch, yarn over, pull up a loop, yarn over, pull through 2 loops, yarn over, pull through last 2 loops)
- bpdc: back post double crochet (yarn over, insert hook from back to front around the post of the indicated stitch, yarn over, pull up a loop, yarn over, pull through 2 loops, yarn over, pull through last 2 loops)
- fptc: front post treble crochet (yarn over twice, insert hook from front to back around the post of the indicated stitch, yarn over, pull up a loop, *yarn over, pull through 2 loops* twice)
- sk: skip
- sp: space
- st(s): stitch(es)
- rep: repeat
- *…*: repeat instructions between asterisks as indicated
- […] : work instructions in brackets into the same stitch or space
- beg: beginning
Let’s Begin Your Willow Square!
Round 1: Foundation Ring
Start with a magic ring (adjustable ring) or ch 4 and sl st to the first ch to form a ring.
Ch 3 (counts as first dc), 11 dc into the ring. Sl st to the top of the beg ch-3. (12 dc)
(If you used a magic ring, pull the tail to close the center hole securely.)
Round 2: Creating the First Points
Ch 1 (does not count as a stitch). Sc in the same st as join.
*Ch 3, sk next dc, sc in next dc; rep from * 4 more times. Ch 3, sk next dc. Sl st to the first sc. (6 sc, 6 ch-3 spaces)
Round 3: Building the Corners
Sl st into the first ch-3 sp.
Ch 3 (counts as first dc), (2 dc, ch 2, 3 dc) in the same ch-3 sp (this is your first corner).
*Ch 1, sk next sc, (3 dc, ch 2, 3 dc) in next ch-3 sp; rep from * 4 more times. Ch 1, sk next sc. Sl st to the top of the beg ch-3. (6 corners of 3 dc, ch 2, 3 dc; 6 ch-1 spaces)
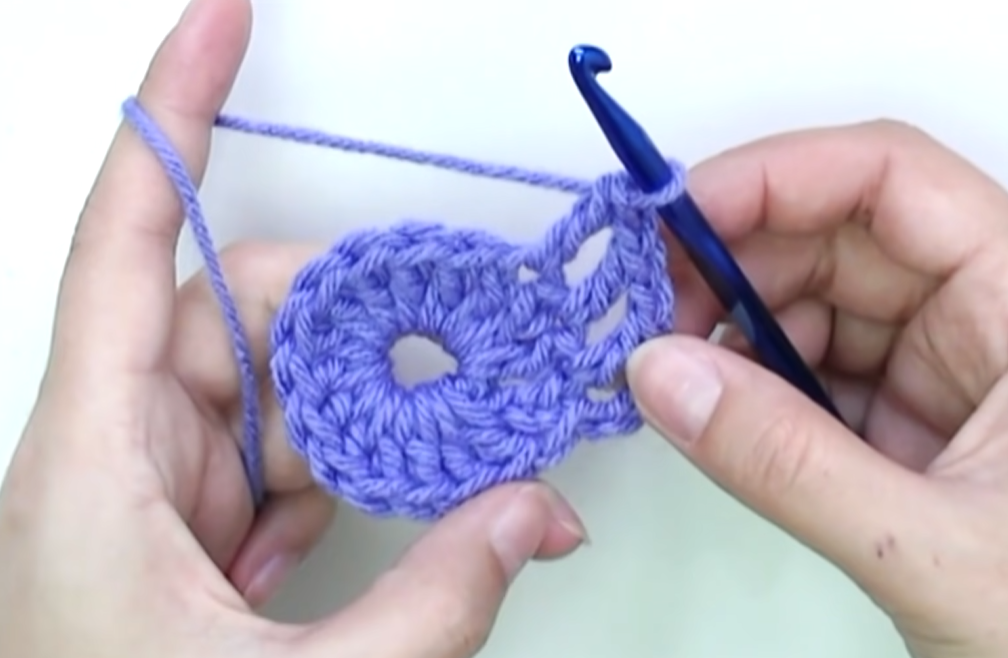
Round 4: Introducing Post Stitches and Square Shape
This round transforms the hexagon into a square.
Sl st into the next 2 dc and into the first ch-2 sp.
Ch 3 (counts as first dc), (2 dc, ch 2, 3 dc) in the same ch-2 sp (this is your first corner).
*Ch 1, fptc around the sc from Round 2 that is directly below the ch-1 sp from Round 3.
Ch 1, (3 dc, ch 2, 3 dc) in the next ch-2 sp (corner); rep from * 2 more times.
Ch 1, fptc around the sc from Round 2 that is directly below the ch-1 sp from Round 3.
Ch 1, sl st to the top of the beg ch-3.
(You’ve now created 4 corners and 4 fptc stitches that will form the sides of your square.) (4 corners, 4 fptc, 8 ch-1 spaces)

Round 5: Refining the Texture
Sl st into the next 2 dc and into the first ch-2 sp.
Ch 3 (counts as first dc), (2 dc, ch 2, 3 dc) in the same ch-2 sp (corner).
*Ch 1, 3 dc in the next ch-1 sp.
fpdc around the next fptc from the previous round.
3 dc in the next ch-1 sp. Ch 1.
(3 dc, ch 2, 3 dc) in the next ch-2 sp (corner); rep from * 2 more times.
Ch 1, 3 dc in the next ch-1 sp.
fpdc around the next fptc from the previous round.
3 dc in the next ch-1 sp. Ch 1. Sl st to the top of the beg ch-3.
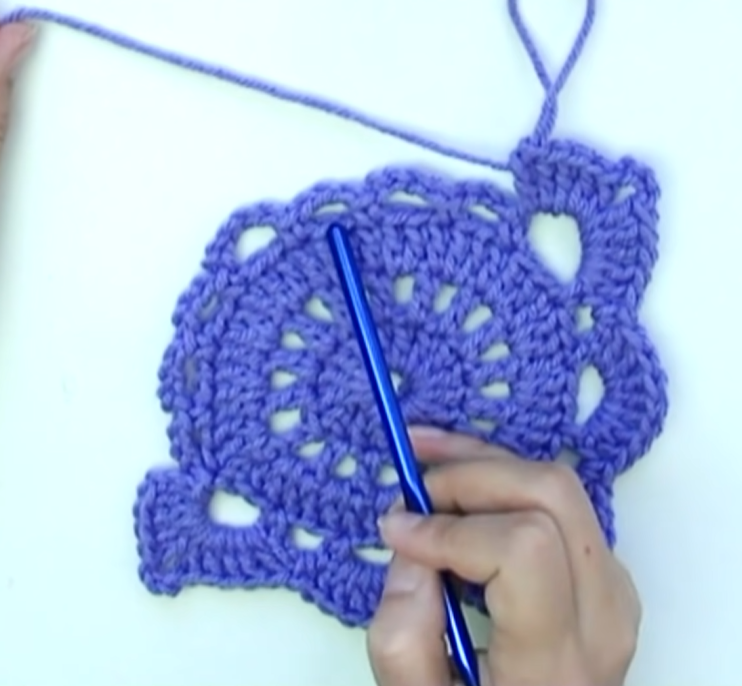
(This round solidifies the square shape and adds another layer of texture with the fpdc.)
Round 6: Final Border (Optional, but recommended for a finished look)
You can use the same color or change to a contrasting color for a neat border.
Ch 1, sc in the same st as join. Sc in each of the next 2 dc.
*Sc in the ch-2 sp (corner), ch 2, sc in the same ch-2 sp.
Sc in each of the next 3 dc. Sc in the next ch-1 sp. Sc in each of the next 3 dc. Sc in the next fpdc. Sc in each of the next 3 dc. Sc in the next ch-1 sp. Sc in each of the next 3 dc.
Rep from * 2 more times, ensuring you work into all the stitches along the side.
Sc in the ch-2 sp (corner), ch 2, sc in the same ch-2 sp.
Sc in each of the next 3 dc. Sc in the next ch-1 sp. Sc in each of the next 3 dc. Sc in the next fpdc. Sc in each of the next 3 dc. Sc in the next ch-1 sp. Sc in each of the remaining 3 dc.
Sl st to the first sc.
Fasten off and weave in all ends.
Video tutorial

Tips for Success:
- Mark your corners: Placing a stitch marker in each ch-2 corner space as you create it can save you a lot of counting and confusion, especially in Round 4 and 5.
- Identify post stitches: When working post stitches, ensure you’re inserting your hook around the correct stitch from the previous round. The fptc in Round 4 is around the sc from Round 2. The fpdc in Round 5 is around the fptc from Round 4.
- Counting is Key: Take your time and count your stitches and spaces in each round to ensure your square stays symmetrical.
- Practice makes perfect: If your first Willow Square isn’t perfect, don’t worry! Unravel and try again. You’ll quickly get the rhythm of the pattern.
- Blocking: For a truly professional finish, block your completed squares. This will help them lay flat and achieve their intended dimensions, which is crucial if you’re joining multiple squares for a larger project.
Using Your Willow Squares:
Once you have a collection of beautiful Willow Squares, the possibilities are endless!
- Blankets: Join them together using your favorite joining method (slip stitch, single crochet, whip stitch, or even a continuous join as you go).
- Cushions: Sew two squares together for a stunning cushion cover.
- Bags/Totes: Combine squares to create unique and textured bags.
- Garments: Integrate them into sweaters, cardigans, or vests for a handmade touch.
- Coasters/Placemats: A single square can make a lovely coaster or a larger one a placemat.
Happy crocheting!