by
by 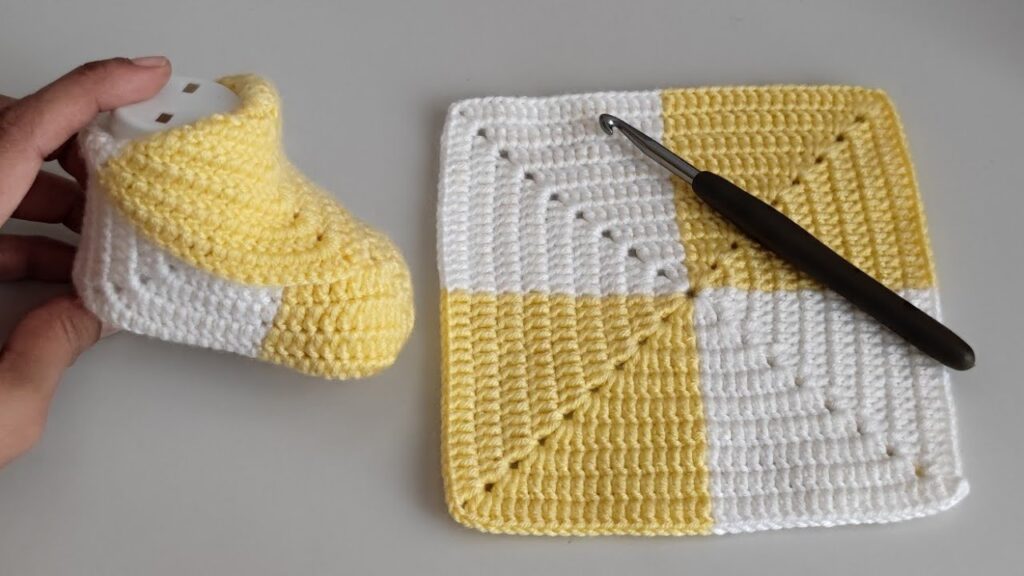
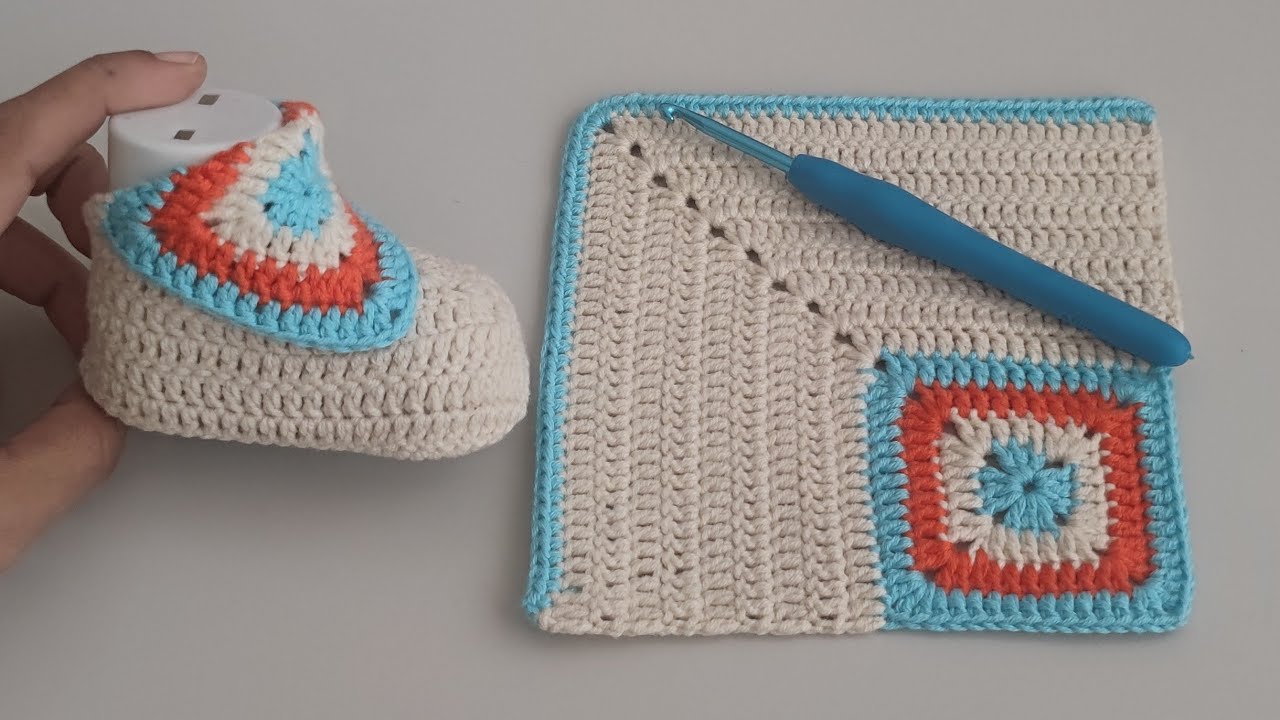
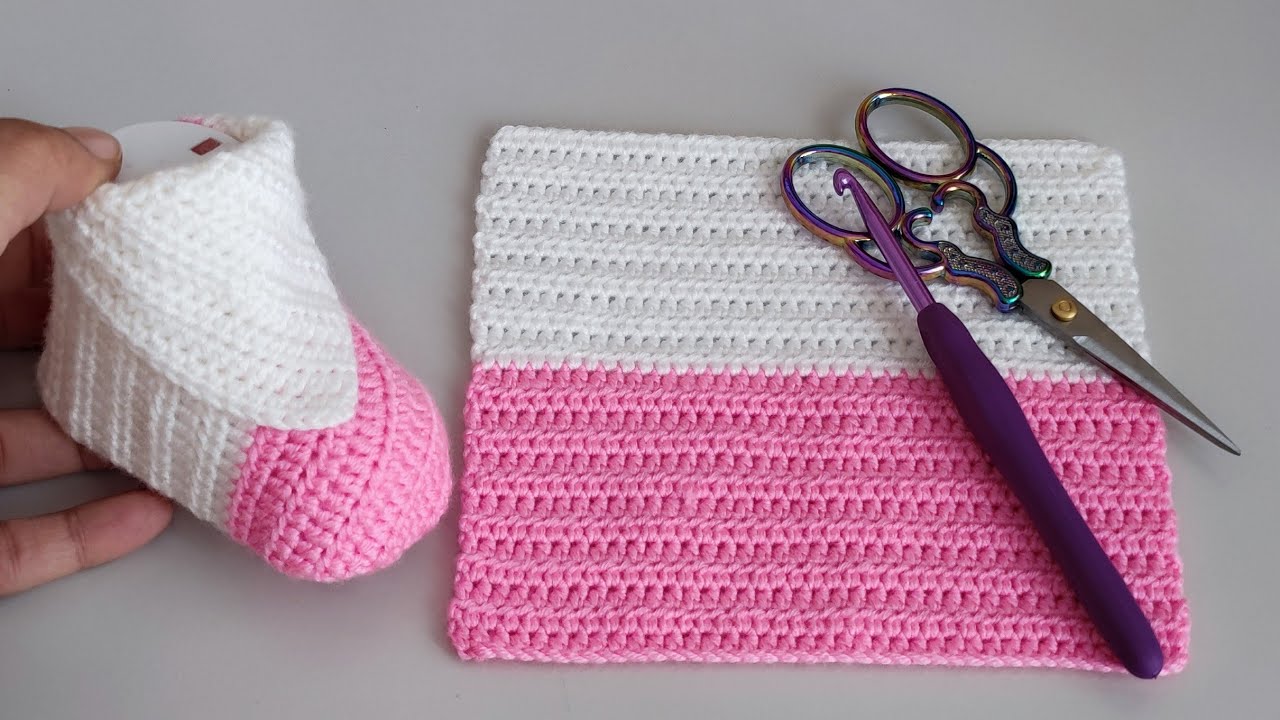
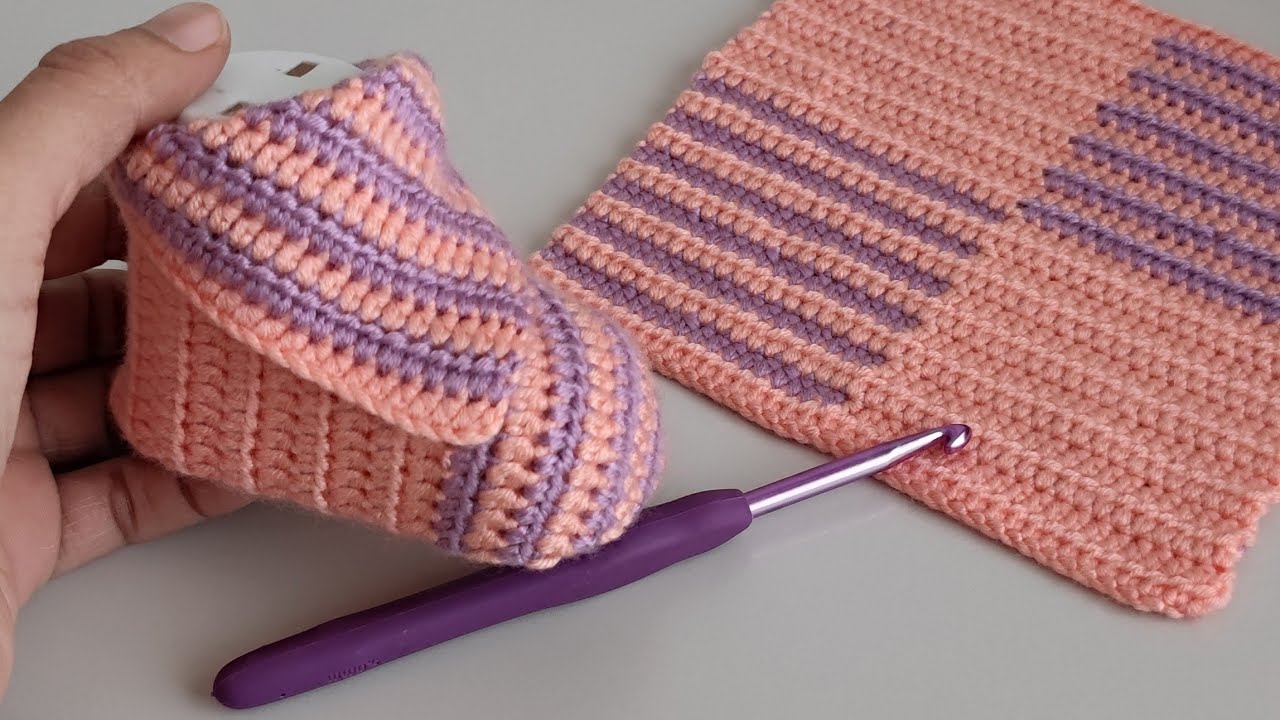
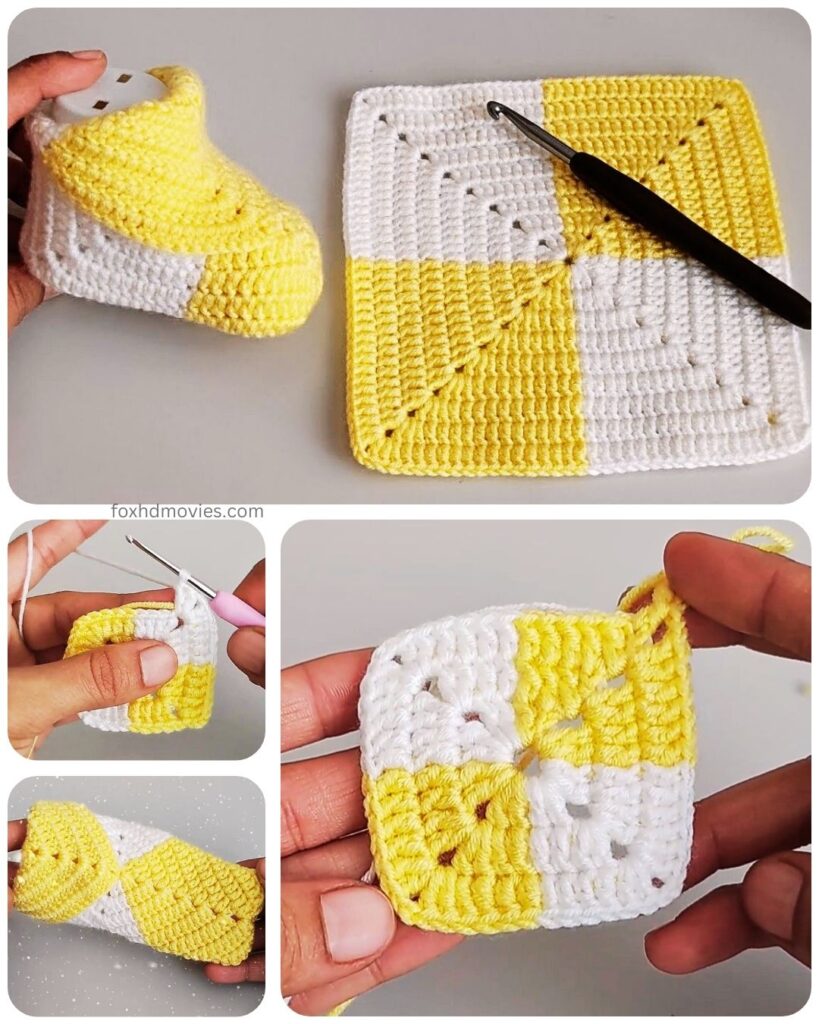
These adorable baby booties utilize the classic granny square as their foundation, making them incredibly easy to crochet. With just a few simple steps and minimal shaping, you’ll have a sweet pair of booties ready to keep tiny toes warm. They’re a fantastic way to use up yarn scraps and make a thoughtful handmade gift.
Skill Level: Beginner
Materials:
- Worsted weight yarn in your desired colors (you’ll need small amounts of at least two colors)
- Crochet hook size H/8 (5.0 mm) or size needed to obtain gauge
- Yarn needle for weaving in ends
- Scissors

Gauge:
While gauge isn’t critical for baby booties, aim for approximately 4 rounds of a granny square to measure about 3 inches square. Adjust your hook size if needed.
Finished Size:
This pattern is written for approximately 0-6 months (sole length around 3.5 inches). Instructions for slight adjustments will be included.
Abbreviations (US Crochet Terms):
- ch: chain
- sl st: slip stitch
- dc: double crochet
- sp: space
- st(s): stitch(es)
- beg: beginning
- rep: repeat
Let’s Get Started!
Part 1: Making the Granny Squares (Make 4)
We’ll create simple three-round granny squares for the main parts of the booties. Feel free to get creative with your color combinations for each square!
Round 1: With your first color, ch 4, sl st to join into a ring. (Alternatively, you can use a magic ring). Ch 3 (counts as first dc), 2 dc in the ring, ch 2, *3 dc in the ring, ch 2; rep from * twice more. Sl st to the top of the beg ch-3. (4 clusters of 3 dc, 4 ch-2 spaces)
Round 2: Sl st into the next dc and into the first ch-2 sp. Ch 3 (counts as first dc), 2 dc in the same ch-2 sp, ch 2, 3 dc in the same ch-2 sp (corner made). *Ch 1, (3 dc, ch 2, 3 dc) in the next ch-2 sp (corner made); rep from * twice more, ch 1. Sl st to the top of the beg ch-3.

Round 3: Sl st into the next 2 dc and into the first ch-2 sp. Change to your second color (optional). Ch 3 (counts as first dc), 2 dc in the same ch-2 sp, ch 2, 3 dc in the same ch-2 sp (corner made). *Ch 1, 3 dc in the next ch-1 sp, ch 1, (3 dc, ch 2, 3 dc) in the next ch-2 sp (corner made); rep from * twice more, ch 1, 3 dc in the last ch-1 sp, ch 1. Sl st to the top of the beg ch-3. Fasten off and weave in ends.
Repeat this process to make a total of 4 granny squares.
Part 2: Assembling the Bootie Sole
We’ll join two of the granny squares to form the sole of one bootie.
- Place two granny squares side by side with the wrong sides facing each other.
- Using your yarn needle and one of the colors you used, whip stitch or single crochet along one edge of each square to join them together. Aim to join through the back loops only for a neater seam.

Part 3: Creating the Bootie Upper
Now we’ll attach the remaining two granny squares to the sole to create the upper part of the bootie.
- Take one of the remaining granny squares. Align one edge of this square with one of the unjoined edges of the sole (the longer edge).
- Using your yarn needle or crochet hook, attach this square to the sole using a whip stitch or single crochet. Center the granny square along the edge of the sole.
- Repeat this process with the last granny square on the opposite unjoined edge of the sole. You should now have a basic bootie shape with an opening at the top.
Part 4: Shaping the Heel
Now we’ll close up the back to form the heel of the bootie.
- Fold the bootie so that the back edges of the two upper granny squares meet.
- Using your yarn needle or crochet hook and yarn, whip stitch or single crochet these back edges together, starting from the bottom of the sole and working upwards. Leave a small opening at the top of the heel for a comfortable fit around the ankle. The size of this opening can be adjusted to your preference.

Part 5: Creating the Ankle Opening
We’ll now work a simple border around the ankle opening for a neater finish.
- With the right side facing you, attach your yarn to any stitch along the top opening of the bootie.
- Ch 1, then work single crochet evenly around the entire opening.
- Sl st to the first sc to join the round.
- You can repeat this round of single crochet for a thicker, more defined border if desired.
- Fasten off and weave in the end.
Part 6: Making the Second Bootie
Repeat all the steps above to create the second bootie. Ensure you join the granny squares in the same way to create a matching pair.
Adjusting the Size:
- For a smaller size: Use a smaller hook and/or thinner yarn. You could also work only two rounds on your granny squares.
- For a larger size: Use a larger hook and/or thicker yarn. You can also add an extra round to your granny squares.
Video tutorial
Tips and Variations:
- Color Play: Have fun experimenting with different color combinations for each granny square or for different parts of the bootie.
- Border Detail: Instead of just single crochet for the ankle border, you could try a simple picot edge (ch 3, sl st in the first ch) or a contrasting color border.
- Adding Straps (Optional): For added security, you can create simple crochet straps and attach them to the sides of the bootie with a button or a tie.
- Embellishments (Optional): Add small crocheted flowers, bows, or buttons to personalize your booties. Ensure any embellishments are securely attached.
Congratulations! You’ve now created a pair of the simplest crochet granny square baby booties. These little gems are quick to make and oh-so-adorable for keeping those tiny feet snug. Happy crocheting!