by
by 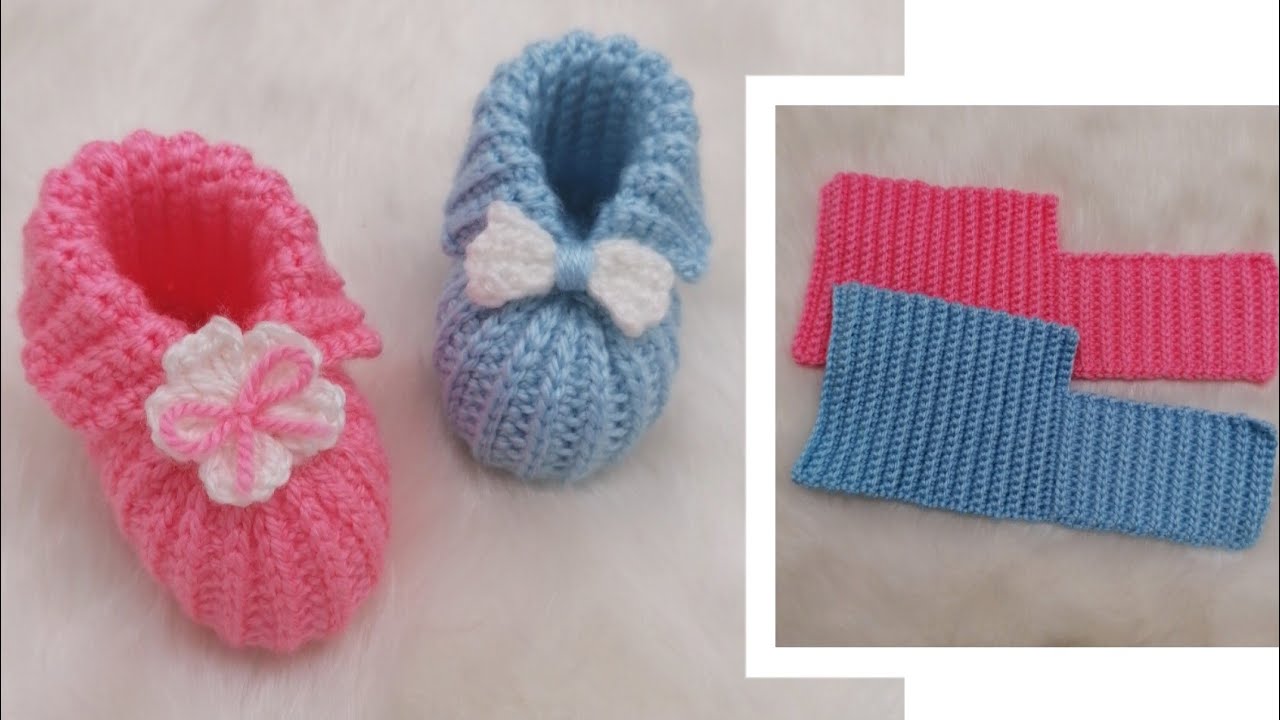
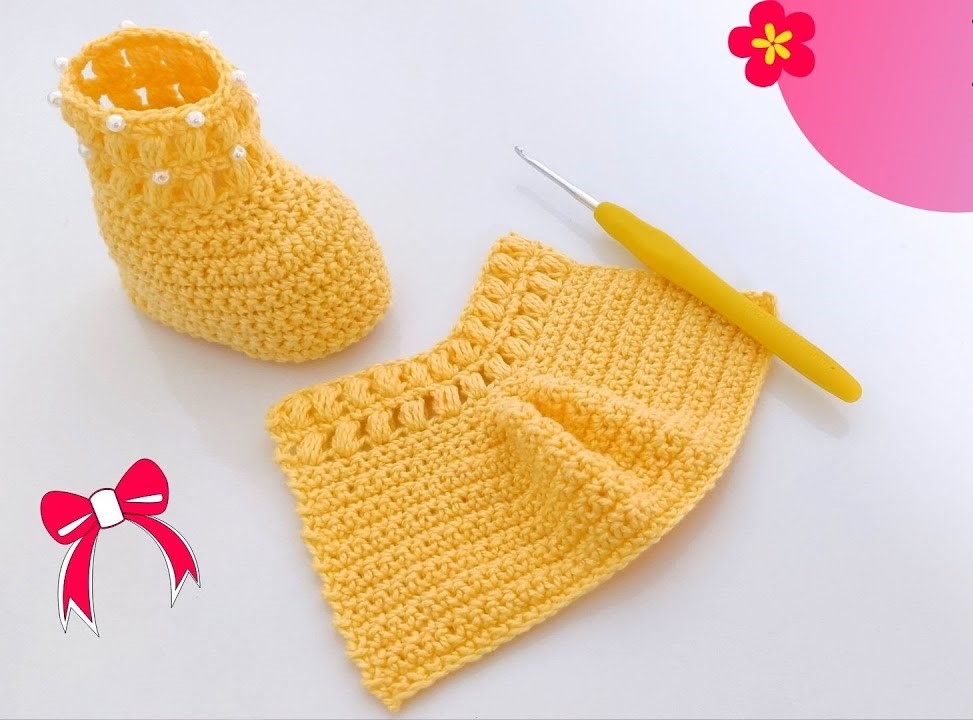
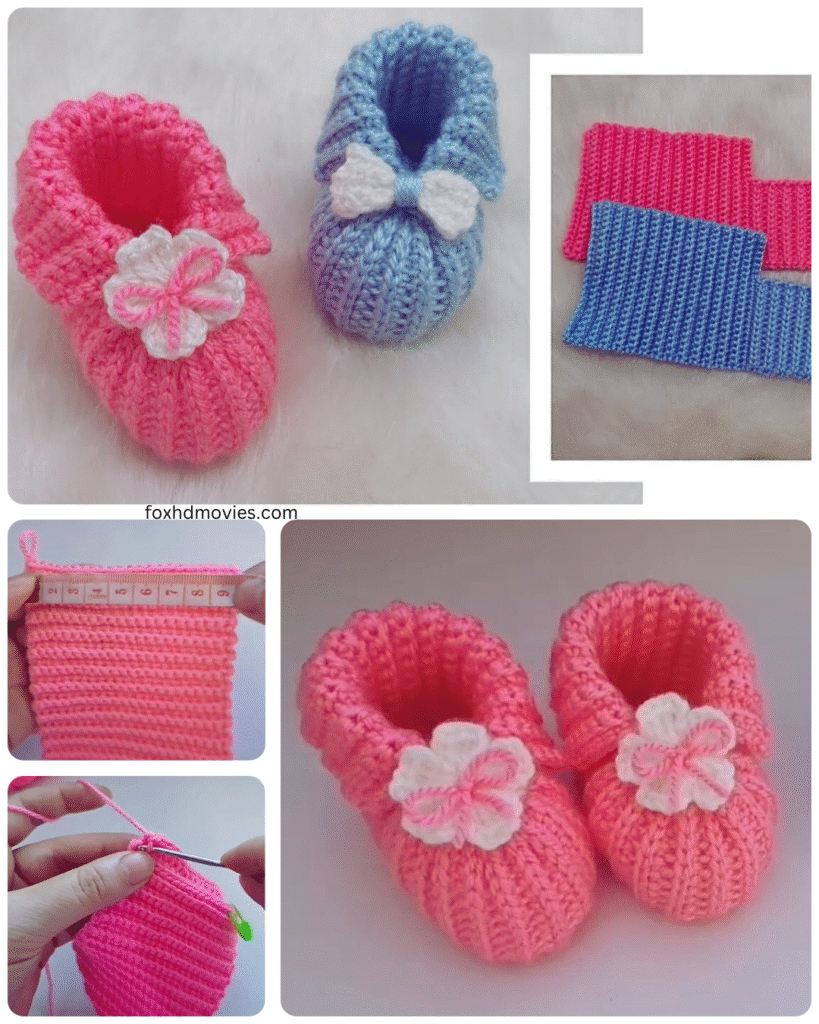
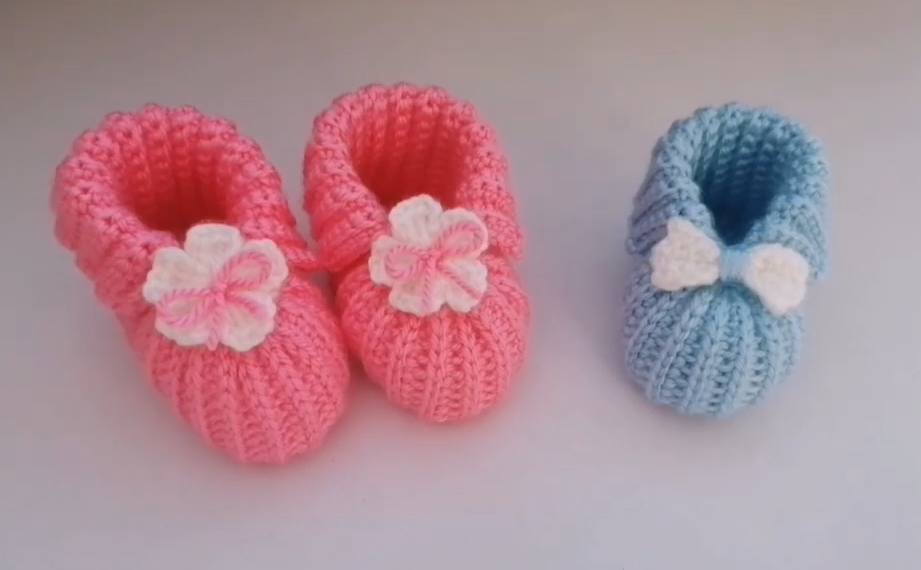
These slippers work up quickly and use basic crochet stitches, making them a perfect project for using up scrap yarn or creating a thoughtful handmade gift. The simple design allows for plenty of creative freedom – think stripes, color blocking, or adding fun appliques!
Skill Level: Beginner
Materials:
- Worsted weight yarn (approximately 100-150 yards depending on size). You can use cotton, acrylic, or wool blends. Choose something soft and washable!
- Crochet hook size H/8 (5.0 mm) or the size needed to obtain gauge.
- Scissors
- Yarn needle for weaving in ends
- Optional: Buttons, small appliques, non-slip fabric paint or suede for soles (for added grip)
Gauge:
While gauge isn’t critical for slippers, aim for approximately 13-14 single crochet (sc) stitches in 4 inches (10 cm). Adjust your hook size if needed.
Sizes:
This pattern provides instructions for a basic size that can be adjusted. We’ll give approximate sole lengths and you can adapt based on the child’s foot measurement.
- Toddler (approx. US shoe size 5-7): Sole length approximately 5-5.5 inches (12.5-14 cm)
- Child (approx. US shoe size 8-10): Sole length approximately 6-6.5 inches (15-16.5 cm)
- Child (approx. US shoe size 11-13): Sole length approximately 7-7.5 inches (18-19 cm)
Abbreviations:
- ch = chain
- sc = single crochet
- hdc = half double crochet
- sl st = slip stitch
- inc = increase (work 2 sc in the same stitch)
- dec = decrease (sc 2 stitches together)
- rep = repeat
- st(s) = stitch(es)
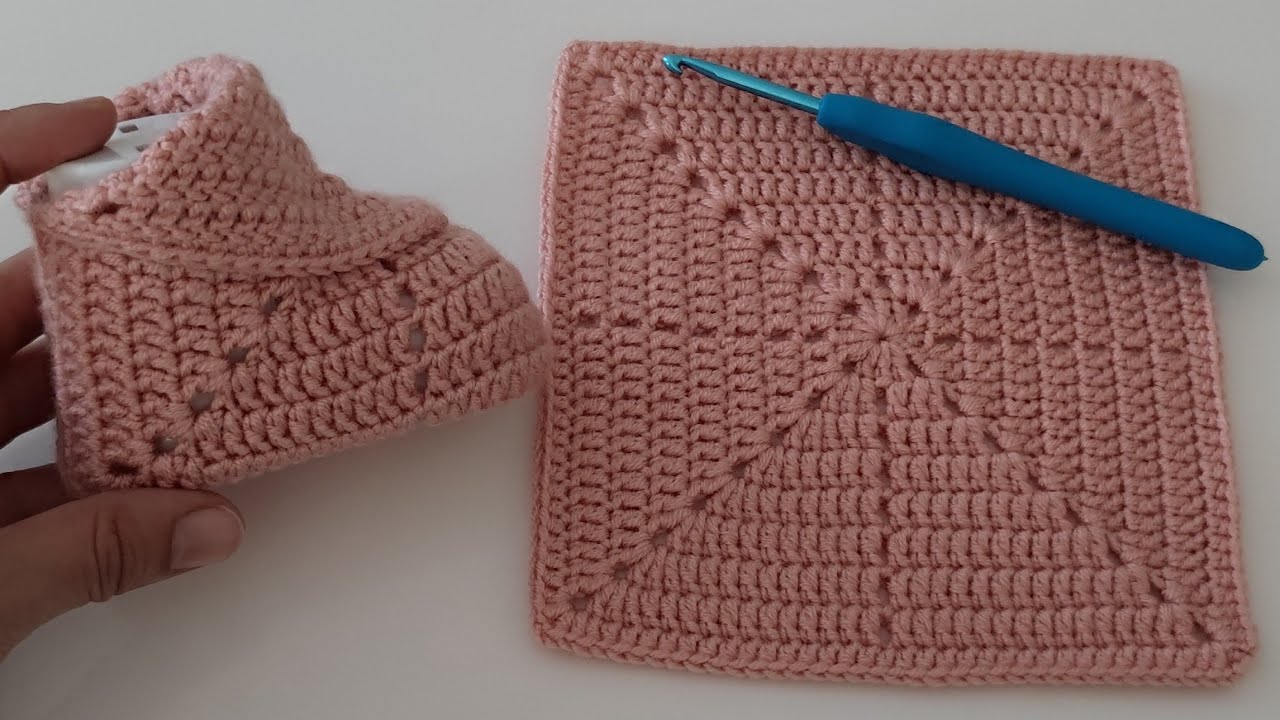
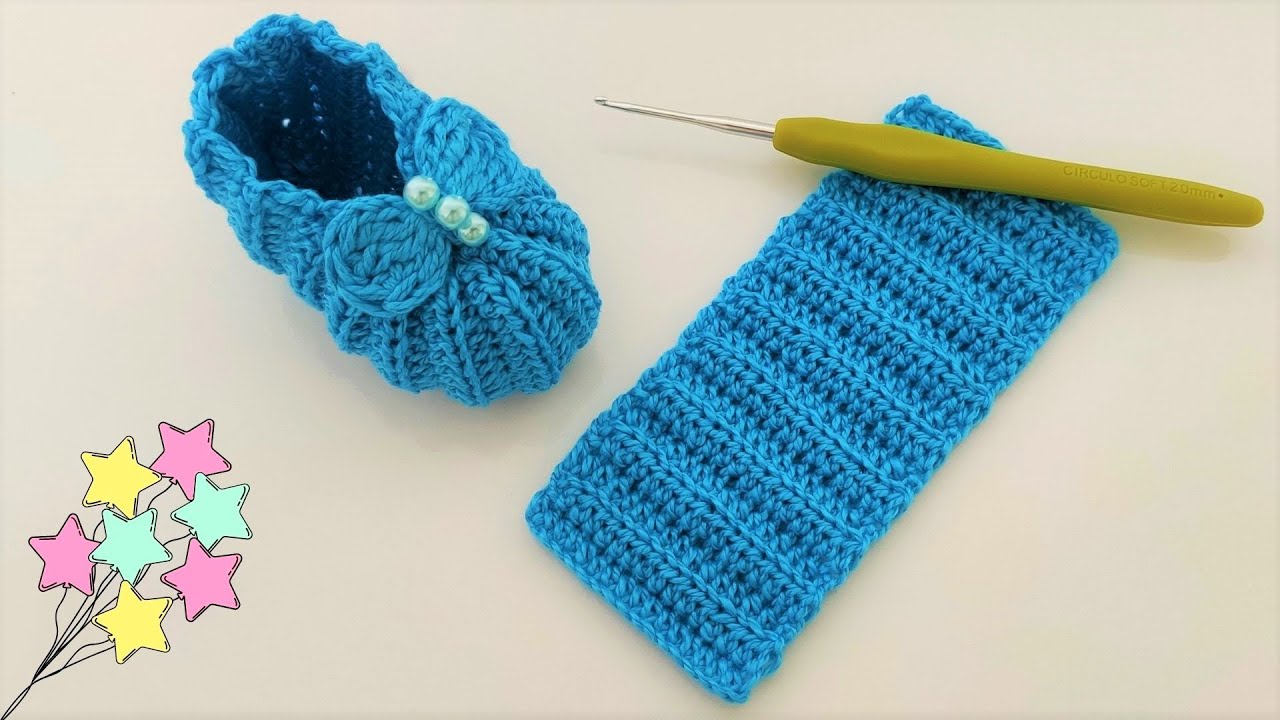
Video pattern
Instructions:
Part 1: The Sole (Make 2)
We’ll start by creating an oval shape for the sole.
- Foundation Chain:
- For Toddler size, ch 11.
- For Child size (8-10), ch 13.
- For Child size (11-13), ch 15.
- (Adjust this number to get the desired length, keeping in mind the initial chain will form the center of the oval).
- Round 1: Sc in the second ch from the hook and in each ch across. In the last ch, work 3 sc. Now, working on the opposite side of the foundation chain, sc in each ch across. Work 2 sc in the first ch. Sl st to the first sc to join the round. (Toddler: 22 sc, Child 8-10: 26 sc, Child 11-13: 30 sc)
- Round 2: Ch 1 (does not count as a st). 1 inc in the next st, sc in the next (number of stitches before the curve – 1) sts. Work 3 inc in the next 3 sts. Sc in the next (number of stitches before the curve – 1) sts. Work 2 inc in the last 2 sts. Sl st to the first sc to join the round. (Toddler: 28 sc, Child 8-10: 32 sc, Child 11-13: 36 sc)
- Round 3: Ch 1. 1 inc in the next st, sc in the next (number of stitches before the curve) sts. (Sc, inc) 3 times. Sc in the next (number of stitches before the curve) sts. (Sc, inc) 2 times. Sl st to the first sc to join the round. (Toddler: 34 sc, Child 8-10: 38 sc, Child 11-13: 42 sc)
- Continue Increasing (Optional): For wider feet or larger sizes, you can add more rounds of increases, always working increases at the rounded ends to maintain the oval shape. A good rule of thumb is to work one more round of (sc in next few sts, inc) around each end.
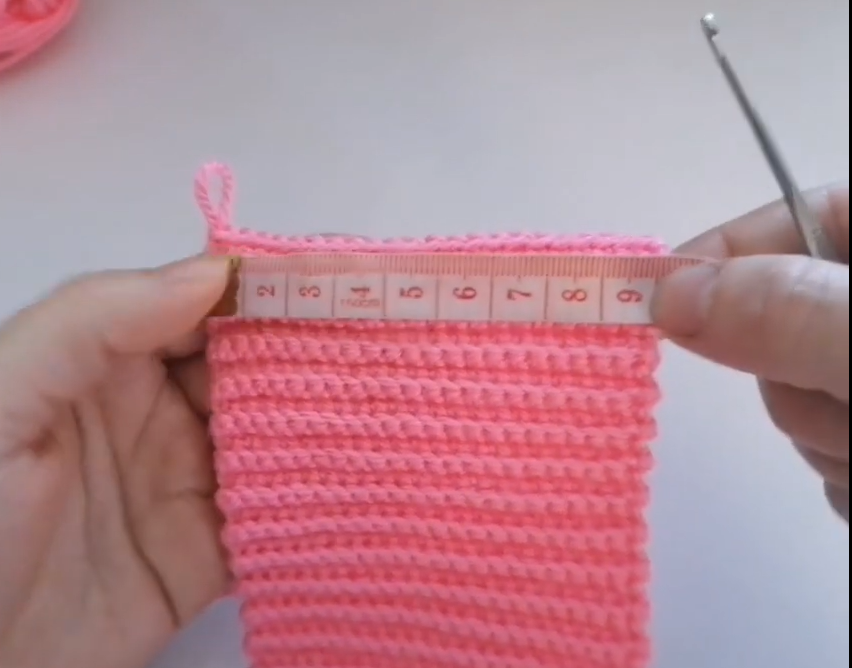
- Final Sole Rounds: Once you reach the desired width, work 1-2 rounds of sc in each st around to create a solid sole. Sl st to join and fasten off, leaving a long tail for sewing later.
Part 2: The Upper
Now we’ll work on the part that covers the top of the foot.

- Joining the Yarn: With the right side of one of your soles facing you, join your yarn with a sl st to any stitch.
- Round 1: Ch 1. Sc in each st around the edge of the sole. Sl st to the first sc to join the round. (Same stitch count as your final sole round).
- Round 2: Ch 1. Sc in each st around. Sl st to the first sc.
- Shaping the Toe: This is where we’ll start creating the opening for the foot. We’ll work in rows now.
- Marking: Find the center front of your slipper. Count approximately 1/3 of the total stitches on each side of the center and place stitch markers. The remaining 1/3 in the center will form the toe opening.
- Row 1: Ch 1. Sc in each st until you reach the first stitch marker. Turn your work.
- Row 2: Ch 1. Sc in each st across to the second stitch marker. Turn your work.
- Repeat Row 2: Continue working back and forth in sc rows between the stitch markers until the upper part covers the toes comfortably. The number of rows will depend on the size and desired coverage. For smaller sizes, around 6-8 rows might be sufficient, while larger sizes may need 10-12 rows.
- Joining the Upper to the Sole: Now we’ll attach the upper to the remaining part of the sole.
- With the wrong side of the upper facing the wrong side of the sole, align the edges.
- Using your yarn needle and the long tail left from the sole, whip stitch or slip stitch the upper to the sole, starting from one side of the toe opening and going all the way around to the other side. Make sure your stitches are secure.
- Repeat: Make a second slipper following the same instructions.

Finishing Touches (Optional):
- Cuffs: You can add a few rounds of hdc or double crochet (dc) around the ankle opening for a little extra warmth and style.
- Embellishments: Sew on buttons, small crocheted appliques (stars, hearts, flowers), or even felt shapes to personalize the slippers.
- Non-Slip Soles: For added safety, you can apply non-slip fabric paint to the soles in dots or lines, or carefully stitch pieces of suede or leather onto the bottom.
Tips and Variations:
- Stripes: Change colors every few rounds for a fun striped effect.
- Color Blocking: Use different colors for the sole and the upper.
- Textured Yarn: Experiment with different textured yarns for a unique look and feel.
- Larger Sizes: For adult sizes, simply increase the foundation chain and the number of rounds in the sole, as well as the number of rows in the upper.
There you have it! A simple yet satisfying pattern for creating cozy crochet slippers for the little ones in your life. Get creative with colors and embellishments, and enjoy the process of making something special with your own two hands. Happy crocheting!