by
by 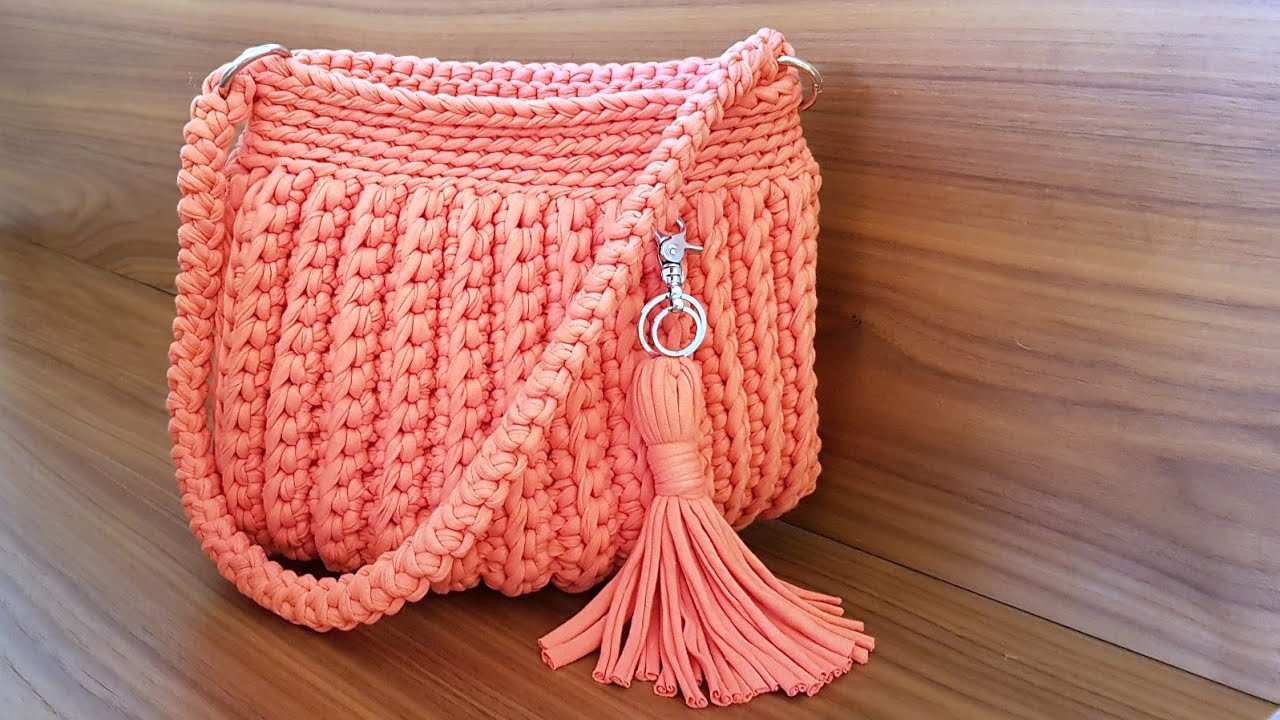
Hello, lovely crafters! Are you dreaming of a stylish, handmade accessory that’s both chic and achievable? Today, we’re embarking on a delightful project: creating an Elegant Crochet Handbag that’s surprisingly simple to make. This design focuses on clean lines, a sophisticated texture, and easy-to-master stitches, making it perfect for crocheters of all levels, especially those looking to create their first wearable bag.
Imagine strolling with a handbag that you personally crafted, a piece that reflects your unique style and skill. This pattern will guide you through each step, ensuring a smooth and enjoyable crocheting experience. So, gather your favorite yarn and let’s crochet ourselves a touch of elegance!
What You’ll Need:
- Worsted Weight Yarn: Choose a yarn with good stitch definition and durability. Cotton, a sturdy acrylic blend, or even a tightly spun wool would work beautifully. Approximately 300-400 yards, depending on the desired size.
- Crochet Hook: Size H/8 (5.0 mm) or the size recommended for your yarn. You might want to go up or down a size to achieve the desired fabric density.
- Scissors: For snipping your yarn.
- Yarn Needle: For weaving in ends.
- Stitch Markers: Highly recommended for marking the beginning of rounds and key points.
- Optional: Handles: You can purchase ready-made handles (leather, bamboo, chain) or crochet your own strap.
- Optional: Magnetic Snap or Closure: To keep your bag securely closed.
- Optional: Fabric Lining: For added structure and a polished interior.
Understanding the Stitches:
This elegant handbag pattern primarily uses a few fundamental crochet stitches:
- Chain (ch): The foundation of our project.
- Slip Stitch (sl st): For joining rounds and creating a neat finish.
- Single Crochet (sc): Creates a dense and sturdy fabric for the base and sides.
- Half Double Crochet (hdc): Offers a bit more height and texture for the main body.
- Slip Stitch Ribbing (sl st in BLO): Creates a subtle, textured band at the top.
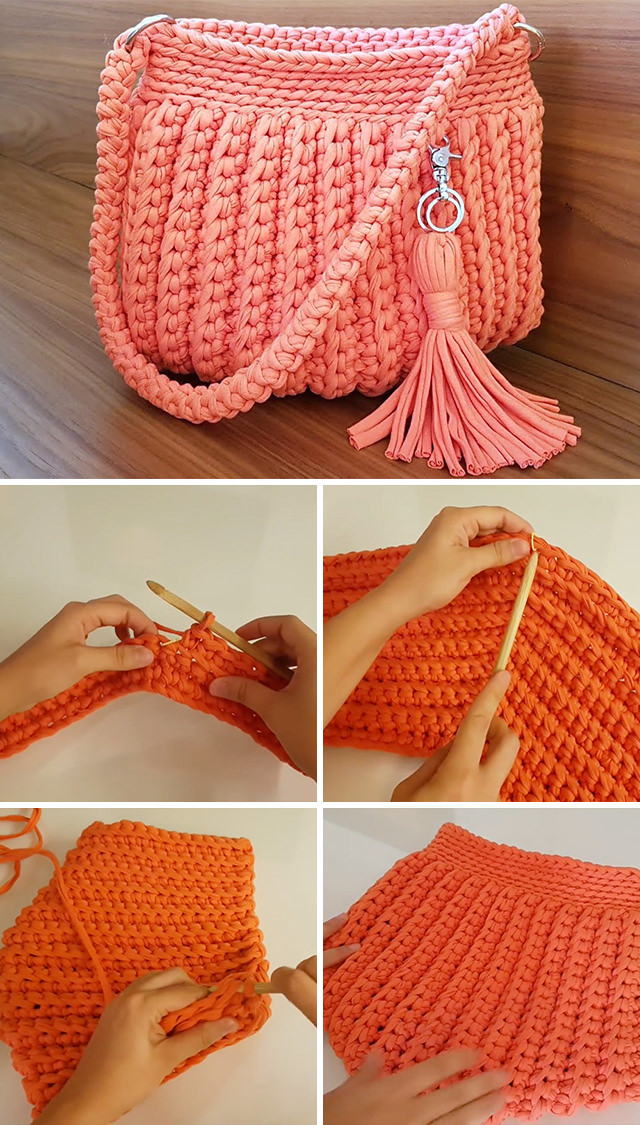
Video tutorial
The Pattern: Crafting Your Elegant Handbag
We’ll be working in rounds from the bottom up to create the main body of the bag.
Part 1: The Base
- Magic Ring (or Chain 2, sl st in first ch to form a ring): Start with a magic ring.
- Round 1: Ch 1 (does not count as a stitch), 6 sc into the magic ring. Pull the tail tight to close the ring. Join with a sl st to the first sc. (6 sc)
- Round 2: Ch 1, 2 sc in each st around. Join with a sl st to the first sc. (12 sc)
- Round 3: Ch 1, 1 *sc in the next st, 2 sc in the next st*; repeat from * around. Join with a sl st to the first sc. (18 sc)
- Round 4: Ch 1, *sc in the next 2 sts, 2 sc in the next st*; repeat from * around. Join with a sl st to the first sc. (24 sc)
- Continue Increasing: Continue in this manner, increasing by 6 stitches each round, placing the increases evenly. For each round, work sc in the existing stitches the same number of times as the round number (e.g., Round 5: *sc in the next 3 sts, 2 sc in the next st*; repeat around).
- Work until your base reaches your desired size. A diameter of 6-8 inches is a good starting point for a medium-sized handbag. Keep track of your stitch count for the last round of the base.

Part 2: The Body
We will now switch to half double crochet to create the height of the bag.
- Round 1 (Transition Round): Ch 1, sc in each st around. Join with a sl st to the first sc. (Same stitch count as the last round of the base)
- Round 2: Ch 1 (does not count as a stitch), hdc in each st around. Join with a sl st to the first hdc.
- Rounds 3- (until desired height): Repeat Round 2. Continue working in rounds of half double crochet until your bag reaches your desired height. A height of 8-10 inches is a common choice. Use a stitch marker to mark the beginning of each round.
Part 3: Creating the Top Edge (Slip Stitch Ribbing)
This creates a nice, slightly textured and firm edge for your bag.
- Round 1: Ch 1, sl st in the back loop only (BLO) of each st around. Join with a sl st to the first sl st.
- Rounds 2-4 (or more for a wider band): Ch 1, sl st in the BLO of each st around. Join with a sl st to the first sl st.
Part 4: Attaching Handles (if using purchased handles)
- Determine the placement of your handles. Ensure they are evenly spaced on either side of the bag opening.
- Follow the manufacturer’s instructions to securely attach the handles to your crocheted bag. This might involve sewing them on with a sturdy thread or using specific hardware.
Part 5: Creating a Crocheted Strap (Optional)
If you prefer a crocheted strap:
- Foundation Chain: Chain a length suitable for your desired strap length (consider if you want a shoulder bag or a crossbody).
- Row 1: Sc in the second ch from the hook and in each ch across. Turn.
- Rows 2- (until desired width): Ch 1, sc in each st across. Turn.
- Attaching the Strap: Sew the ends of the crocheted strap securely to the sides of your bag opening, ensuring they are evenly spaced.

Part 6: Adding a Closure (Optional)
- Magnetic Snap: Follow the manufacturer’s instructions to install a magnetic snap to the inside top edges of your bag.
- Crocheted Loop and Button: Create a small crocheted loop on one side of the opening and sew a button on the opposite side.
Part 7: Adding a Fabric Lining (Optional)
Adding a lining gives your bag structure and a more finished look.
- Measure the inside of your crocheted bag.
- Cut fabric pieces according to your measurements, adding seam allowances.
- Sew the fabric pieces together to create a bag shape that fits snugly inside your crochet bag.
- Hand-stitch or carefully machine-stitch the lining to the inside top edge of your crocheted bag.
Finishing Touches:
- Weave in all loose ends securely using your yarn needle.
- If you blocked your yarn, you might want to gently steam block your finished bag to help it hold its shape. Be careful not to melt synthetic fibers.

Tips for Success and Variations:
- Consistent Tension: Maintaining consistent tension throughout your project will result in a more even and professional-looking bag.
- Stitch Markers are Your Friends: Use them to mark the beginning of rounds, especially when working in continuous rounds, and to mark placement for handles or closures.
- Experiment with Texture: You can introduce different stitch patterns for the body of the bag, such as the Suzette stitch or a simple shell stitch, for added visual interest.
- Color Blocking: Use different colors of yarn for the base, body, and top edge to create a unique design.
- Embellishments: Consider adding crocheted flowers, appliques, or beads to personalize your bag.
- Handle Alternatives: Explore different types of handles, like wooden rings or chain straps, to change the overall look of your bag.
Carry Your Confidence!
Congratulations on creating your elegant crochet handbag! This project is a testament to the beauty and versatility of crochet. Carry it with pride, knowing that you crafted a stylish and unique accessory with your own two hands.