by
by 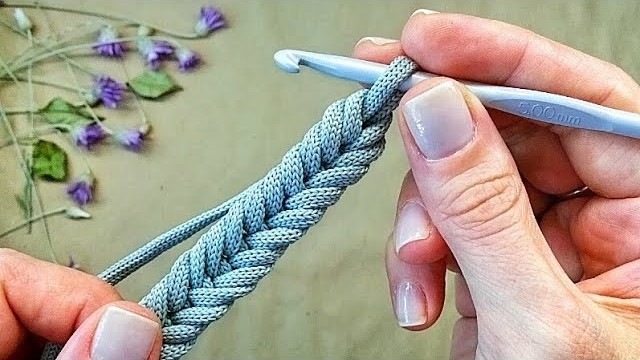
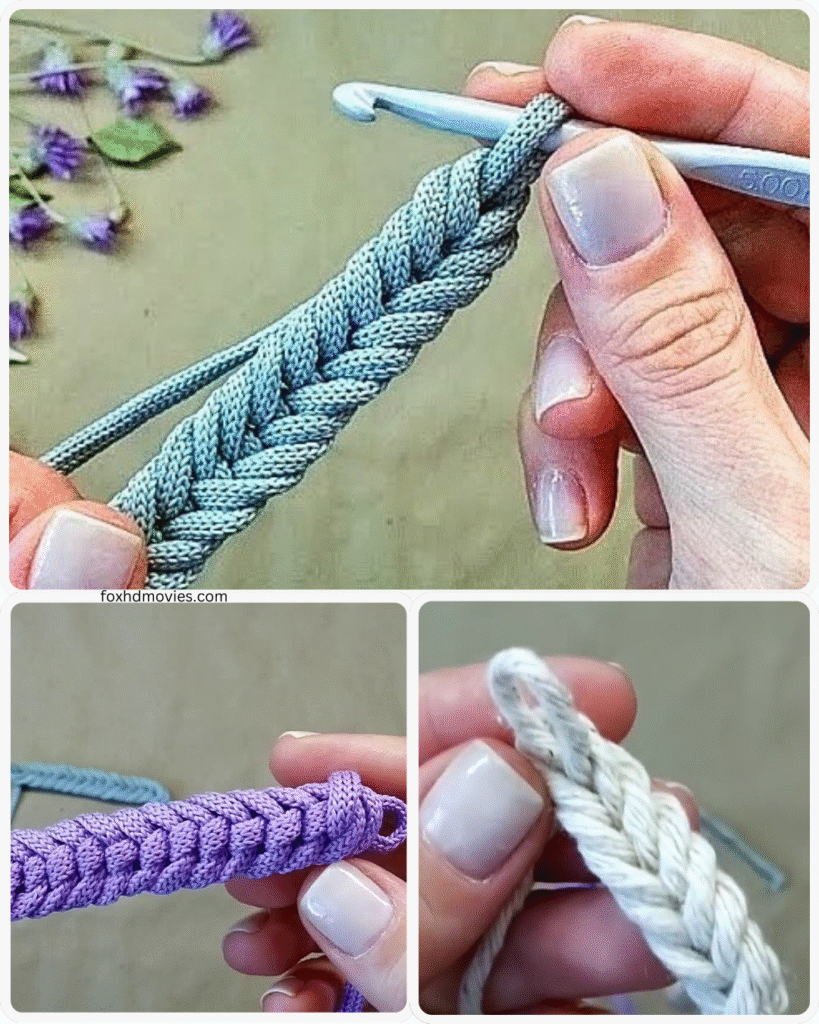
a trusty crochet cord! It’s amazing how such a simple technique can yield something so versatile. Let’s craft a detailed pattern for creating a sturdy and adaptable crochet cord.
Skill Level: Beginner
Materials:
- Any weight yarn (the weight will determine the thickness of your cord; worsted weight is a good starting point).
- A crochet hook appropriate for your yarn weight (check the yarn label for recommendations).
- Scissors.
Abbreviations (US Crochet Terms):
- ch = chain
- sl st = slip stitch
Gauge:
- Gauge is not critical for this project, as the exact thickness isn’t usually crucial for a cord. However, for consistency, you can aim for a relatively tight tension.


Instructions:
- Starting Chain: Begin by making a chain of your desired length. Consider what you’ll be using the cord for. A short chain (e.g., 10-15 ch) is good for practicing, while a longer chain can be used for drawstrings, ties, or even decorative elements.
- Make a slip knot on your hook.
- Yarn over (yo) and pull through the loop on your hook. This creates your first chain stitch.
- Repeat the “yo, pull through” motion until you have the desired number of chain stitches.
- Creating the Cord: Now we’ll work back along the chain to create the thickness and sturdiness of the cord.
- Row 1: Insert your hook into the second chain from your hook.
- Yarn over (yo) and pull up a loop (two loops on your hook).
- Yarn over (yo) and pull through both loops on your hook. This completes one slip stitch (sl st).
- Continue to work one slip stitch into each of the remaining chain stitches. You will end up with a row of slip stitches.
- Building the Thickness (Optional but Recommended): For a more substantial and less stretchy cord, you can repeat the slip stitch row.
- Row 2 (and subsequent rows): Chain 1 (this does not count as a stitch).
- Turn your work.
- Insert your hook into the first stitch of the previous row (which is the top loop of the first slip stitch).
- Yarn over (yo) and pull up a loop (two loops on your hook).
- Yarn over (yo) and pull through both loops on your hook (completing one slip stitch).
- Continue to work one slip stitch into the top loop of each stitch across the row.
- Repeating for Desired Thickness: Repeat Step 3 until your cord reaches your desired thickness. One or two rows of slip stitches after the initial chain usually creates a good, basic cord. For a rounder, thicker cord, you might work more rows.
- Finishing Off:
- Once your cord is the desired thickness, cut the yarn, leaving a tail of about 6-8 inches (or longer if you need it for attaching the cord).
- Yarn over and pull the tail completely through the last loop on your hook.
- Pull the tail gently but firmly to secure the knot.
- Weaving in the Ends: To make your cord look neat and prevent unraveling, you’ll need to weave in the yarn ends.
- Thread the yarn tail onto a tapestry needle (a blunt-tipped needle with a large eye).
- Carefully weave the needle through the stitches of your cord, going in one direction for a few stitches and then back in the opposite direction. This helps to secure the end.
- Repeat this process with the starting tail (the one from your initial slip knot).
- Once the ends are securely woven in, trim any excess yarn close to the cord.
Video tutorial
Tips and Variations:
- Tension: Maintain a consistent tension throughout your work to create an even cord.
- Yarn Choice: Experiment with different yarn weights and fibers to see how they affect the look and feel of your cord. Cotton yarn creates a strong, less stretchy cord, while acrylic can be softer and more flexible.
- Color Changes: For a decorative cord, you can change colors every few rows or even within a row for a striped effect.
- I-Cord Alternative: For a very round and sturdy cord, you might explore the I-cord technique (though this pattern focuses on a simpler method).
- Using Your Cord: This simple crochet cord is incredibly versatile! Use it for:
- Drawstrings for bags or pouches.
- Ties for garments or curtains.
- Hangers for lightweight items.
- Decorative elements in craft projects.
- Bookmarks.
- Gift wrapping.