 by
by 
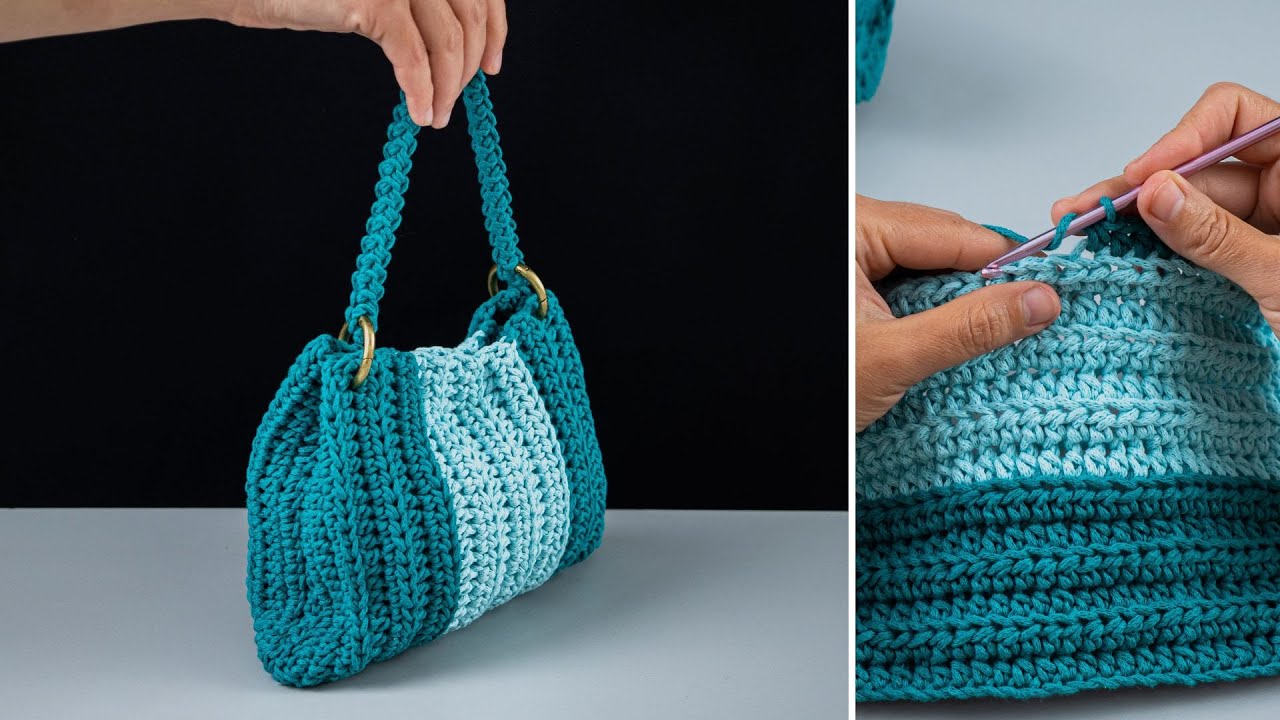
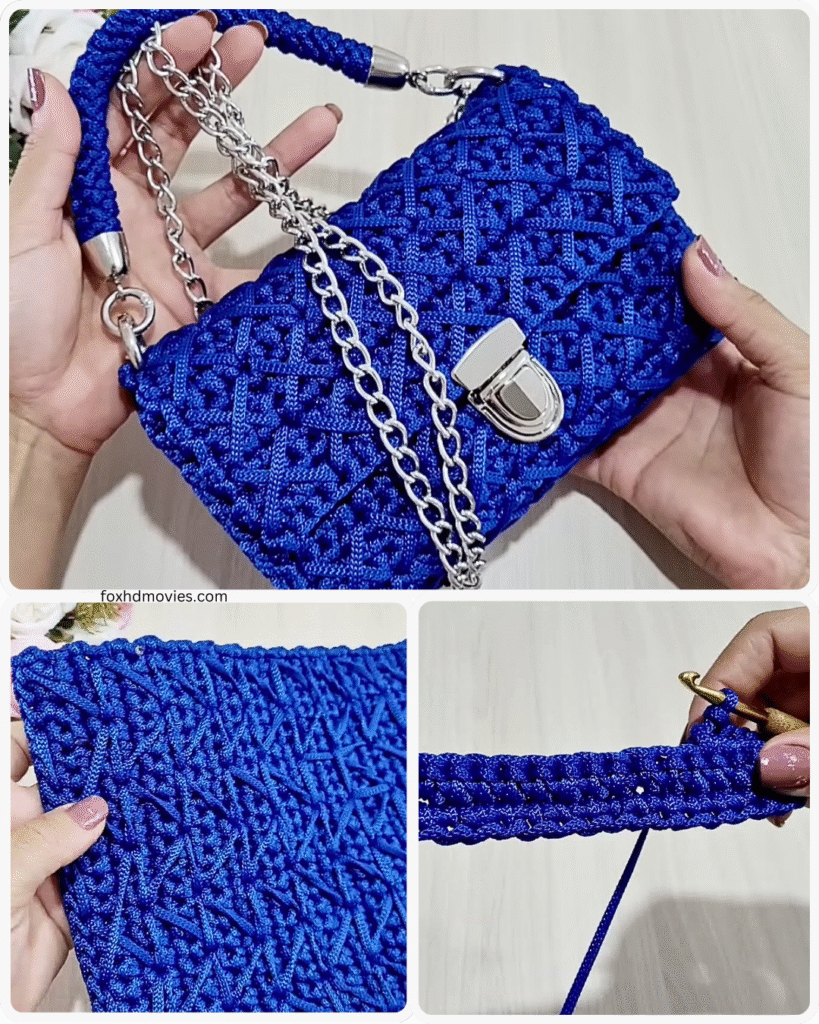
This pattern will guide you through creating a stylish and sturdy modern crochet tote bag. Featuring clean lines and a subtle texture created by the half double crochet in the third loop, this bag is perfect for everyday use and showcases a contemporary aesthetic.
Skill Level: Easy to Intermediate
Finished Size: Approximately 12 inches wide x 14 inches tall (excluding handles)
Materials:
- Approximately 400-500 yards of Worsted Weight Cotton Yarn (or a durable cotton blend)
- Crochet Hook size H/8 (5.0 mm) or size needed to obtain gauge
- Stitch Marker
- Yarn Needle
- Scissors
- Optional: Fabric for lining, sewing needle, coordinating thread
Gauge: 14 sts and 10 rows in half double crochet in the third loop = 4 inches
To check your gauge, create a 4×4 inch swatch using the stitch specified in the pattern. If your swatch is too small, try a larger hook size. If your swatch is too large, try a smaller hook size.
Stitches Used (US Terms):
- ch: chain
- sl st: slip stitch
- sc: single crochet
- hdc: half double crochet
- hdc in the third loop: Half double crochet worked into the horizontal bar located on the back of the hdc stitch from the previous row. This creates a subtle ribbed effect on the right side of the fabric.
- rnd: round
- st(s): stitch(es)
Pattern Notes:
- The bag is worked in joined rounds from the bottom up.
- The chain 2 at the beginning of each round does NOT count as a stitch.
- Join rounds with a slip stitch to the top of the first hdc of the round.
- The main body of the bag is worked using the hdc in the third loop to create a modern, textured fabric.
Instructions:
Base of the Bag:
The base is worked in oval rounds to create a sturdy foundation.
Rnd 1: Ch 31 (or a desired starting chain length for your preferred bag width – the final width will be slightly larger than your starting chain). Hdc in the 3rd ch from the hook and in each ch across. 3 hdc in the last ch. Do not turn, continue working along the opposite side of the starting chain. Hdc in each ch across. 2 hdc in the last ch. Join with a sl st to the top of the first hdc. (62 hdc) Rnd 2: Ch 2. 2 hdc in the first st. Hdc in the next 28 sts. 2 hdc in the next 3 sts. Hdc in the next 28 sts. 2 hdc in the last 2 sts. Join with a sl st to the top of the first hdc. (70 hdc) Rnd 3: Ch 2. 2 hdc in the first st. Hdc in the next 30 sts. 2 hdc in the next 3 sts. Hdc in the next 30 sts. 2 hdc in the last 2 sts. Join with a sl st to the top of the first hdc. (78 hdc) Rnd 4: Ch 2. 2 hdc in the first st. Hdc in the next 32 sts. 2 hdc in the next 3 sts. Hdc in the next 32 sts. 2 hdc in the last 2 sts. Join with a sl st to the top of the first hdc. (86 hdc)
Continue increasing in this manner, working 2 hdc in the first and last 2 sts of the round and 2 hdc in the middle 3 sts on each side, increasing the number of hdc between the increases by 2 each round, until your base is the desired width. Ensure you have an even number of stitches at the end of your last base round.

Body of the Bag:
Now, we will work the sides of the bag using the hdc in the third loop technique.
Rnd [Base + 1]: Ch 2. Hdc in the third loop of each st around. Join with a sl st to the top of the first hdc. ( stitch count should be the same as the last base round) Rnd [Base + 2] – Rnd [Desired Height]: Ch 2. Hdc in the third loop of each st around. Join with a sl st to the top of the first hdc. (stitch count remains the same)
Repeat Rnd [Base + 2] until your bag reaches the desired height.

Finishing the Top Edge:
To create a neat and sturdy top edge, we will work a round of single crochet.
Rnd [Desired Height + 1]: Ch 1 (does not count as a stitch). Sc in each st around. Join with a sl st to the first sc.
Handles:
You can create your own crochet handles or attach pre-made handles. Here are instructions for simple crochet handles:
Make two handles.
Row 1: Ch 40 (or desired handle length). Sc in the 2nd ch from the hook and in each ch across. (39 sc) Row 2: Ch 1. Turn. Sc in each st across. (39 sc)
Repeat Row 2 for a few more rows until your handle is the desired width and thickness. Fasten off, leaving a long tail for sewing.

Attaching Handles:
Lay your bag flat and determine the placement of your handles. Pin the handles in place on the inside of the bag, ensuring they are evenly spaced on the front and back. Using your yarn needle and the long tails, sew the handles securely to the bag. Repeat for the second handle. Weave in any remaining loose ends.
Video tutorial
Optional Lining:
Adding a fabric lining will give your bag a professional finish and extra durability.
- Measure the dimensions of your finished bag (width and height).
- Cut two pieces of fabric slightly larger than your bag dimensions (add about 1/2 inch seam allowance on all sides).
- With right sides together, sew the two fabric pieces together along the sides and bottom, leaving the top open. Create a boxed bottom for the lining by matching the side and bottom seams and sewing across the corner.
- Hem the top edge of the lining by folding it over twice and stitching.
- Insert the lining into your crochet bag. Fold the top edge of the lining over the top edge of the bag and hand stitch it securely in place using a sewing needle and coordinating thread.
Finishing:
Weave in any remaining loose ends neatly using your yarn needle.