by
by 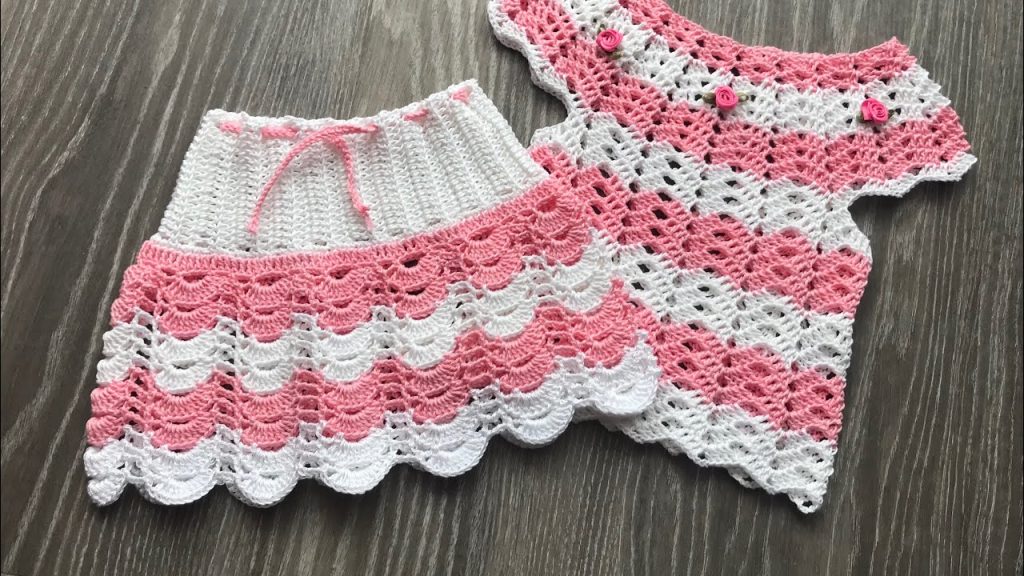
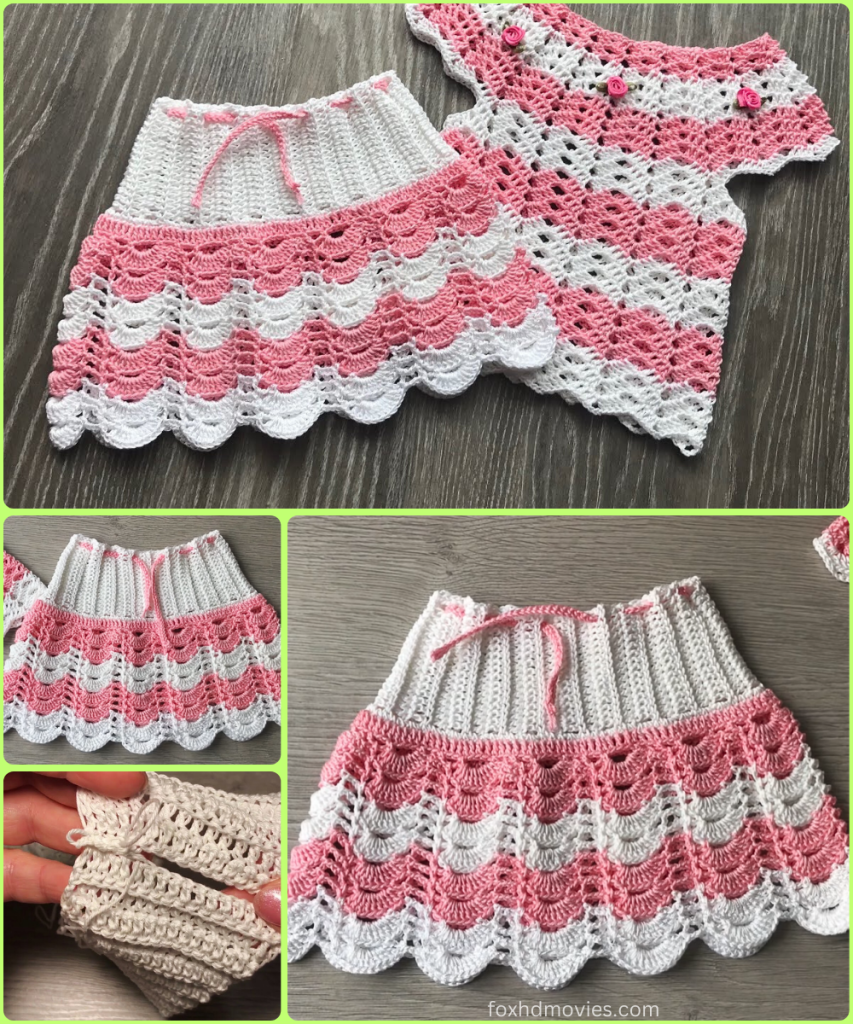
Create a skirt that’s as cute as it is comfortable! This beautiful two-toned baby skirt features a ribbed-look waistband with a functional drawstring, a flowing body of alternating shell stitches, and a gorgeous wide scalloped border. This is a fun project for using up yarn scraps and practicing your shell stitch skills.
Let’s pick up our hooks and create this delightful, lacy skirt!
Skill Level: Intermediate
Materials You’ll Need:
- Yarn:
- Approximately 100-150 yards of sport (size 2) or DK (size 3) weight yarn in a main color (e.g., white).
- Approximately 100-150 yards of sport (size 2) or DK (size 3) weight yarn in a contrasting color (e.g., pink).
- A crochet hook appropriate for your yarn. A size G/6 (4.0mm) hook is a good choice for this type of project.
- Scissors
- Yarn needle for weaving in ends
- Stitch markers (optional)
Key Stitches and Abbreviations:
- ch: chain
- st(s): stitch(es)
- sl st: slip stitch
- sc: single crochet
- hdc: half double crochet
- dc: double crochet
- Shell/Fan st: fan stitch ([5 dc] in the same stitch)
- Wider Shell st: [7 dc] in the same stitch
- sk: skip
- sp: space
- rnd: round
Pattern Instructions:
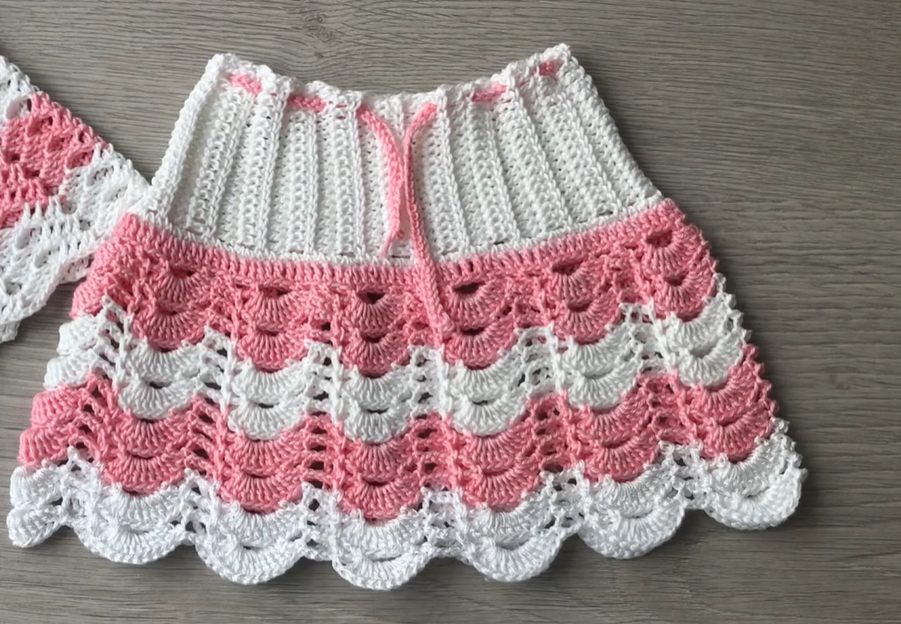
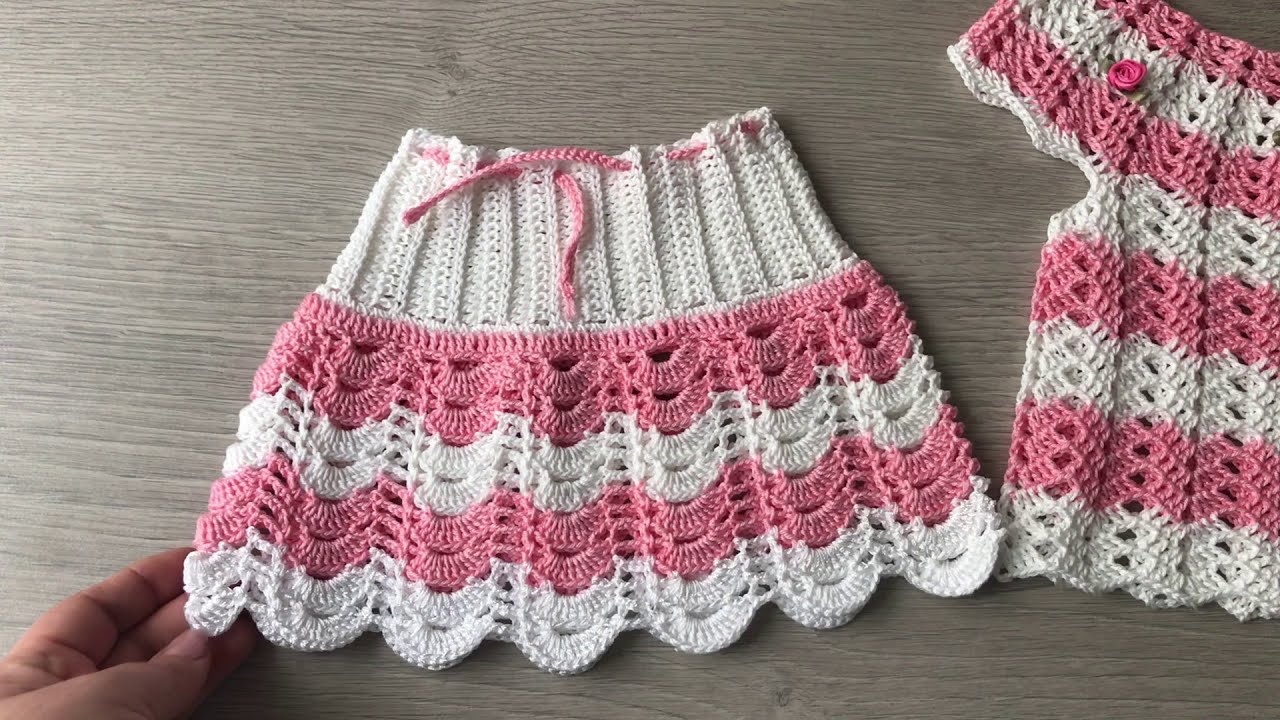
Part 1: The Waistband (White Yarn)
The waistband is worked in the round to create a simple, ribbed-look band with a channel for the drawstring.
- Rnd 1 (Setup): With white yarn, ch 65 (or enough to fit the waist of a baby/toddler). Sl st to the first ch to form a ring, being careful not to twist the chain. (65 sts)
- Rnd 2: ch 1, hdc in each st around. Join with sl st.
- Rnd 3 (Drawstring Channel): ch 1, sc in first st. ch 1, sk 1 st, sc in next st. Repeat from * around, adjusting the pattern at the end to fit the round. Join with sl st. This creates the holes for the drawstring.
- Rnd 4: ch 1, hdc in each st and ch-1 sp around. Join with sl st. Fasten off white yarn.
Part 2: The Skirt Body (Pink and White Yarn)
The body is worked in alternating rows of shell stitches, creating a lovely striped pattern.

- Rnd 5 (First Shell Row): Join pink yarn to any stitch on the last round. ch 3 (counts as dc). sk 2 sts, [5 dc] in next st (this is your shell stitch), sk 2 sts, dc in next st. Repeat from * around. Join with sl st to top of ch 3.
- Rnd 6: Ch 3 (counts as dc). dc in each of the next 2 dc. ch 1, sc in the center dc of the next shell, ch 1, dc in each of the 3 dc of the next shell. Repeat from * around. Join with sl st.
- Rnd 7: Ch 1, sc in the first dc. sk 2 sts, [5 dc] in the sc from the previous round. Repeat from * around. Join with sl st. Fasten off pink yarn.
- Rnd 8: Join white yarn to the first sc of the previous round. Ch 3 (counts as dc), and work the same pattern as Rnd 5.
- Rnd 9: Work the same pattern as Rnd 6.
- Rnd 10: Work the same pattern as Rnd 7.
- Continue working in this alternating color pattern until the skirt reaches your desired length, alternating between your pink and white yarns every three rounds. To create a slight increase in the flare of the skirt, you can increase the number of double crochets in the shell stitches every few rows (e.g., use [6 dc] or [7 dc] in a shell instead of 5).
Part 3: The Scallop Border (White Yarn)
The bottom of the skirt is finished with a wide, ruffled scalloped edge.
- Rnd 1: Join white yarn to the hem of the skirt. Work a round of single crochet stitches.
- Rnd 2 (Wider Scallop): sk 2 sts, [7 dc] in next st (this is your wider shell), sk 2 sts, sc in next st. Repeat from * around. Join with sl st. Fasten off.
Part 4: Finishing Touches
- Drawstring: With white yarn, ch a long chain (at least 30 inches / 76 cm) to create your drawstring cord.
- Thread the drawstring through the channel in the waistband you created in Part 1. You can use a yarn needle or safety pin to help you.
- Tie the ends of the drawstring in a knot.
- Weave in all your loose ends securely with your yarn needle.
- Blocking: Gently block the finished skirt to help the shell stitches and scallop border lay flat and define the stitches.
You’re Done!
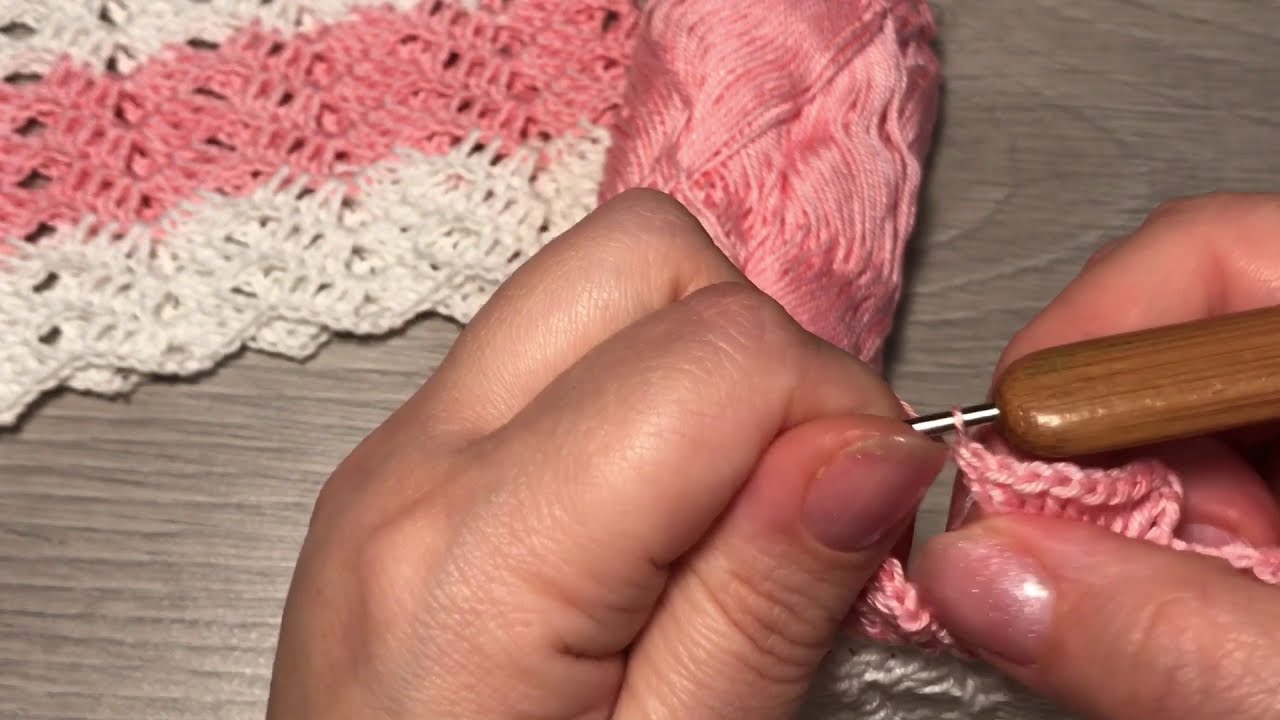
Video tutorial
Congratulations! You’ve just crocheted a beautiful, two-toned baby skirt with a lovely shell stitch pattern. This project is both fun and rewarding, resulting in a unique and heartfelt garment.
Share your finished skirt with me on social media using #ScallopSkirtPattern – I’d love to see your color choices! Happy crocheting!