 by
by 
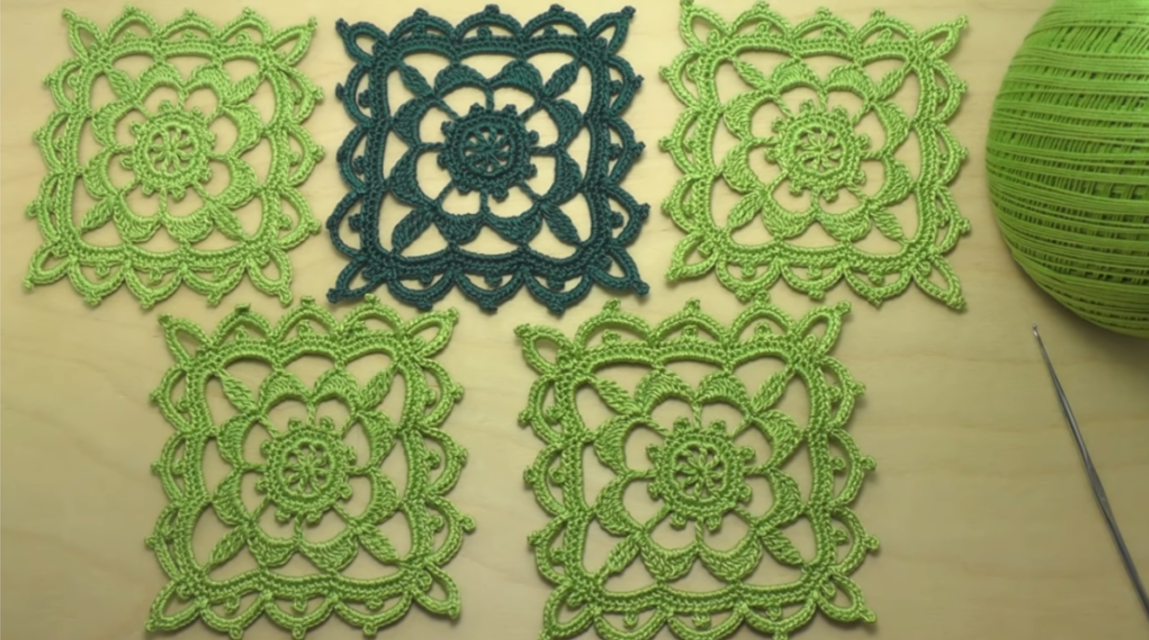
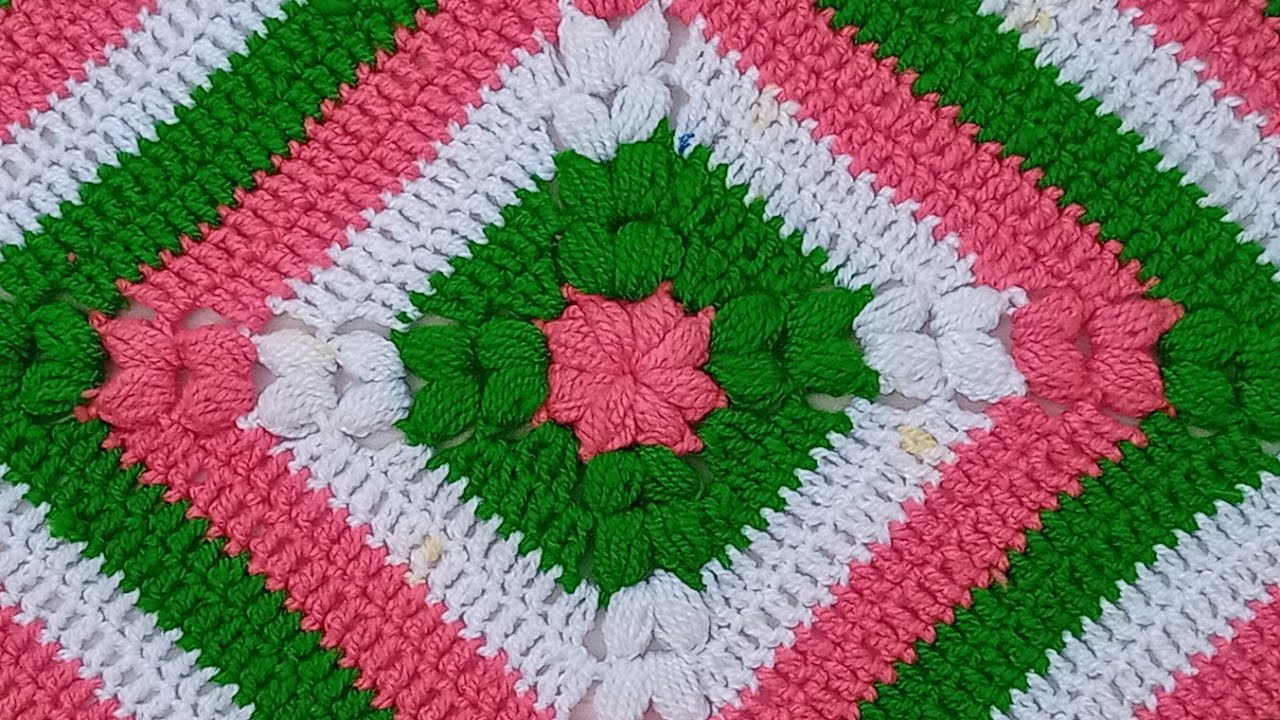
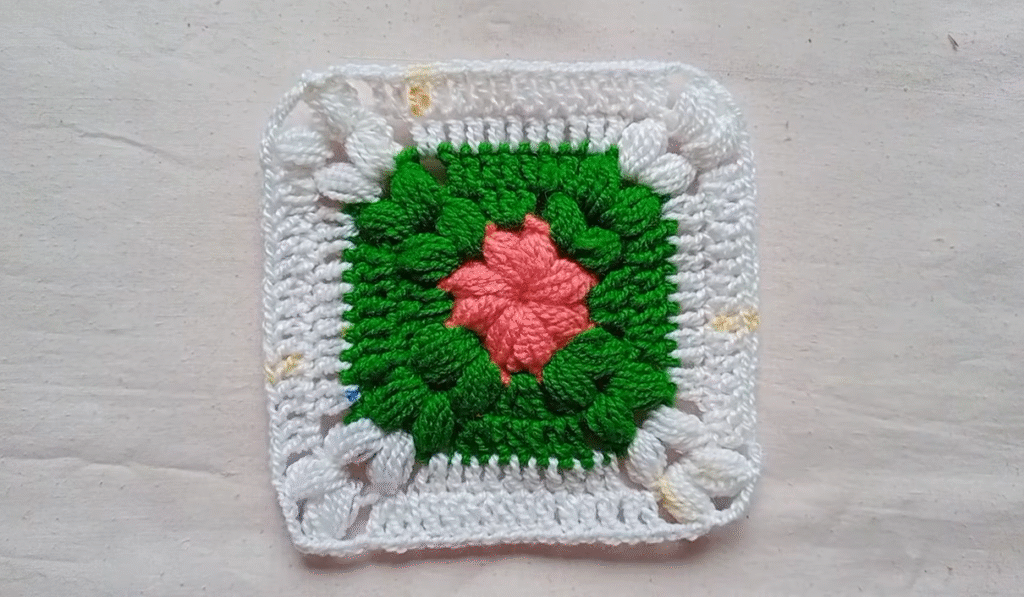
Add a burst of color and a touch of floral charm to your next project with this eye-catching crochet square! Featuring a sweet flower at its heart and radiating diagonal stripes, this motif is perfect for blankets, pillows, bags, or even a unique garment. It’s a fantastic way to play with color and create a truly dynamic piece.
The vibrant pink, green, and white combination in your photo is so cheerful and highlights the clever diagonal design. This pattern is suitable for confident beginners and intermediate crocheters looking for a fun and rewarding make.
What You’ll Need:
- Yarn:
- Worsted weight (Category 4) or DK weight (Category 3) yarn is a great choice. Acrylic or cotton blends work well.
- You’ll need three contrasting colors: one for the flower (e.g., Pink), one for the inner ring of leaves (e.g., Green), and two colors for the diagonal stripes (e.g., White and Pink/Green again).
- Yardage: Small amounts for each color for one square, approximately 20-50 yards per color per square.
- Crochet Hook:
- Appropriate size for your yarn (e.g., 4.0mm (G) or 5.0mm (H) for worsted weight). Check your yarn label for recommendations.
- Scissors
- Yarn Needle (for weaving in ends)
Abbreviations (US Terms):
- ch: chain
- sl st: slip stitch
- sc: single crochet
- hdc: half double crochet
- dc: double crochet
- tr: treble crochet (yarn over 2 times) – used for petals
- st(s): stitch(es)
- sp: space
- yo: yarn over
- MR: magic ring (or magic circle)
- FO: fasten off
- cl: cluster (e.g., dc3tog, or group of stitches in one space)
Let’s Get Started!
Difficulty: Intermediate (requires some understanding of shaping and color changes)

Notes:
- The beginning chains usually do NOT count as a stitch unless specified.
- Join each round with a slip stitch to the first stitch of the round (not the starting chain) unless directed otherwise.
- Color Change Tip: When changing colors, work the final yarn over of the slip stitch join with the new color to create a seamless transition.
- The diagonal stripe effect is created by working specific stitches into certain parts of the previous round to push the “lines” diagonally.
Pattern for a Diagonal Striped Flower Square:

(Part 1: The Flower Center – Using your Flower Color 1, e.g., Pink)
Round 1: (Center Ring)
- Start with a Magic Ring (MR).
- Ch 1 (does not count as st). Work 8 sc into the MR.
- Pull MR tight to close. Sl st to the top of the first sc to join. (8 sc)
Round 2: (Petals)
- Ch 1 (does not count as st). Sc in the same st.
- In the next st, work (hdc, 2 tr, hdc). This forms a petal.
- Sc in the next st.
- Repeat from * to * around (4 petals created).
- Sl st to the first sc to join.
- FO Flower Color 1. (4 petals, 4 sc between them)
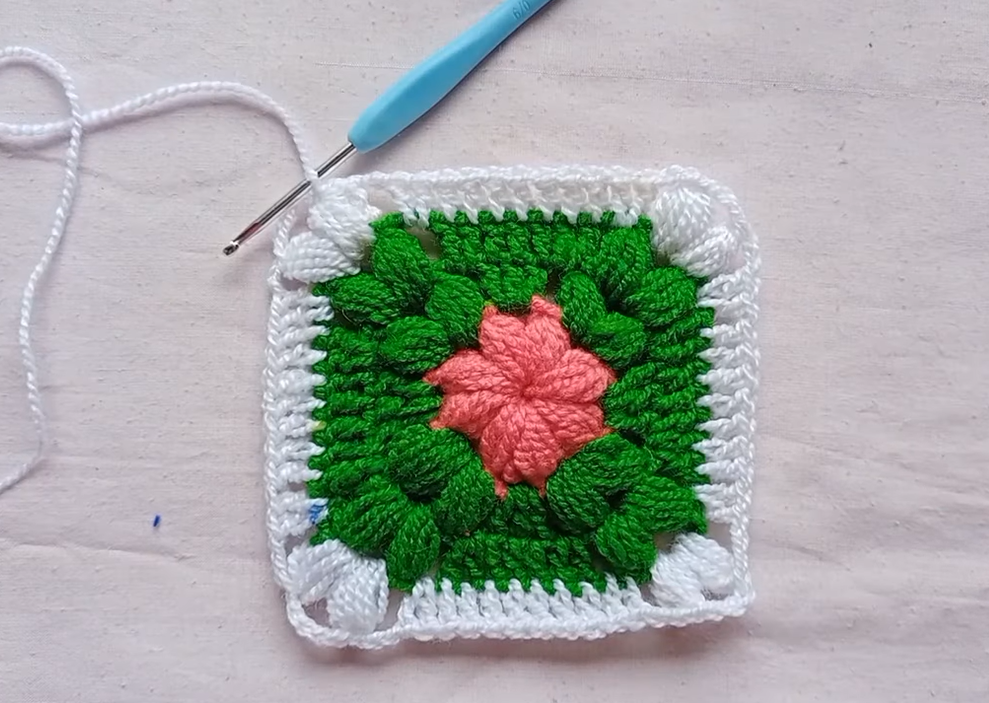
(Part 2: The Green “Leaves” / Foundation – Using your Flower Color 2, e.g., Green)
Round 3: (Behind Petals)
- Attach Green yarn with a sl st in any sc from Round 2.
- Ch 3 (counts as 1 dc). Work 2 dc in the same sc. (First dc cluster)
- Ch 2. Sk the petal. In the next sc, work (3 dc).
- Repeat from * to * around.
- Ch 2, sl st to the top of the initial Ch 3 to join. (4 clusters of 3 dc, 4 ch-2 spaces)
Round 4: (Square Shaping)
- Sl st into the next 2 dc and into the first ch-2 space.
- Ch 3 (counts as 1 dc). In the same ch-2 space, work (2 dc, ch 2, 3 dc). This creates the first corner.
- Ch 1. In the space between the 3-dc clusters (from Round 3), work 3 dc. This is a side.
- Ch 1. In the next ch-2 space (a corner), work (3 dc, ch 2, 3 dc).
- Repeat steps 3-4 around.
- Ch 1, sl st to the top of the initial Ch 3 to join.
- FO Green yarn.
(Part 3: Diagonal Stripes – Using your Stripe Color 1, e.g., White)
Round 5:
- Attach White yarn with a sl st in any ch-1 space along a side.
- Ch 3 (counts as 1 dc). Work 2 dc in the same ch-1 space. (First 3-dc cluster)
- Ch 1. In the next corner ch-2 space, work (3 dc, ch 2, 3 dc).
- Ch 1. In the next ch-1 space along the side, work 3 dc.
- Ch 1. In the next ch-1 space along the side (this will be the one before the next corner), work (dc3tog), skipping over the corner space and connecting to the next side. (This is where the diagonal shift happens! You’re creating a cluster that connects two sides diagonally).
- Repeat from * to * around. (You’ll have 4 regular side clusters, 4 corner clusters, and 4 dc3tog clusters).
- Sl st to the top of the initial Ch 3 to join.
- FO White yarn.
Note for Round 5: The “dc3tog” should be worked over the last dc of the first 3-dc group, the ch-2 corner space, and the first dc of the next 3-dc group. This will pull the stitches inwards and create the diagonal effect.
Round 6: (Diagonal Stripes – Stripe Color 2, e.g., Pink – or same green as flower) (The image uses the flower pink and a green for the diagonal stripes. Let’s assume you’re using Pink again for this stripe.)
- Attach Pink yarn with a sl st in any ch-1 space along a side (not a corner, and not the space over the dc3tog).
- Ch 3 (counts as 1 dc). Work 2 dc in the same ch-1 space.
- Ch 1. In the next corner ch-2 space, work (3 dc, ch 2, 3 dc).
- Ch 1. In the next ch-1 space along the side, work 3 dc.
- Ch 1. In the ch-1 space that sits above the dc3tog from the previous round, work (dc3tog), connecting across that point.
- Repeat from * to * around.
- Sl st to the top of the initial Ch 3 to join.
- FO Pink yarn.
Continuing the Diagonal Stripes:
To continue making the square larger with the diagonal stripes, you’ll repeat the pattern of Round 6, alternating your stripe colors (e.g., Green, then White, then Pink, etc.).
- Always attach your new color in a ch-1 space along a side.
- Your corners will always be (3 dc, ch 2, 3 dc) in the corner ch-2 space.
- You’ll work 3 dc in each regular ch-1 space along the sides.
- The “dc3tog” (or a similar cluster that closes a gap) will always be worked over the ch-1 space that sits above the cluster from the previous round, creating that continuous diagonal line. You’ll work a ch 1 before and after this cluster.
Continue until your square reaches the desired size.
Video tutorial
Finishing Up!
- Fasten Off (FO): Once your square reaches the desired size, cut your yarn, leaving a short tail. Pull the tail completely through the last loop on your hook to secure.
- Weave in all ends: Use your yarn needle to neatly weave in all starting and ending tails. For multi-color projects, this is crucial for a clean and professional appearance.
- Blocking (Recommended): Blocking will make a significant difference in the finished look of your square, especially with the diagonal lines. Pin your square to a flat, soft surface (like a foam mat or ironing board), gently stretching it into a perfect square shape. Mist it lightly with water (for cotton) or use a steam iron (hovering, not touching the yarn directly for acrylics). Let it dry completely in shape.
You now have a vibrant and beautifully textured diagonal striped flower square, ready to be joined into a larger project or used as a standalone coaster or appliqué! Happy crocheting!