 by
by 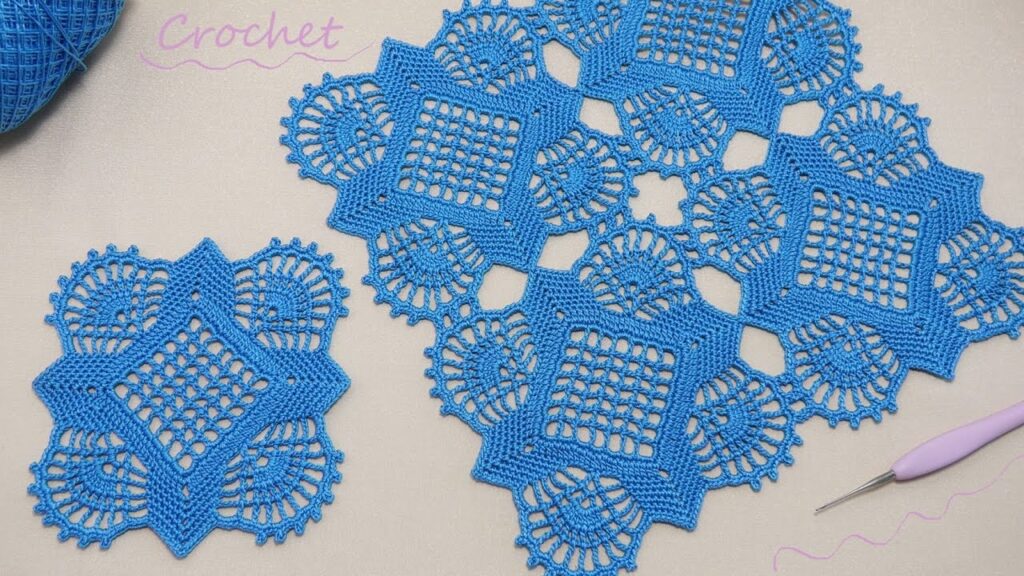
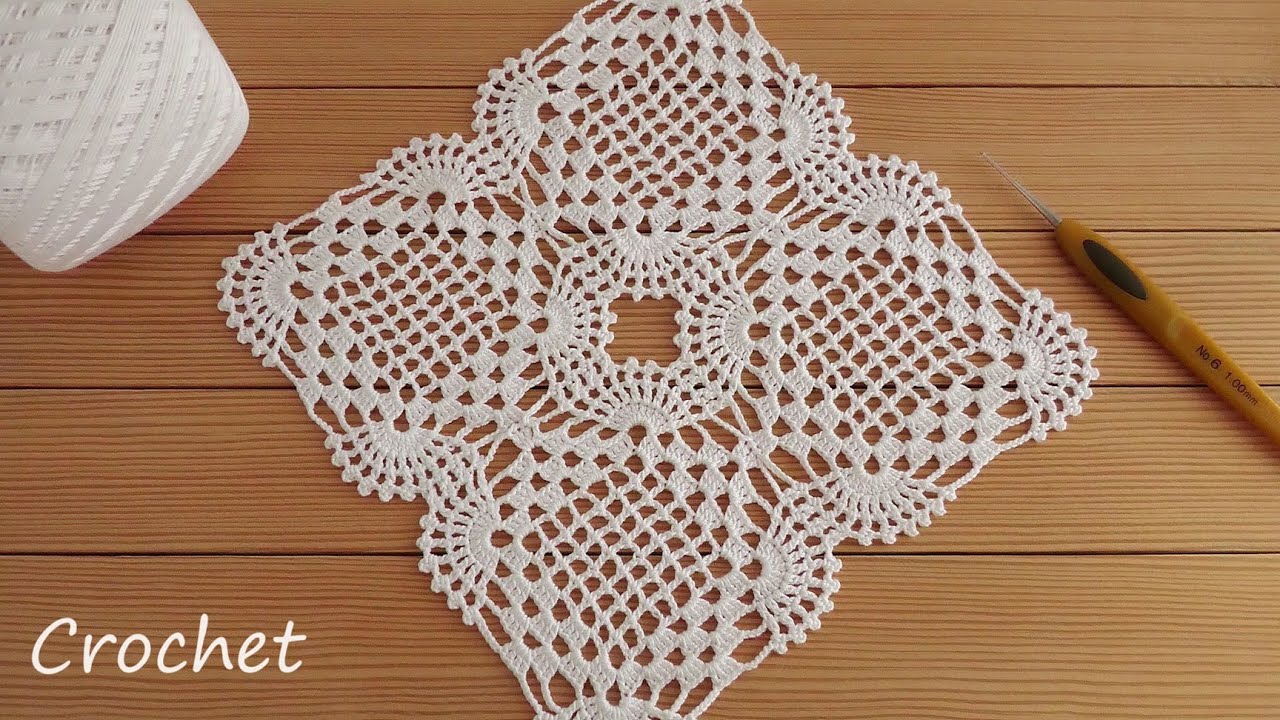
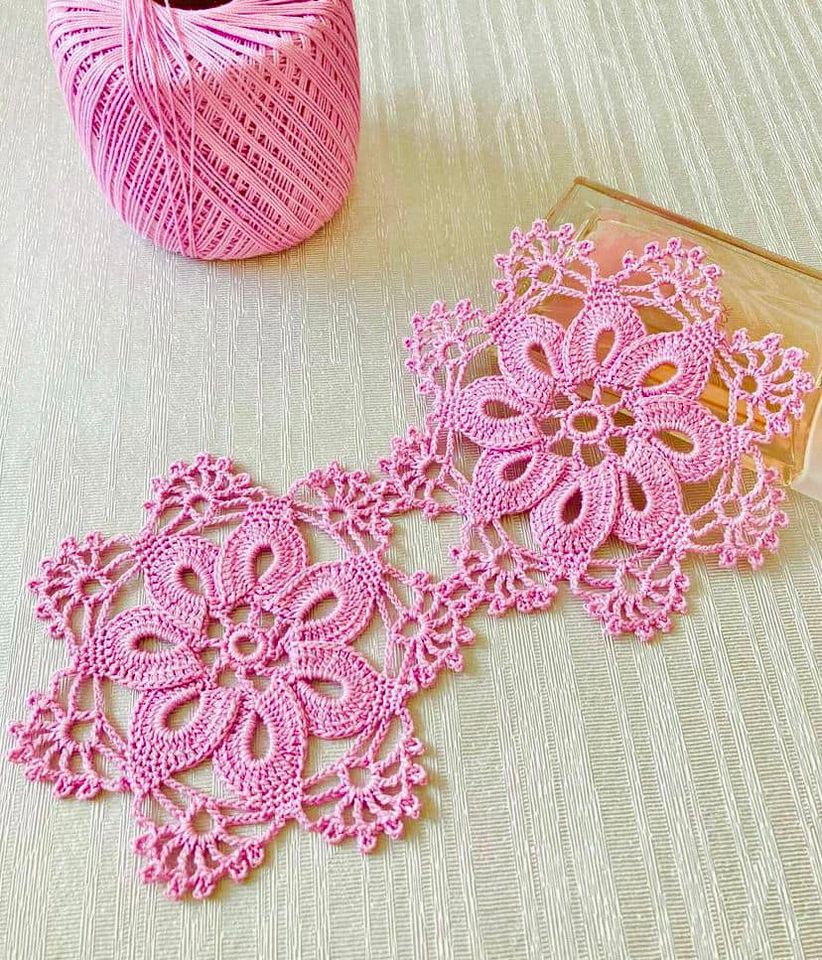
Hello, crochet lovers! Today, we’re going to tackle a project that’s both elegant and captivating: a beautiful square lace doily, just like the one in our inspiration photo! This design features striking square motifs connected by delicate fan-like elements, creating a truly intricate piece that will elevate any surface it adorns.
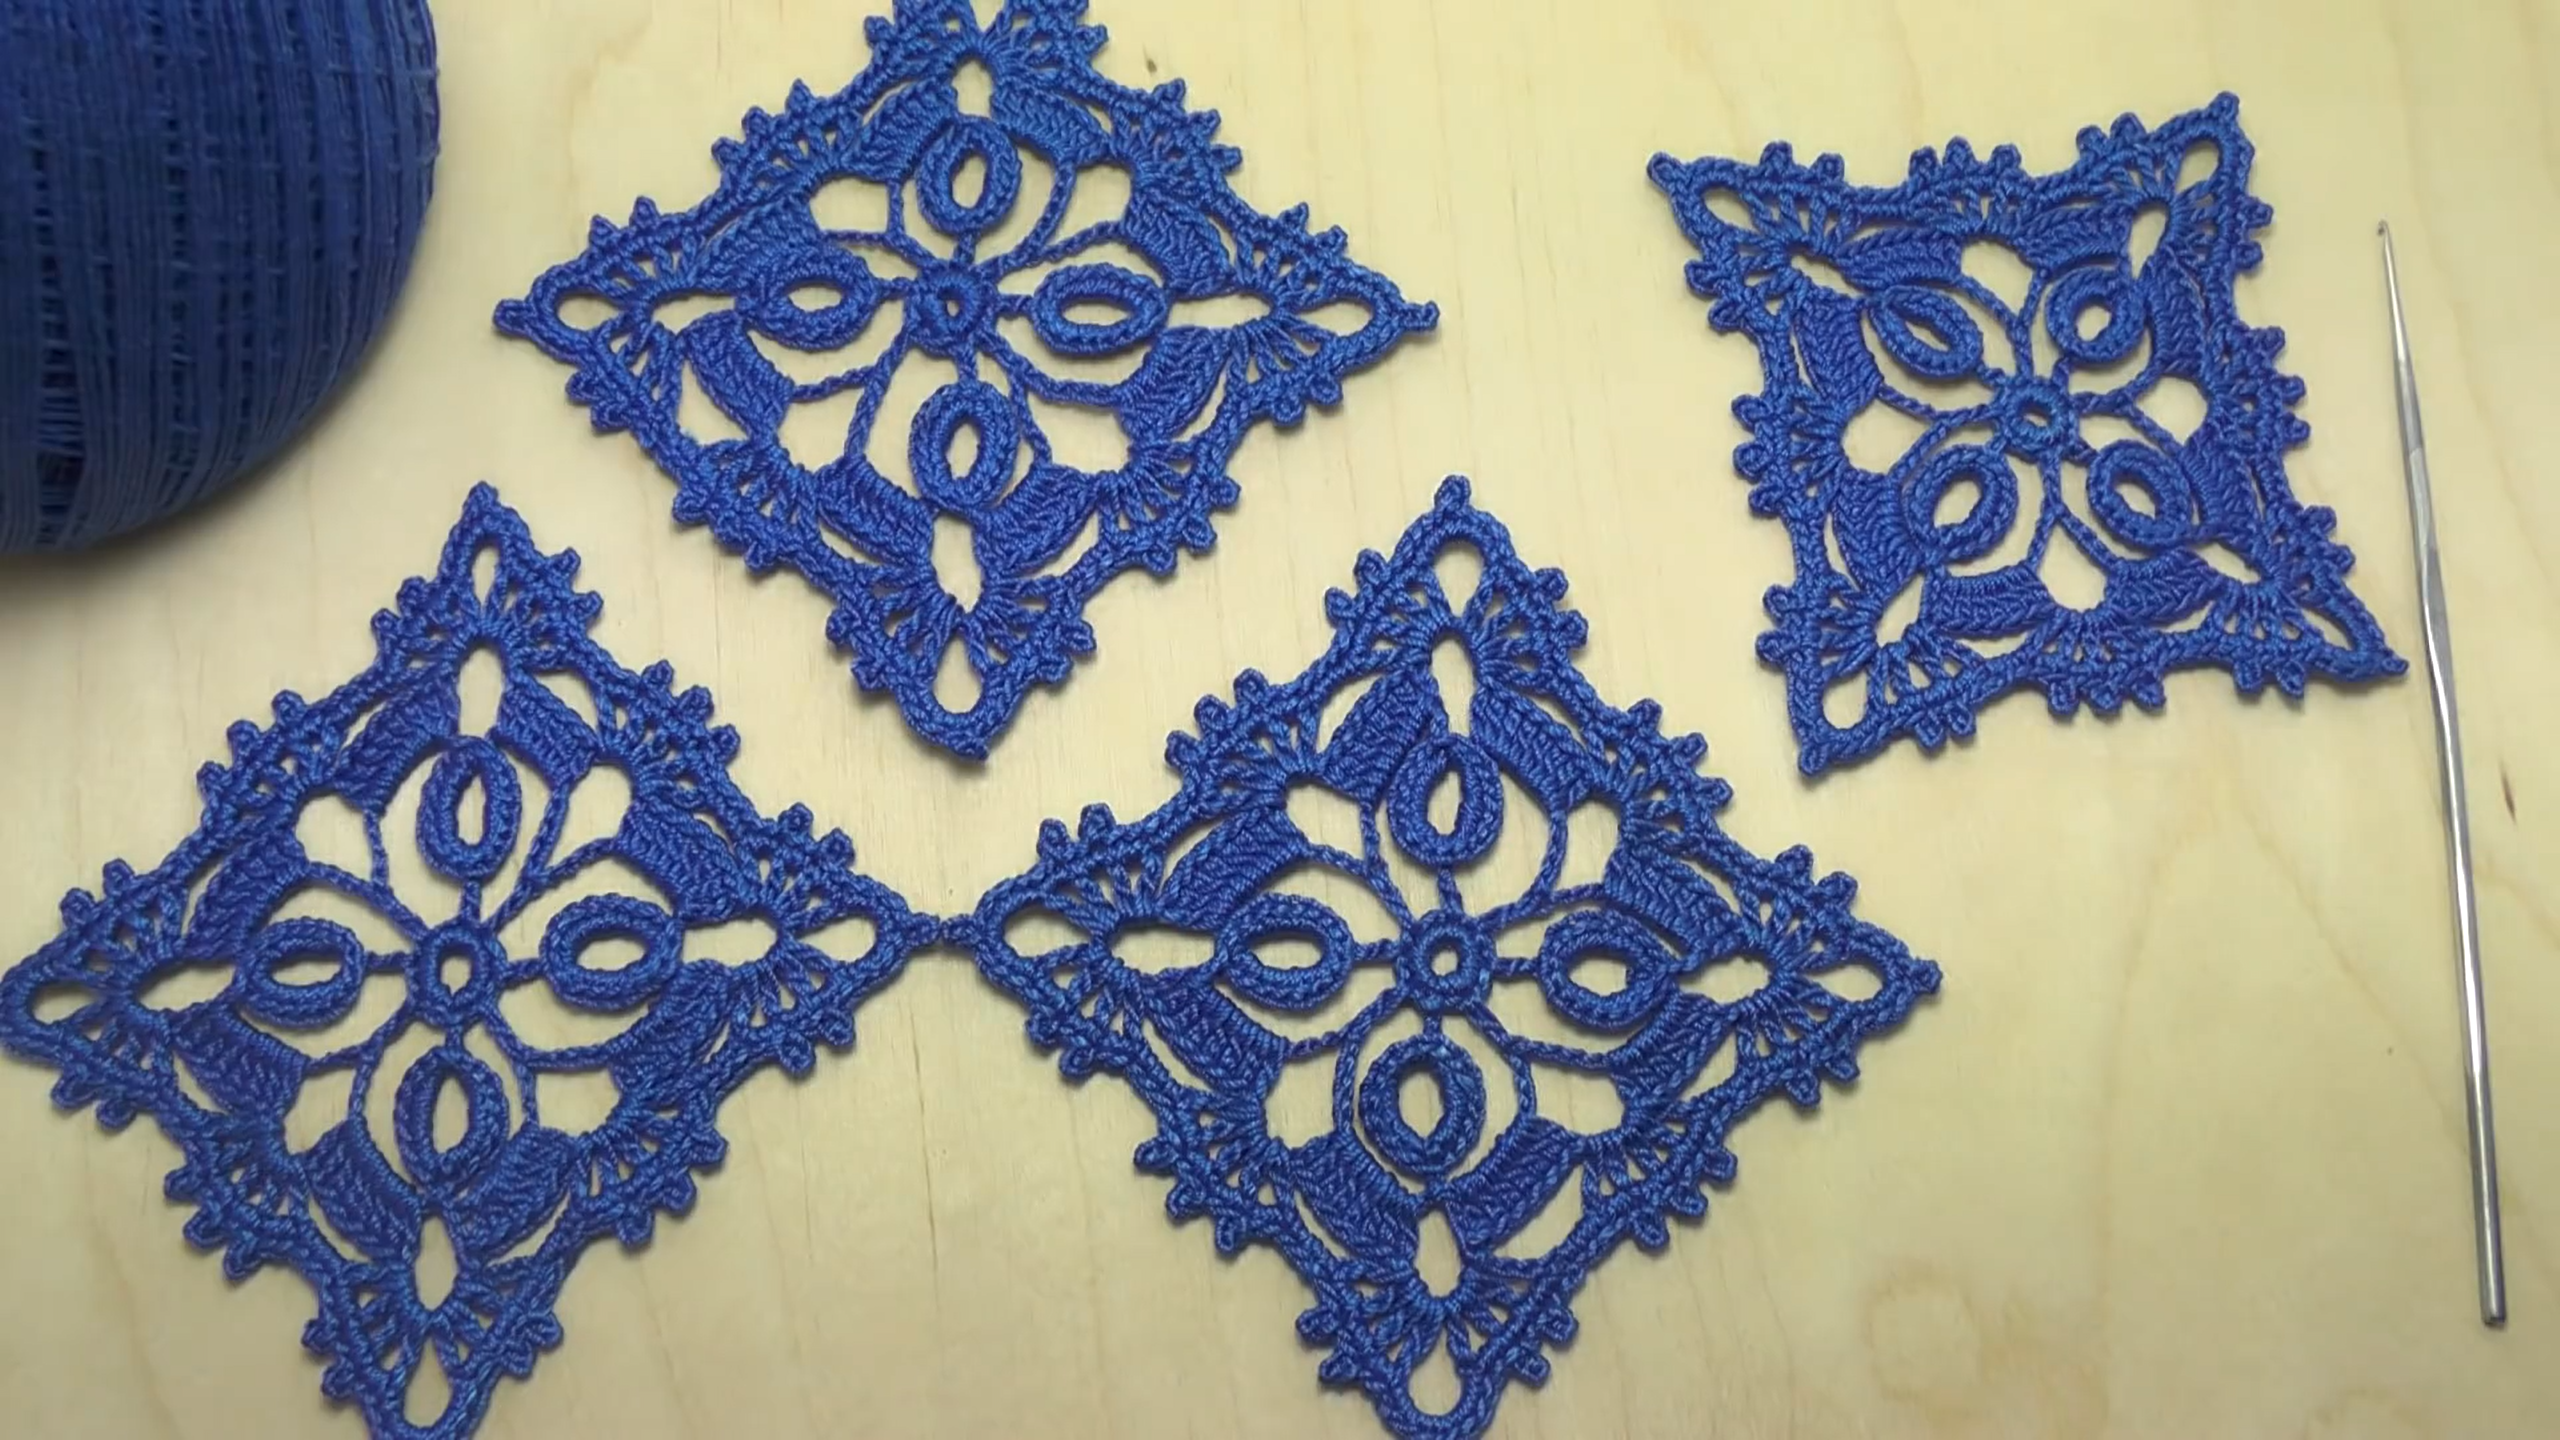
The inspiration photo shows a lovely blue doily, but imagine this in crisp white, delicate cream, or even a vibrant contrasting color to match your decor. This pattern is perfect for adding a touch of handmade charm to your home or as a thoughtful gift.
What You’ll Need:
- Yarn: Fine weight (fingering or lace weight) cotton yarn is ideal for achieving the crisp stitch definition and delicate feel of this doily. The photo suggests a lovely blue.
- Crochet Hook: A small hook size will be necessary for fine yarn. The hook in the picture appears to be quite small (possibly 0.75mm to 1.5mm), but always check your yarn label for recommended hook sizes. Choose a hook that gives you a firm but not overly stiff fabric.
- Scissors
- Yarn Needle (for weaving in ends)
Abbreviations (US Terms):
- ch: chain
- sl st: slip stitch
- sc: single crochet
- hdc: half double crochet
- dc: double crochet
- tr: treble crochet
- dtr: double treble crochet
- sk: skip
- sp: space
- rep: repeat
- yo: yarn over
- beg: beginning
Let’s Get Started! (Pattern for One Square Motif – Approx. 4 motifs for the main doily)
Note: This pattern is based on visual interpretation of the image and may require some adjustments depending on your tension and yarn. The large doily is made of 4 main squares and connecting sections. We’ll start with one square.

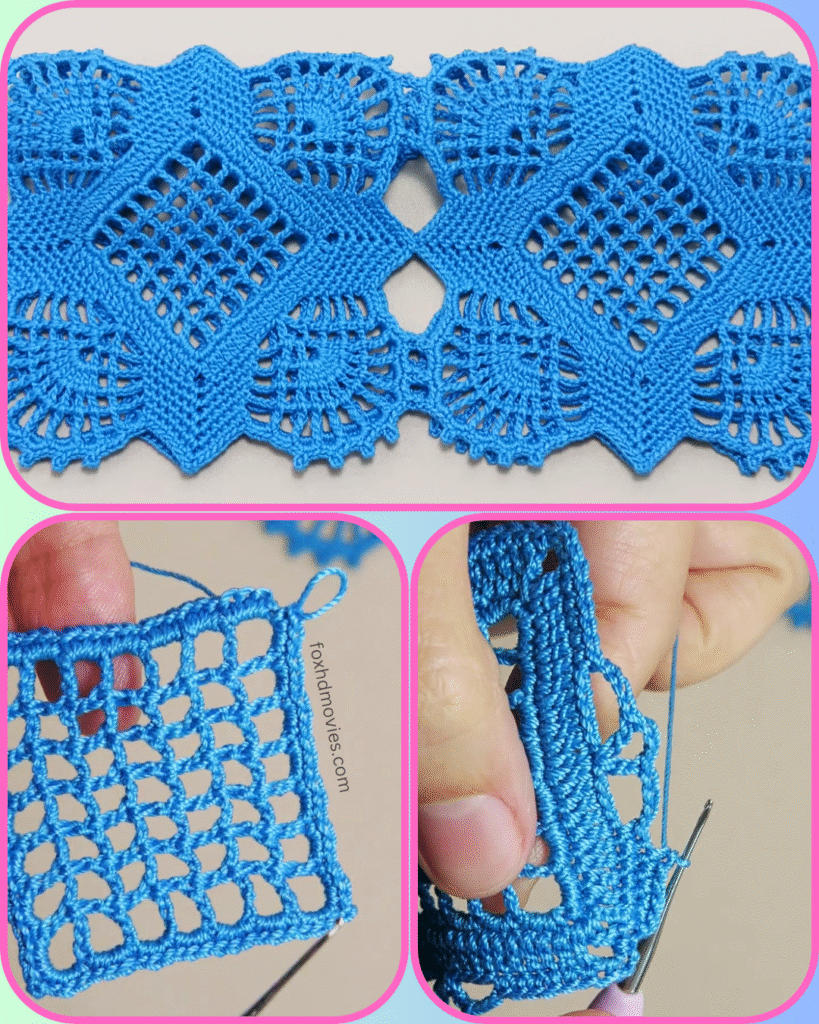
Square Motif
Round 1: Center Make a magic ring. Ch 3 (counts as first dc), 15 dc into the ring. Join with sl st to top of beg ch 3. (16 dc)
Round 2: Creating Corner Spaces Ch 1 (does not count as st). Sc in same st. Ch 5, sk 3 dc, sc in next dc. Rep from * to * 3 more times. Ch 5, join with sl st to first sc. (4 sc, 4 ch-5 loops)
Round 3: First Corner Formation Sl st into first ch-5 loop. Ch 3 (counts as 1 dc), 2 dc in same ch-5 loop. Ch 3 (corner ch-sp), 3 dc in same ch-5 loop. Ch 3, in next ch-5 loop: 3 dc, ch 3, 3 dc. Rep from * to * 3 more times. Ch 3, join with sl st to top of beg ch 3. (24 dc, 8 ch-3 sps)
Round 4: Building the Square Sl st into next 2 dc. Sl st into first corner ch-3 sp. Ch 3 (counts as 1 dc), (2 dc, ch 3, 3 dc) in same corner ch-3 sp. Ch 3, sk 3 dc, sc in next ch-3 sp. Ch 3, in next corner ch-3 sp: (3 dc, ch 3, 3 dc). Rep from * to * 3 more times. Ch 3, sk 3 dc, sc in next ch-3 sp. Ch 3, join with sl st to top of beg ch 3.
Round 5: Continuing the Square’s Lacy Sides Sl st into next 2 dc. Sl st into first corner ch-3 sp. Ch 3 (counts as 1 dc), (2 dc, ch 3, 3 dc) in same corner ch-3 sp. Ch 3, sk 3 dc, sc in next ch-3 sp. Ch 3, sc in next ch-3 sp. Ch 3, in next corner ch-3 sp: (3 dc, ch 3, 3 dc). Rep from * to * 3 more times. Ch 3, sk 3 dc, sc in next ch-3 sp. Ch 3, sc in next ch-3 sp. Ch 3, join with sl st to top of beg ch 3.
Round 6: Final Square Edge Sl st into next 2 dc. Sl st into first corner ch-3 sp. Ch 3 (counts as 1 dc), (2 dc, ch 3, 3 dc) in same corner ch-3 sp. Ch 3, (sc in next ch-3 sp, ch 3) twice. Sc in next ch-3 sp. Ch 3, in next corner ch-3 sp: (3 dc, ch 3, 3 dc). Rep from * to * 3 more times. Ch 3, (sc in next ch-3 sp, ch 3) twice. Sc in next ch-3 sp. Ch 3, join with sl st to top of beg ch 3.

Fasten off. Weave in ends.
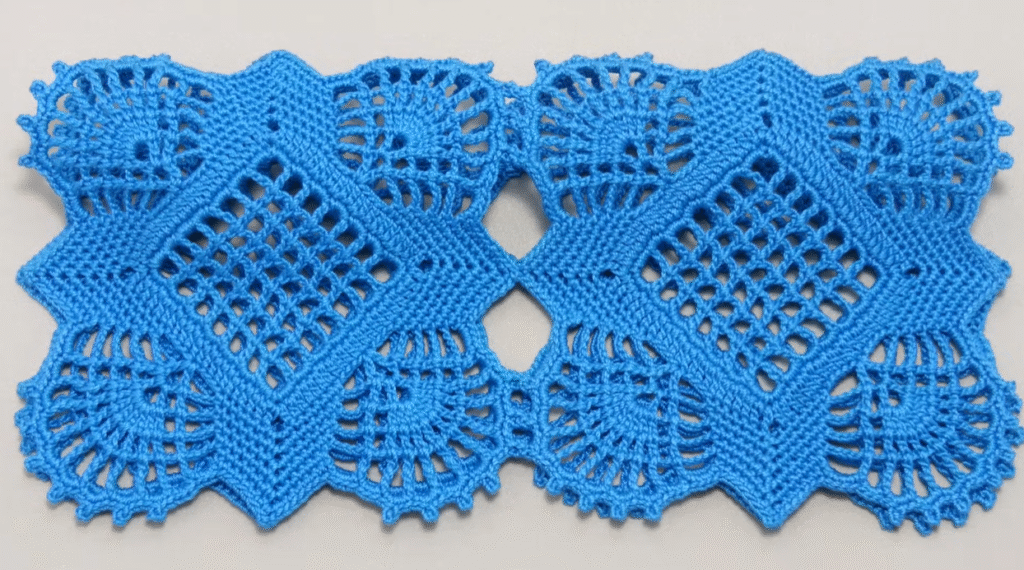
Make 4 of these square motifs.
Connecting the Squares & Adding Fan Edges
This is where it gets a little trickier, as the image shows a seamless connection. You will join the squares as you crochet the final connecting rounds, or sew them together later. For a seamless look, I recommend joining as you go.
Connecting Method (example for joining two squares side-by-side):
When you reach a corner where two squares meet, instead of chaining for the full corner, you’ll chain half, sl st into the corresponding corner ch-sp of the adjacent square, then chain the remaining half. Repeat for side connections, replacing chains with sl sts into the previous square’s ch-sps.
Fan Edges (Between Squares & Outer Edges)
The fan-like elements are created using a series of trebles or double trebles to create height and curves.
- You’ll likely use combinations of (dc, ch, dc) or (tr, ch, tr) in specific chain spaces to create the “peaks” and then groups of (dc/tr/dtr) stitches to form the “fan” shape.
- The small picots (ch 3, sl st back into first ch) seen along the outer edge are added as you crochet the final rounds to create that spiked effect.
Due to the complexity of visually determining the exact stitch count for the seamless connections and fan edges, I recommend searching for a specific “square doily join as you go” tutorial or a “fan crochet motif” tutorial if you’re struggling to replicate the exact look.
General Steps for the Full Doily:
- Make 4 square motifs.
- Arrange them in a 2×2 grid.
- Start connecting them by crocheting around the edge of one square, and when you reach a joining point (corner or side), incorporate the next square by slip stitching or single crocheting into its corresponding chain space or stitch.
- Add the fan sections in the spaces between the squares and along the outer edges, following a pattern of increasing stitch heights (e.g., sc, hdc, dc, tr, dtr, tr, dc, hdc, sc) to create the curved fan shape.
- Finish with the spiked edge (picots) along the outer perimeter.

Finishing:
- Weave in all remaining ends.
- Blocking is crucial for a project like this! Wet the doily thoroughly, gently squeeze out excess water, then pin it to a foam board or blocking mats, stretching it to its desired shape and dimensions, ensuring all the lace patterns are open and even. Let it air dry completely.
Video tutorial
This doily will be a stunning conversation piece and a testament to your crochet skills. Happy crocheting! Don’t forget to share your finished doilies with me using #SquareLaceDoily!