Hello, cherished crafters!

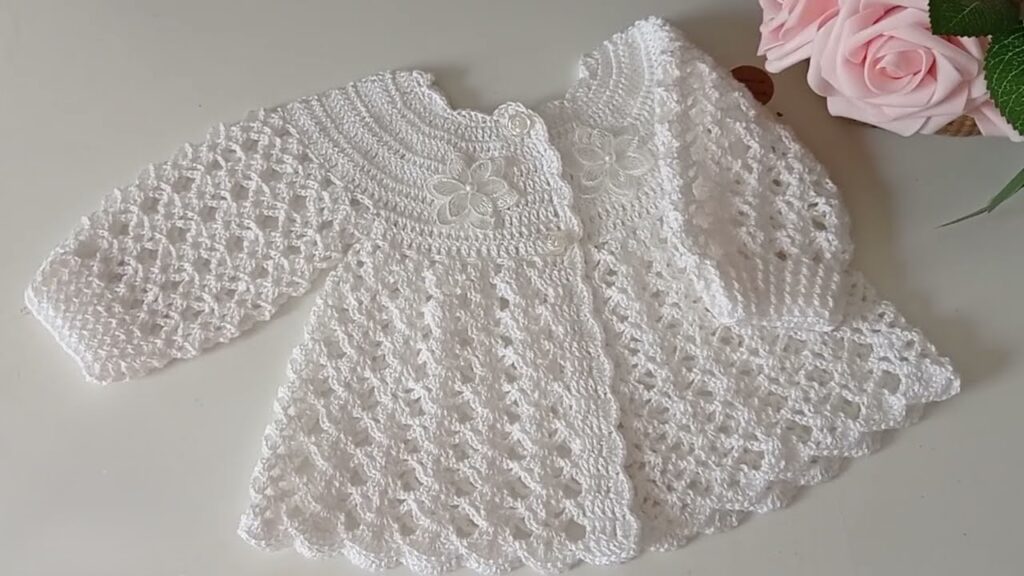
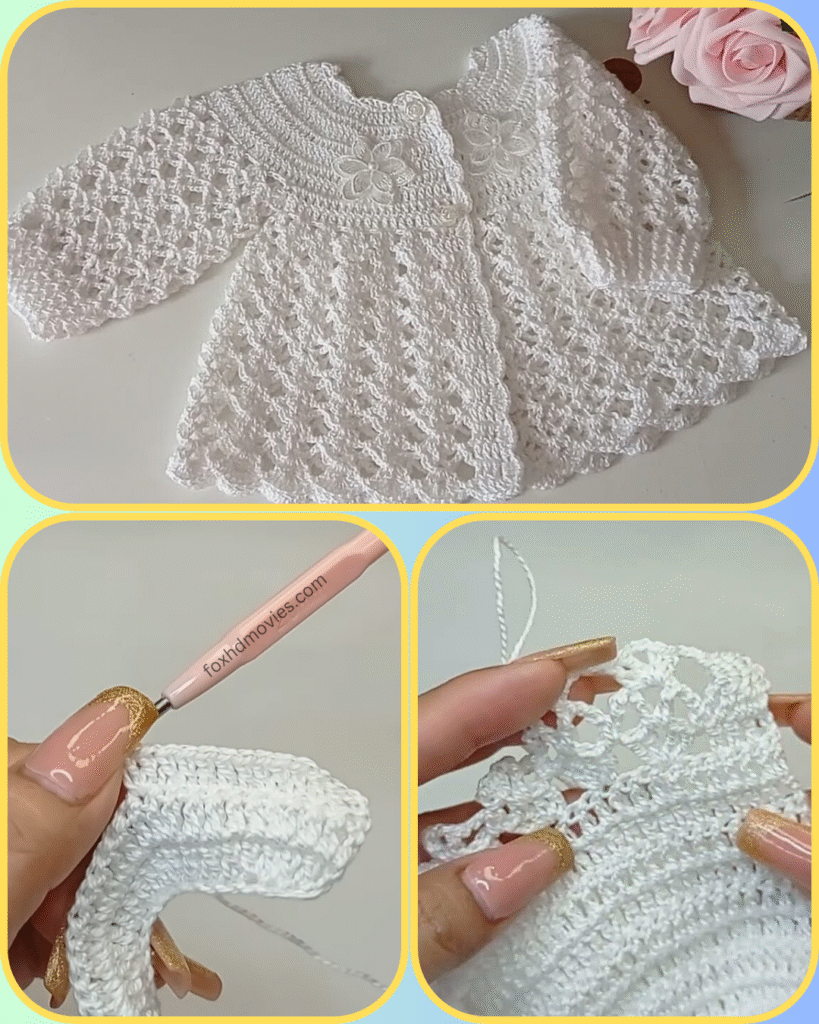
Prepare to create a truly exquisite garment that will be treasured for generations! This stunning white lace baby jacket is the epitome of delicate elegance, perfect for christenings, special occasions, or as a timeless gift. Its intricate yoke, airy lace body, and classic design make it an absolute showstopper.
The jacket in the picture is pristine white, suggesting pure innocence and classic charm. Imagine it in soft cream, a gentle pastel, or even a subtle ombre for a modern twist!

Before we begin this beautiful journey, here are some important notes:
- Skill Level: Advanced Intermediate. This pattern involves shaping the yoke, working intricate lace stitches, and combining different patterns. While the body lace is repetitive, the yoke requires careful attention.
- Yarn Choice: For a garment this delicate and for baby’s sensitive skin, choose a soft, fine baby yarn. Fingering weight (#1) or Sport weight (#2) yarn in cotton, bamboo, a cotton blend, or a high-quality baby acrylic would be ideal.
- Hook Size: This is crucial for achieving the airy lace effect. Always check your yarn label, but you might go up half a size to ensure your lace is open and drapes beautifully. (e.g., 2.5mm – 3.5mm, depending on yarn).
- Gauge is PARAMOUNT! For baby garments, especially with lace, hitting the correct gauge is vital for the finished size and drape. Make a swatch of both the yoke stitch and the body lace stitch.
Let’s Gather Our Supplies!
Materials You’ll Need:
- Approx. 150-250 grams of fine baby yarn (Fingering/Sport weight) in white or your chosen color.
- Crochet hook (e.g., 3.0mm, adjust for gauge)
- Stitch markers (very helpful for yoke shaping and stitch counts!)
- Yarn needle
- Scissors
- 1-2 small pearl or decorative buttons (approx. 1/2 inch or 1.25 cm)
Crochet Language Decoder (Abbreviations):
- ch: chain
- st(s): stitch(es)
- sl st: slip stitch
- sc: single crochet
- hdc: half double crochet
- dc: double crochet
- tr: treble crochet
- sk: skip
- sp: space
- fpdc: front post double crochet
- bpdc: back post double crochet
- [ ]: repeat instructions within brackets
- ( ): number of stitches at the end of the row/round
Gauge:
- Yoke Stitch Swatch: Work a few rows of the yoke pattern (e.g., Row 3-5 from Yoke section).
- Body Lace Swatch: Work at least 5-7 rows of the Lace Mesh pattern.
- Example Gauge (Body Lace): 4
(dc, ch 2)repeats and 6 rows = 2 inches (5 cm). Adjust hook size to match gauge.
Key Stitch Patterns:
A. Lace Mesh Stitch (for Body & Sleeves): This creates the main open lattice pattern on the jacket body and sleeves.
- Foundation Row: Dc in first st, [ch 2, sk 2 sts, dc in next st] repeat across.
- Subsequent Rows/Rounds: Dc in first dc, [ch 2, dc in next dc] repeat across, working dc into the previous row’s dc stitches and ch 2 over ch 2 spaces.
B. Yoke Decorative Stitching: The yoke is intricate. We’ll build it with a series of increasing rows using V-stitches and shells to create a lacy, fanned effect. Please note: Replicating the exact floral motif in the image requires a very specific chart or video tutorial. This pattern will focus on a beautiful, expanding lace yoke that achieves a similar elegant feel.
- V-Stitch (V-st): (Dc, ch 1, dc) in indicated stitch or space.
- Shell: (2 dc, ch 1, 2 dc) in indicated stitch or space.

Pattern Instructions (Top-Down Construction):
This jacket is worked from the neckline down, flat initially for the back opening, then joined for the body. Size: 0-3 Months (Approx. 16-18 inch chest circumference when finished) (Adjust starting chain and increase rates for larger sizes)
Part 1: The Yoke (Worked Flat)
- Ch 58 (64 / 70) (for Newborn / 3-6 Months / 6-12 Months, approximately).
- Row 1 (RS): Sc in 2nd ch from hook, sc in each ch across. Ch 3 (counts as first dc), turn. (57 / 63 / 69 sts)
- Row 2: Dc in each st across. Ch 3, turn.
- Row 3 (First Lace Row / Increases): Dc in first st. [Ch 1, sk 1 st, V-st in next st, ch 1, sk 1 st, dc in next st]. Repeat [ ] across to 2 sts before end. Sk 1 st, dc in last st. Ch 3, turn.
- You should have sections of
(dc, ch 1, V-st, ch 1, dc)increasing the stitch count.
- You should have sections of
- Row 4: Dc in first dc, ch 1, V-st in ch-1 sp of V-st from previous row, ch 1, dc in next dc. Repeat across. Ch 3, turn.
- Row 5 (Further Increases): Dc in first dc. [Ch 1, sk ch-1 sp, Shell (2 dc, ch 1, 2 dc) in ch-1 sp of V-st from previous row, ch 1, sk ch-1 sp, dc in next dc]. Repeat [ ] across. Ch 3, turn.
- This will create a distinct fan shape.
- Continue working increasing rows for the yoke, alternating between different shell/V-stitch patterns and carefully distributing increases. The goal is to create a flat, expanding semi-circle. Work until the yoke measures approx. 4 (4.5 / 5) inches from the neckline, or until it can comfortably wrap around the baby’s chest and shoulders, with armholes open. Ensure your final stitch count is suitable for the body lace pattern division.
- Place stitch markers at the corners for front/back/sleeves if it helps manage increases.
Part 2: Dividing for Body and Sleeves
This forms the armholes.
- Next Row (Joining and Dividing): Ch 3 (counts as dc).
- Work in established pattern across stitches for the first front panel.
- Skip stitches for armhole: Ch 3 (4 / 5) (this is the underarm chain). Sk the next X stitches (these are for the first sleeve).
- Work in established pattern across stitches for the back panel.
- Skip stitches for armhole: Ch 3 (4 / 5). Sk the next X stitches (for the second sleeve).
- Work in established pattern across stitches for the second front panel.
- Continue working the main lace pattern across this entire row, joining to the first dc of the row. Do NOT join with a sl st here yet, as we continue working flat for the jacket opening.
Part 3: The Body of the Jacket (Lace Mesh Pattern)
Now we work the main jacket body, continuing the front opening.
- Row 1: Ch 3 (counts as dc). Dc in first st. [Ch 2, sk 2 sts, dc in next st]. Repeat [ ] across the body, ensuring you work into the underarm chains as well. Turn.
- Adjust
skstitches to match the number of stitches available.
- Adjust
- Row 2: Ch 3. Dc in first dc. [Ch 2, dc in next dc]. Repeat [ ] across. Turn.
- Rows 3-X: Repeat Row 2 until the jacket reaches your desired length (measure from shoulder to hem), leaving room for the final edging.
- To create a subtle flare, you can occasionally add an extra
(dc, ch 2)repeat every 5-7 rows by adding adcin a ch-2 space, or by changingch 2toch 3in selected places for a wider opening.
- To create a subtle flare, you can occasionally add an extra
- Fasten off.

Part 4: The Sleeves (Lace Mesh Pattern)
Go back to each armhole.
- Attach yarn: Attach yarn with a sl st in the center of the underarm chain.
- Rnd 1: Ch 3 (counts as dc). Dc in same sp. [Ch 2, sk 2 sts, dc in next st]. Repeat [ ] around the armhole, working into the stitches of the yoke and the underarm chain. Join with a sl st to top of beg ch 3.
- Rnd 2: Ch 3. Dc in first dc. [Ch 2, dc in next dc]. Repeat [ ] around. Join with a sl st to top of beg ch 3.
- Rnds 3-X: Continue repeating Rnd 2 until the sleeve reaches the desired length.
- Fasten off.
- Repeat for the second sleeve.
Part 5: Edging (Neckline, Front Opening, Sleeves, Bottom Hem)
This adds a lovely polished finish.
- Neckline & Front Opening: Attach yarn at the bottom corner of the jacket opening. Ch 1, sc evenly up the front opening, around the neckline, and down the other front opening. Work 3 sc in the corners of the opening to create neat turns. Join with sl st if working in a full round, or simply fasten off if working edge sections individually.
- You can add a subtle picot or shell edging to this if desired (e.g., [sc, ch 2, sl st in 2nd ch from hook] or [sc, ch 1, sc]).
- Sleeve Cuffs: Attach yarn at the underarm of each sleeve. Ch 1, sc evenly around the cuff. Join with sl st. Fasten off.
- Add the same subtle edging as the neckline if desired.
- Bottom Hem: Attach yarn anywhere on the bottom hem. Ch 1, sc evenly around the entire hem. Join with sl st. Fasten off.
- Add the same subtle edging as the neckline if desired to match the delicate look.
Part 6: Finishing Touches
- Weave in all loose ends neatly using your yarn needle.
- Button & Loop: Create a small loop (ch 3-5, sl st into previous st) on one side of the front opening of the yoke, near the top, to act as a buttonhole. Sew your chosen button onto the opposite front opening, aligning with the loop.
- Blocking: For lace garments, blocking is highly recommended! Gently wet the jacket, carefully pin it to shape on a blocking mat, and allow it to dry completely. This will open up the lace pattern beautifully and give it a professional finish.
Video tutorial
Your Heirloom Lace Jacket is Complete!
Congratulations! You’ve just poured your love and skill into creating a truly exquisite crochet baby jacket. This delicate piece is sure to be cherished for years to come, a testament to your beautiful craftsmanship.
Feel free to customize your jacket with a different type of button, or by adding a small embroidered detail.
Don’t forget to share your finished jacket! I’d love to see your unique creation. Tag me on social media or send me a picture!
Happy crocheting!


