 by
by 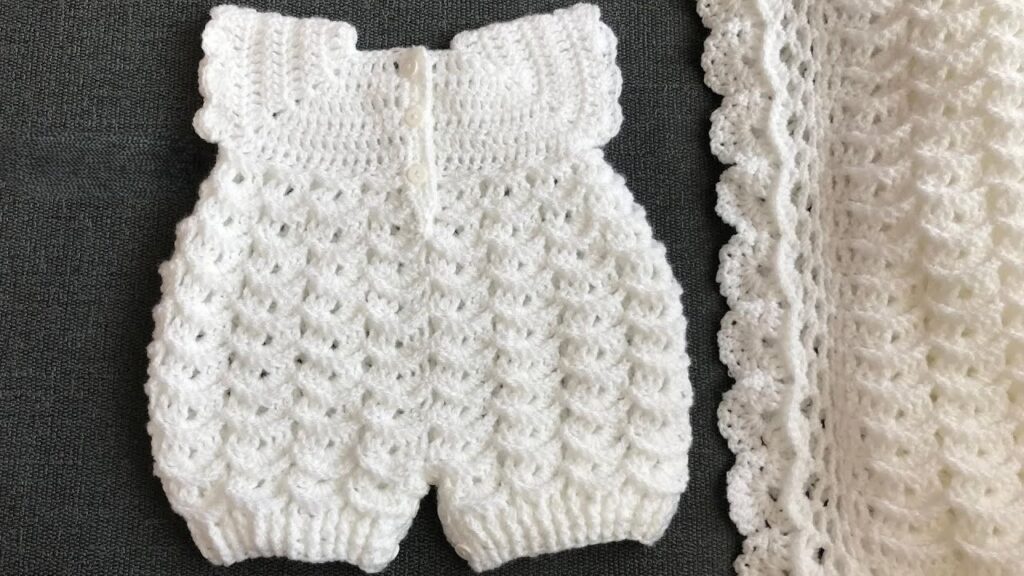
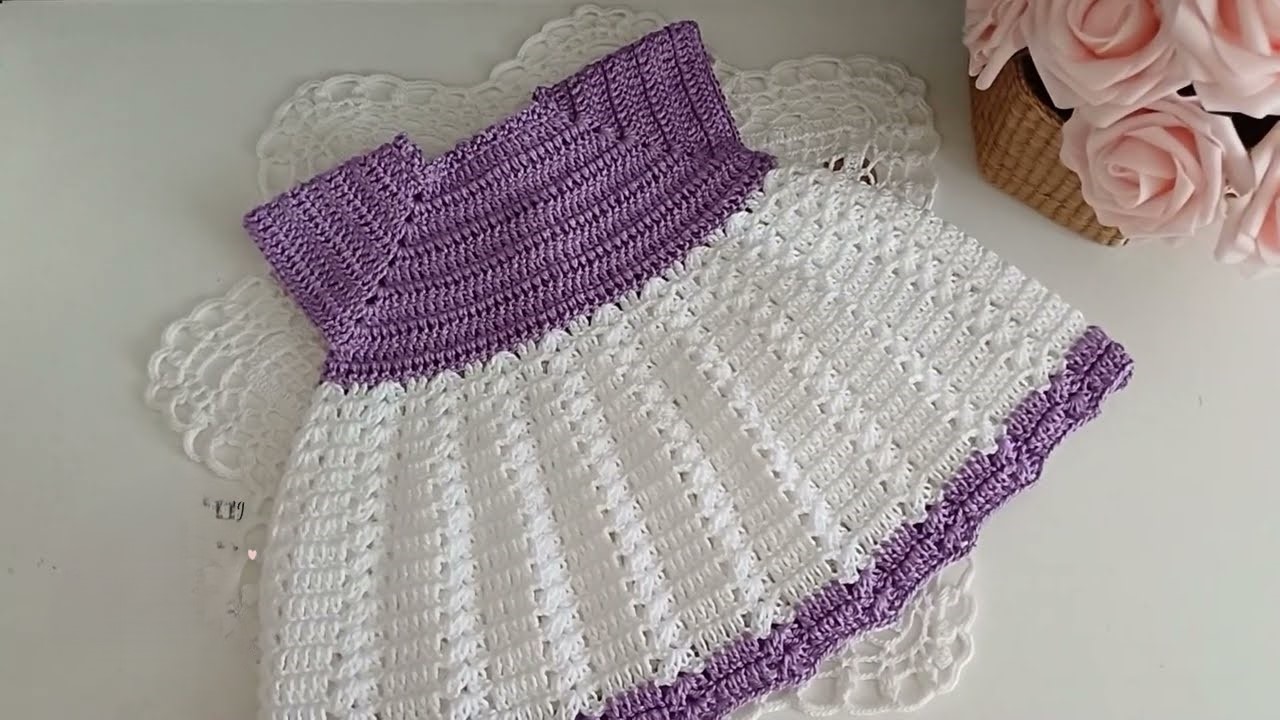
There’s something incredibly special about handmade items for little ones, and a crochet baby romper is a sweet and practical project that’s perfect for beginners. Using simple stitches and basic shaping, you can create a comfortable and adorable outfit for a baby.
This pattern is designed with ease in mind, primarily utilizing double crochet stitches. It’s worked in sections and then joined, making it manageable even if you’re new to amigurumi or more complex garment construction.
Skill Level: Easy Estimated Time: Will vary depending on your speed and experience.
Materials You’ll Need:
- Approximately 200-300g of DK weight yarn. Look for a soft, baby-friendly yarn like acrylic, cotton, or a bamboo blend. Choose a color you love!
- Crochet hook size 4.0mm (or size needed to obtain gauge).
- Two to three buttons.
- Yarn needle for weaving in ends and sewing buttons.
- Scissors.
- Stitch markers (optional, but helpful).
Gauge: Working 16 double crochet stitches and 10 rows in a 4×4 inch (10×10 cm) square will help ensure your romper is the correct size. It’s recommended to crochet a small swatch before you begin to check your gauge.
Abbreviations:
- ch: chain
- st(s): stitch(es)
- sl st: slip stitch
- sc: single crochet
- dc: double crochet
- dc2tog: double crochet two stitches together (decrease)
- rep: repeat
Video tutorial
Let’s Get Started!
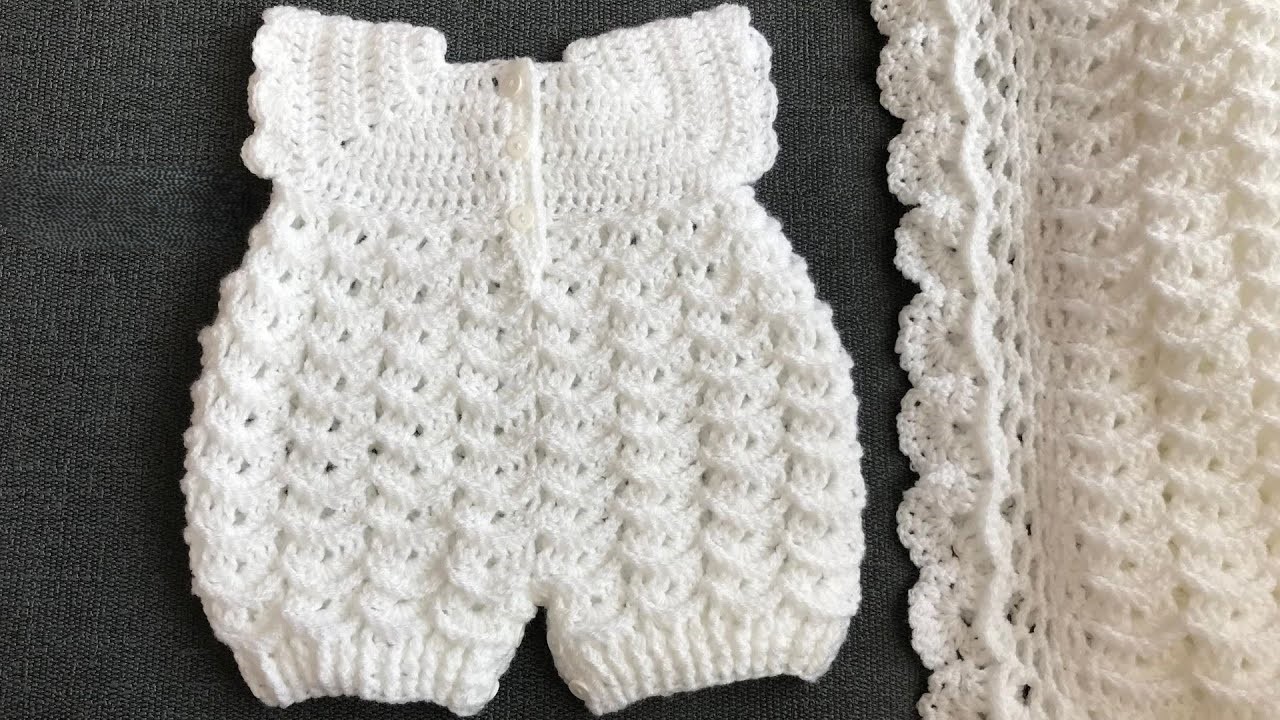
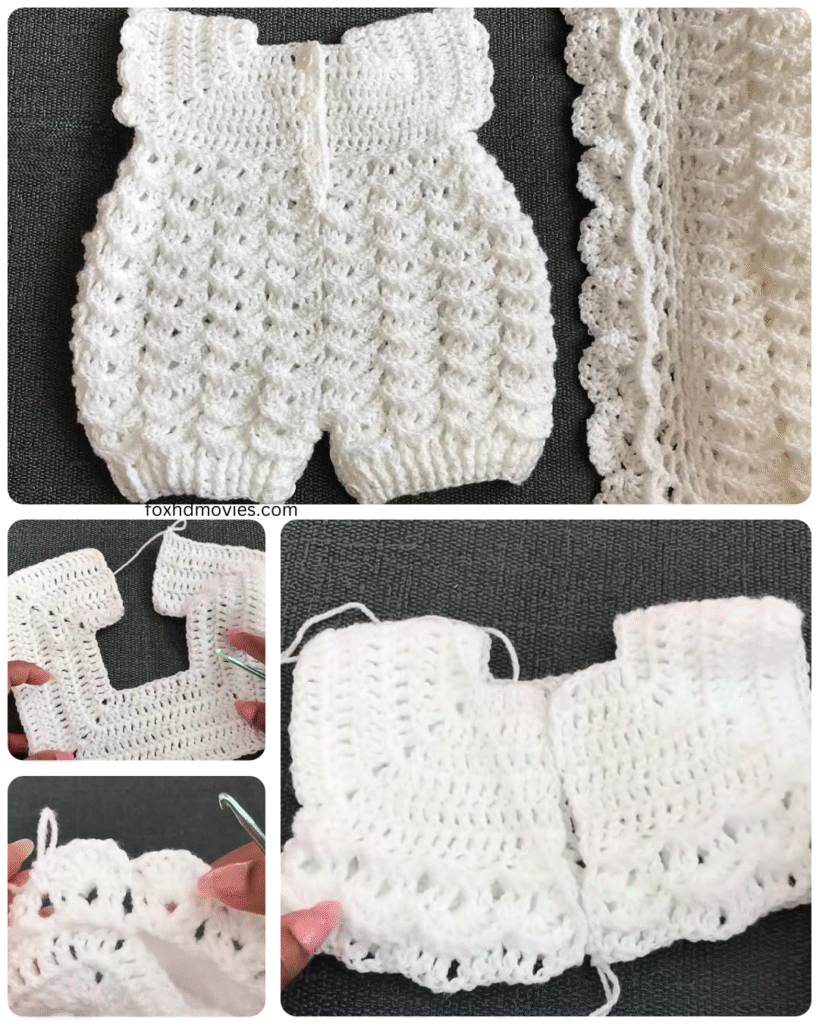
This romper is worked in sections: the back panel with the diaper flap, the main body worked in the round, the front bib, and the straps.
Back Panel (with Diaper Flap)
We’ll start by creating the back panel, which includes the snap or button closure for easy diaper changes.
Chain a multiple of 2 + 2 for your desired width. A typical starting chain for a 0-3 month size might be around 30-34 chains, but adjusting based on your gauge and desired width is key.
Row 1: Dc in the 3rd chain from the hook and in each chain across. Ch 2 (does not count as a st), turn. (You will have your starting chain number minus 2 double crochet stitches). Row 2 – (Desired length of back panel before flap): Dc in each stitch across. Ch 2, turn. Creating the Diaper Flap: Continue working in rows, but you will likely start decreasing to create a tapered flap. A simple decrease involves working dc2tog at the beginning and end of certain rows. For example: Decrease Row: Ch 2, dc2tog over the first two stitches, dc in each stitch until the last two stitches, dc2tog over the last two stitches. Ch 2, turn. Repeat decrease rows strategically until your flap is the desired width for button placement. Work a few rows even (dc in each stitch across) after your decreases if needed to achieve the desired flap length. Fasten off and weave in ends.
Front Panel
The front panel will be slightly shorter than the back panel before the diaper flap.
Chain the same number of stitches as your initial chain for the back panel.
Row 1: Dc in the 3rd chain from the hook and in each chain across. Ch 2, turn. Row 2 – (Desired length of front panel): Dc in each stitch across. Ch 2, turn. Fasten off and weave in ends.
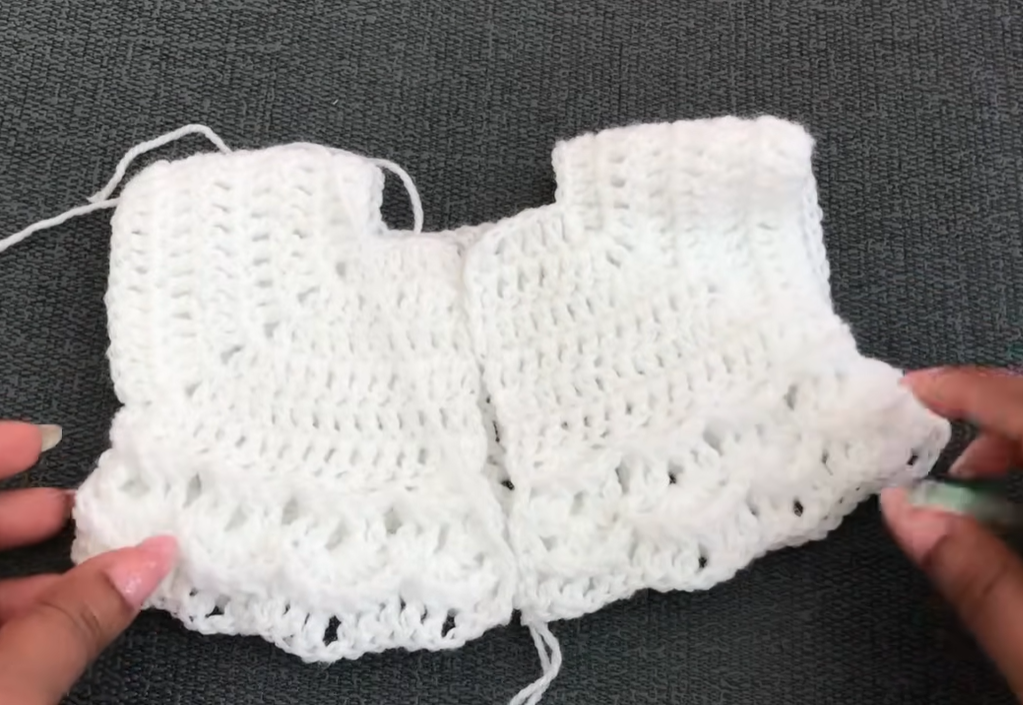
Joining and Working the Body in the Round
Now you will join the front and back panels and work the main body of the romper in the round.
With the right sides facing outwards, join your yarn to the corner of one side of the front panel. You can use a slip stitch to join.
Round 1: Ch 2 (does not count as a st). Work a row of double crochet stitches evenly spaced along the side of the front panel, across the bottom edge of the front panel, up the other side of the front panel, along the side of the back panel, across the un-flapped edge of the back panel, and up the other side of the back panel. The goal is to create a continuous loop of stitches around the leg openings and body. Join with a sl st to the first dc of the round. Ch 2, turn. Round 2 – (Desired length of romper body): Dc in each stitch around. Join with a sl st to the first dc of the round. Ch 2, turn. Continue working in rounds until the body of the romper reaches the desired length from the crotch to the underarm.

Creating the Leg Openings (Optional but Recommended)
For defined leg openings, you can now divide the stitches and work each leg separately in the round for a few rounds.
Lay the romper flat and determine the center front and back. Place stitch markers to divide the stitches for each leg opening.
Join yarn at the stitch marker for one leg opening.
Leg Round 1: Ch 2 (does not count as a st). Dc in each stitch around the leg opening. Join with a sl st to the first dc of the round. Ch 2, turn. Leg Round 2 – (Desired length of leg cuff): Dc in each stitch around. Join with a sl st to the first dc of the round. Fasten off and weave in ends. Repeat for the second leg opening.
Front Bib
Attach yarn to the center front of the romper at the top edge of the body section. You will now work in rows to create the front bib.
Row 1: Ch 2 (does not count as a st). Dc in a set number of stitches across the center front. The number of stitches will determine the width of your bib. Ch 2, turn. Row 2 – (Desired height of bib): Dc in each stitch across. Ch 2, turn. Continue working in rows until the bib reaches the desired height. Fasten off and weave in ends.
Straps
Determine where you want the straps to attach to the back of the romper. This is usually on either side of the back panel.
Join yarn to the corner of the top of the front bib.
Row 1: Ch 2 (does not count as a st). Dc in the first few stitches to create the width of your strap (3-4 stitches is usually sufficient). Ch 2, turn. Row 2 – (Desired length of strap): Dc in each stitch across the strap. Ch 2, turn. Repeat until the strap is long enough to reach the desired attachment point on the back panel. Fasten off, leaving a long tail for sewing. Repeat for the second strap, attaching it to the other corner of the front bib.
Finishing Touches
- Weave in all loose ends neatly using your yarn needle.
- Sew the straps to the back panel of the romper. You can sew them straight or crossed over for a different look.
- Attach buttons to the diaper flap on the back panel and create corresponding button loops on the front lower edge of the romper. You can create button loops by chaining a small number of stitches and slip stitching back into the fabric, or by using existing gaps in the crochet stitches.
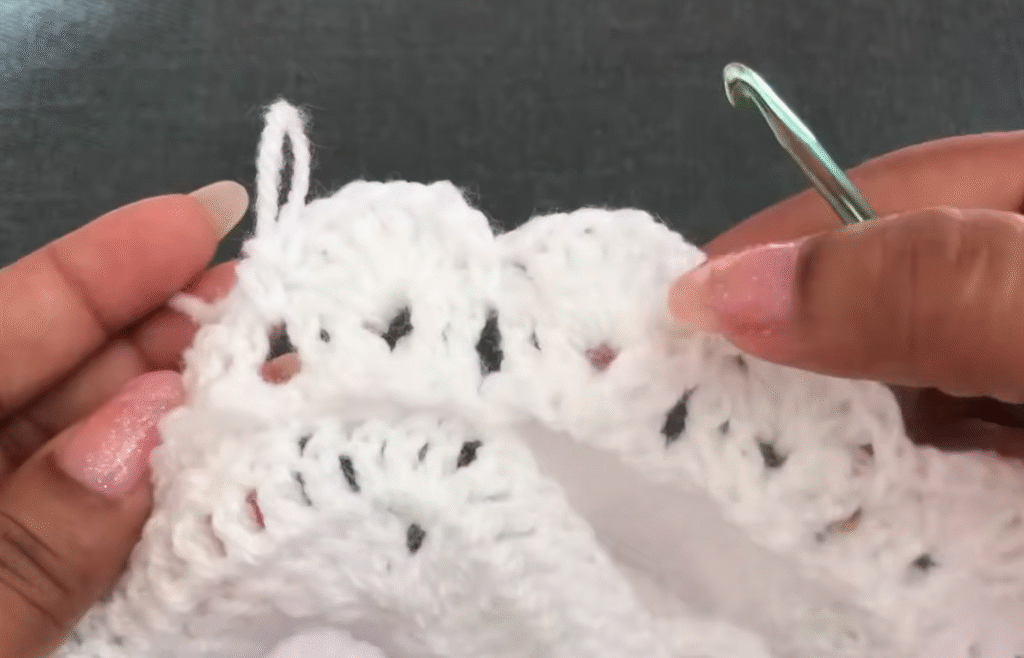
- Optional: Add a decorative edging around the leg openings, armholes (if you didn’t add sleeves), and the top edge of the bib using single crochet or a simple shell stitch.
Tips for Customization and Sizing:
- Adjusting Size: To make the romper larger or smaller, you can adjust your starting chain for the front and back panels, use a different hook size, or add/subtract rows in the body and bib sections. Measuring a romper that currently fits the baby is a great way to get accurate dimensions.
- Yarn Choice: While acrylic and cotton are recommended for ease of care and softness, always choose a yarn that is safe and non-irritating for a baby’s delicate skin.
- Adding Sleeves: For a romper with sleeves, you would typically create armholes when joining the front and back panels and then work in rounds around the armhole openings for the sleeves.
- Color Blocking: Get creative with colors! You can make the different sections in contrasting colors or add stripes to the body.