by
by 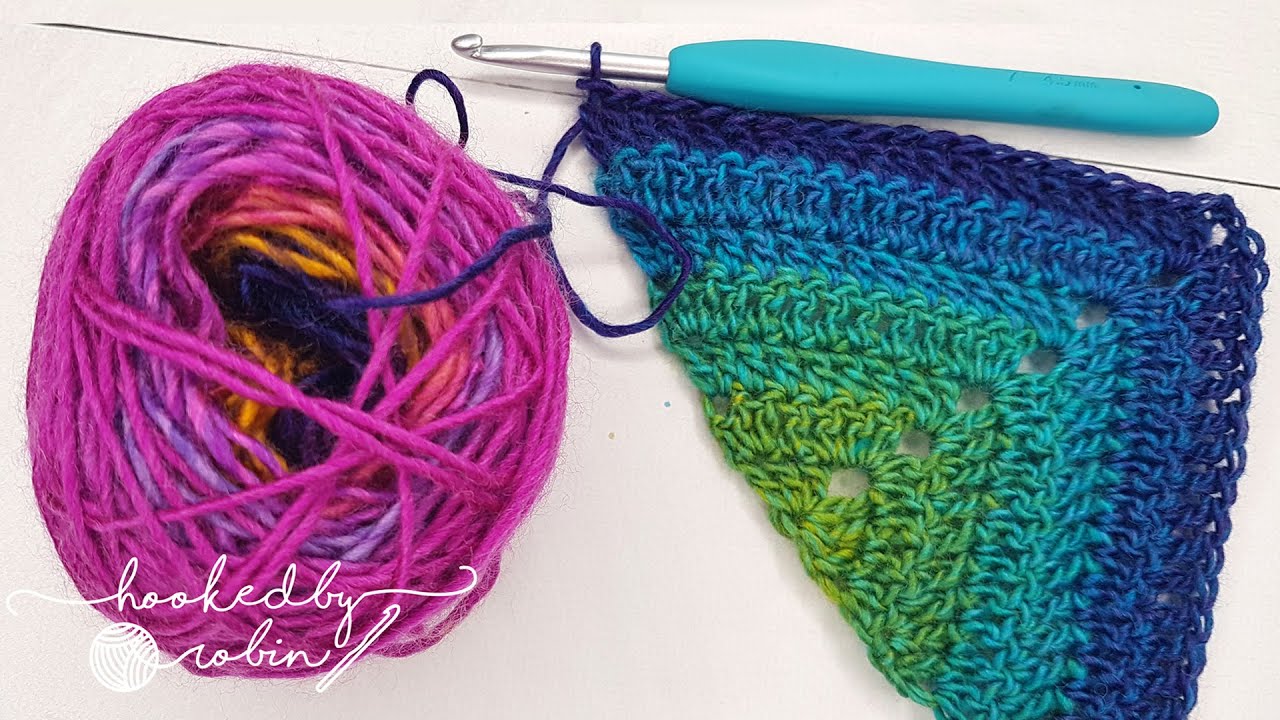
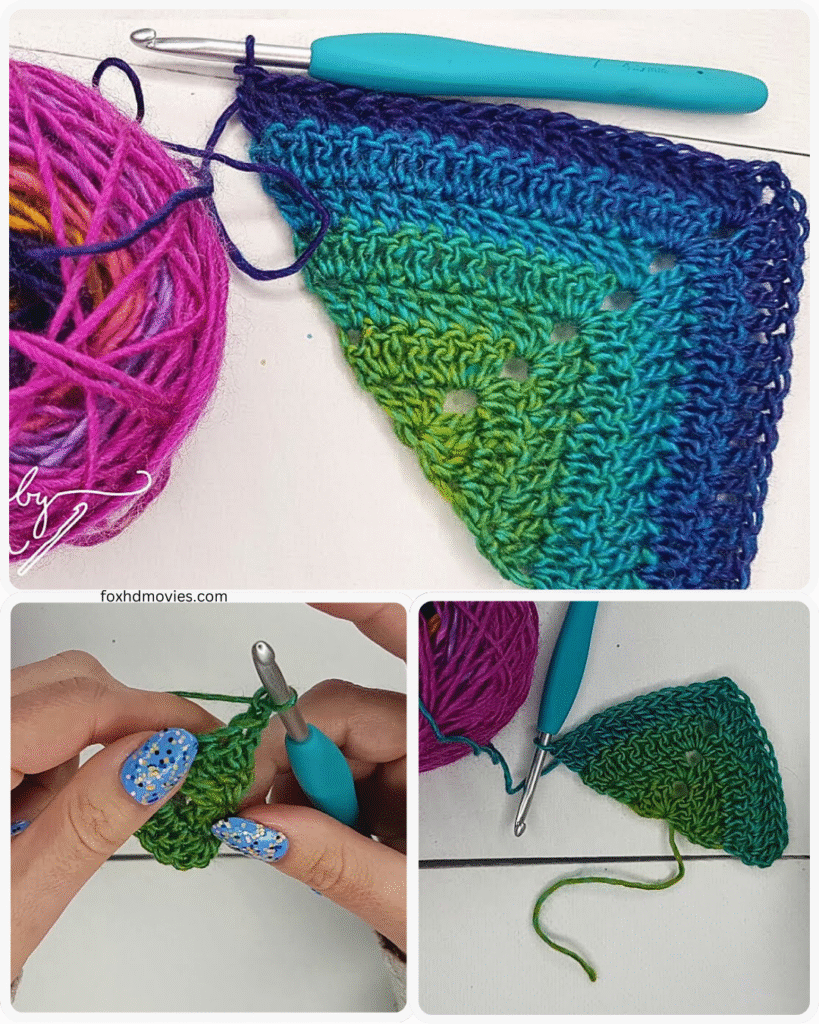
The solid granny triangle is a versatile and beloved crochet motif, perfect for creating beautiful and cozy items like shawls. Unlike the traditional lacy granny square, the solid version offers a denser fabric with a lovely drape. In this blog post, we’ll walk through how to create this fundamental motif, setting you on your way to crocheting a stunning triangle shawl.
This motif is worked in rows, increasing at the beginning, end, and the center point to form the triangular shape. It’s a relatively simple pattern, making it suitable for confident beginners and enjoyable for experienced crocheters alike.
Ready to get hooking? Let’s gather your supplies!
Materials You’ll Need:
- Yarn: The beauty of a granny shawl is that it works well with a variety of yarn weights. A worsted weight yarn is a popular choice for a substantial shawl, while a lighter weight yarn would create a more delicate fabric. Choose a yarn you love the look and feel of! The amount needed will depend on the size of your desired shawl.
- Crochet Hook: Select a hook size appropriate for your chosen yarn. Check your yarn label for a recommended hook size, or use a size that gives you a fabric you’re happy with – not too stiff, not too loose.
- Yarn Needle: For weaving in those pesky ends.
- Scissors: For cutting your yarn.
Stitches You’ll Use (US Terms):
- Ch: Chain
- Sl St: Slip Stitch
- DC: Double Crochet
If you’re more familiar with UK terms, remember that a US Double Crochet (DC) is equivalent to a UK Treble Crochet (Tr).
Video tutorial
Let’s Crochet! The Solid Granny Triangle Motif Pattern
This pattern creates one solid granny triangle motif. You can continue repeating the increase rows to make a larger triangle for a one-piece shawl, or make multiple motifs to join together for a modular design.
Foundation: Create a magic ring (or Ch 4 and join with a Sl St to the first Ch to form a ring).
Row 1: Ch 3 (counts as your first DC), 2 DC into the ring, Ch 2, 3 DC into the ring. Turn. (6 DC, 1 Ch-2 space)
Row 2: Ch 3 (counts as your first DC), 2 DC in the first stitch, 1 DC in each of the next 3 stitches, (2 DC, Ch 2, 2 DC) in the Ch-2 space, 1 DC in each of the next 3 stitches, 3 DC in the top of the starting Ch 3. Turn. (14 DC, 1 Ch-2 space)
Row 3: Ch 3 (counts as your first DC), 2 DC in the first stitch, 1 DC in each stitch across to the Ch-2 space, (2 DC, Ch 2, 2 DC) in the Ch-2 space, 1 DC in each stitch across to the last stitch, 3 DC in the top of the starting Ch 3. Turn. (22 DC, 1 Ch-2 space)
Subsequent Rows: Repeat Row 3 for as many rows as needed to reach your desired motif size. Each repeat of Row 3 will increase the number of DC stitches on each side of the triangle by 4 (2 at the beginning/end and 2 on each side of the center Ch-2 space).
Continuing for a Shawl: To create a single large triangle shawl, simply continue repeating Row 3 until your shawl is the desired size. The increases will naturally form the triangle shape.
Finishing Your Motif:
Once your motif (or shawl) is the desired size, fasten off your yarn and weave in all loose ends securely using your yarn needle.

Turning Motifs into a Shawl
If you’re making a modular shawl from multiple motifs, you’ll need to join them together. There are various joining methods you can use, such as:
- Slip Stitch Join: A simple and flat join where you slip stitch through the corresponding stitches of two motifs.
- Single Crochet Join: Creates a slightly raised seam, adding a bit of texture.
- Join-As-You-Go (JAYG): This method allows you to join the motifs as you crochet the final round of each one, minimizing the amount of sewing needed at the end.
The arrangement of your triangles will determine the final shape of your shawl. You can create a large triangle by joining smaller triangles together, or form different shapes by arranging them in various configurations.

Adding the Finishing Touches
Once your shawl is assembled (if using multiple motifs) and all ends are woven in, you can add an optional border. A simple row of single crochet, double crochet, or a more decorative edge like picots or shells can add a beautiful finish to your solid granny triangle shawl.
Variations to Explore
- Color Changes: Introduce new colors at the beginning of a new row to create stripes or a gradient effect.
- Different Yarn: Experiment with different yarn fibers and weights for varying textures and drape.
- Edging: As mentioned, add a unique border to personalize your shawl.
Crocheting a solid granny triangle shawl is a rewarding project that results in a beautiful and functional accessory. Whether you make one large triangle or join several smaller ones, the process is enjoyable and the possibilities for customization are endless.
Happy Crocheting!