by
by 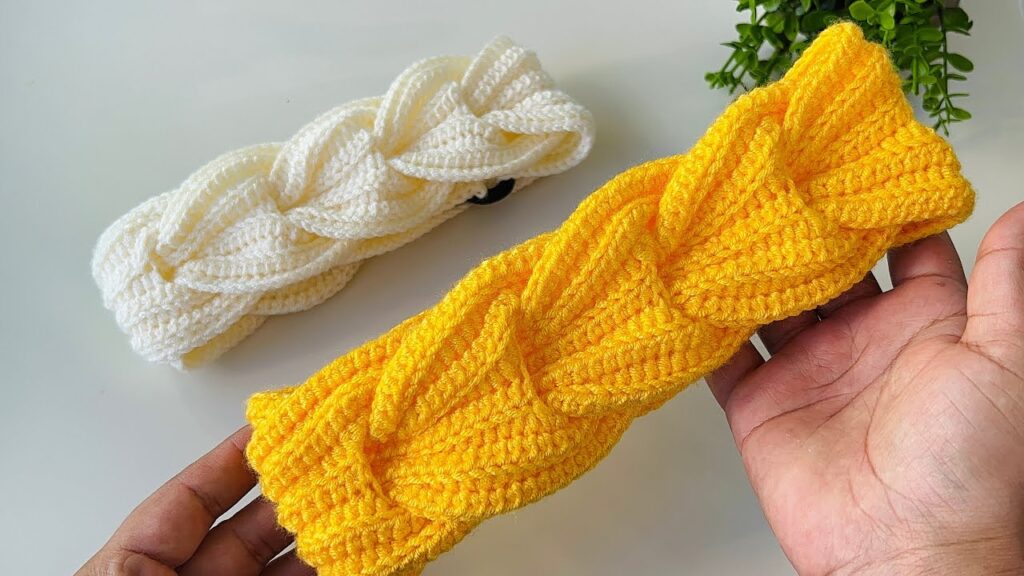
let’s get this cozy headband whipped up! Here’s a detailed pattern that’s super easy to follow, perfect for beginners. We’ll use basic crochet stitches, so you’ll have it done in no time.
Skill Level: Beginner
Materials:
- Worsted weight yarn (any color you like!) – a small amount will do.
- Crochet hook size H/8 (5.0 mm) – or whatever size gives you a nice, even fabric with your chosen yarn.
- Scissors
- Yarn needle
Abbreviations (US Crochet Terms):
- ch = chain
- sc = single crochet
- sl st = slip stitch
- st(s) = stitch(es)
- rep = repeat
Gauge:
Gauge isn’t super critical for this project since it’s not about precise sizing, but for a good starting point, aim for about 4 single crochet stitches per inch.
Headband Dimensions:
We’ll be making a headband that’s approximately 4 inches wide. You can easily adjust the length to fit your head circumference. A common adult head circumference is around 22 inches, but measure yours to be sure!
Instructions:
Part 1: Creating the Headband Band
- Foundation Chain: Chain 15. This will determine the width of your headband. If you want a wider or narrower headband, adjust the number of chains here.
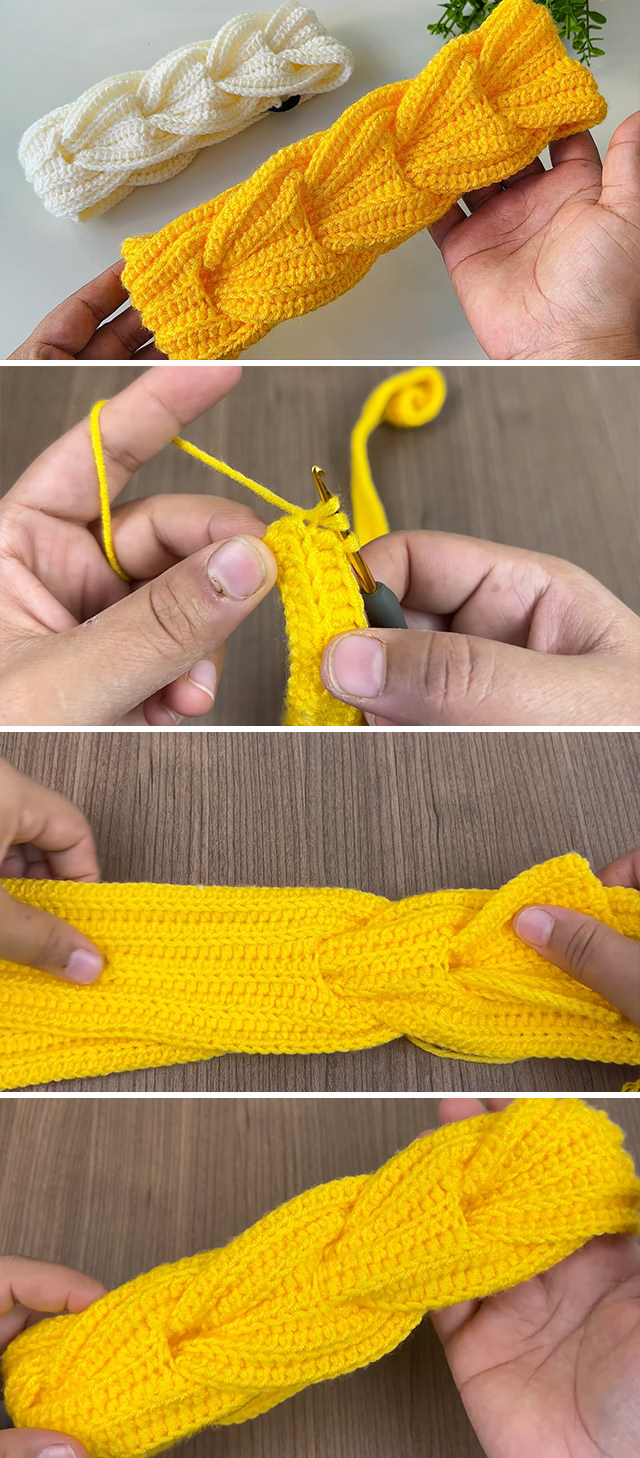
- Row 1: Starting in the second chain from your hook, single crochet (sc) in each chain across. You should have 14 single crochet stitches.
- Row 2: Chain 1 (this does not count as a stitch), turn your work. Single crochet (sc) in each stitch across. You’ll still have 14 single crochet stitches.
- Repeat Rows 2: Continue repeating Row 2 until your headband reaches your desired length. To figure out the length, wrap your starting chain around your head (where you want the headband to sit) and make it slightly snug but not too tight. Remember that the fabric will have a little stretch. For an average adult, this will likely be around 20-22 inches.
- Fasten Off: Once you reach your desired length, cut your yarn, leaving a tail long enough to sew the ends together. Pull the yarn tail through your last loop and tighten the knot.
Part 2: Joining the Ends
Now we’ll join the two short ends of your crocheted rectangle to create the headband loop.
- Align the Ends: Lay your crocheted rectangle flat. Bring the two short ends together, making sure the right sides are facing each other (or the side you want to be the outside of your headband).
- Sew the Ends: Thread your yarn needle with the long yarn tail you left when you fastened off. Whipstitch or slip stitch the two ends together securely. Go back and forth a few times to make sure it’s strong.
- Weave in the Ends: Once the ends are securely joined, weave in any loose yarn tails into the fabric of your headband so they don’t come undone.
And there you have it! Your easy crochet headband is complete.
Video tutorial
Optional Embellishments:
Want to jazz up your headband? Here are a few simple ideas:
- Twist Detail: Before joining the ends, give one end a half twist (180 degrees) and then sew the ends together. This creates a stylish twisted look in the front.
- Button or Appliqué: Once your headband is complete, you can sew on a decorative button, a small crocheted flower, or any other appliqué you like.
- Different Stitches: Experiment with other basic crochet stitches like half double crochet (hdc) or double crochet (dc) for a different texture. Just remember that the starting chain will need to be adjusted for the height of the stitch.
- Color Stripes: Change yarn colors every few rows to create stripes.