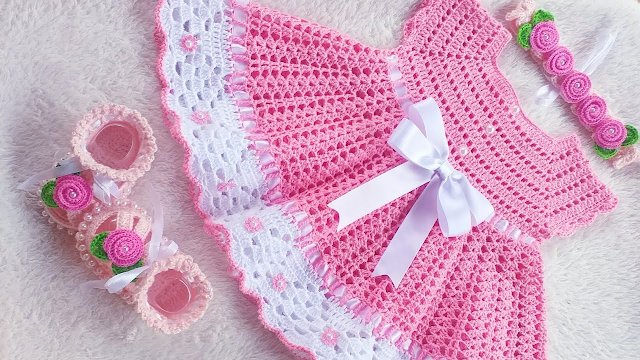
Creating a crochet dress like the one you’ve mentioned, named “Aurora,” can be a fun and rewarding project. While I can’t provide you with a specific pattern for “Aurora” since it’s a unique design that I don’t have information on, I can guide you through the general steps to create a crochet dress. You can adapt these steps to create your own “Aurora” design or find a similar pattern to follow. Here’s a general outline:
Materials You’ll Need:
- Crochet hooks in the appropriate size for your chosen yarn.
- Yarn in the colors and thickness of your choice.
- Scissors.
- Stitch markers (optional).
- Measuring tape.
- Sewing needle for finishing and weaving in ends.


Step-by-Step Instructions:
- Choose a Pattern: Find or create a crochet dress pattern that you like. You can search for crochet dress patterns online, in crochet books, or create your own design.
- Gauge Swatch: Make a small gauge swatch with your chosen yarn and hook to ensure that your stitches match the pattern’s gauge. This is important for getting the right size.
- Measurements: Take accurate body measurements, such as bust, waist, hips, and length from shoulder to the desired dress length. Use these measurements to guide your crochet work.
- Start with a Foundation Chain: Most crochet dress patterns begin with a foundation chain. Make a chain of the required length based on your measurements.
- Body of the Dress: Work the body of the dress in the stitch pattern specified in your chosen pattern. This often involves crocheting in rows, increasing or decreasing stitches as needed to create the desired shape. Continue crocheting until you reach the desired length for the dress.
- Armholes and Neckline: When you’ve reached the desired length for the body, create armholes and a neckline according to your pattern. Typically, you’ll crochet a few rows without increasing or decreasing to create these openings.
- Sleeves (if applicable): If your dress has sleeves, follow the pattern instructions to create them. You may need to crochet the sleeves separately and then attach them to the dress.
- Finishing: After completing all the crochet work, make sure to weave in any loose ends using a sewing needle. This will give your dress a polished look.
- Blocking: Block your crochet dress to ensure it has the right shape and dimensions. To block, pin your dress onto a foam board or use blocking mats and spritz it lightly with water. Allow it to dry in the desired shape.
- Optional Embellishments: If you want to add any embellishments, such as buttons, lace, or beads, do so at this stage.
- Try It On: Put on your dress and make any necessary adjustments. Ensure it fits comfortably.
- Final Touches: Once you’re satisfied with the fit and appearance, your crochet dress is complete.


Remember that the specific pattern for “Aurora” may have unique features or stitch patterns. If you have a pattern for “Aurora,” follow it carefully for the best results. If not, you can experiment with different stitch patterns and design elements to create your own one-of-a-kind crochet dress.