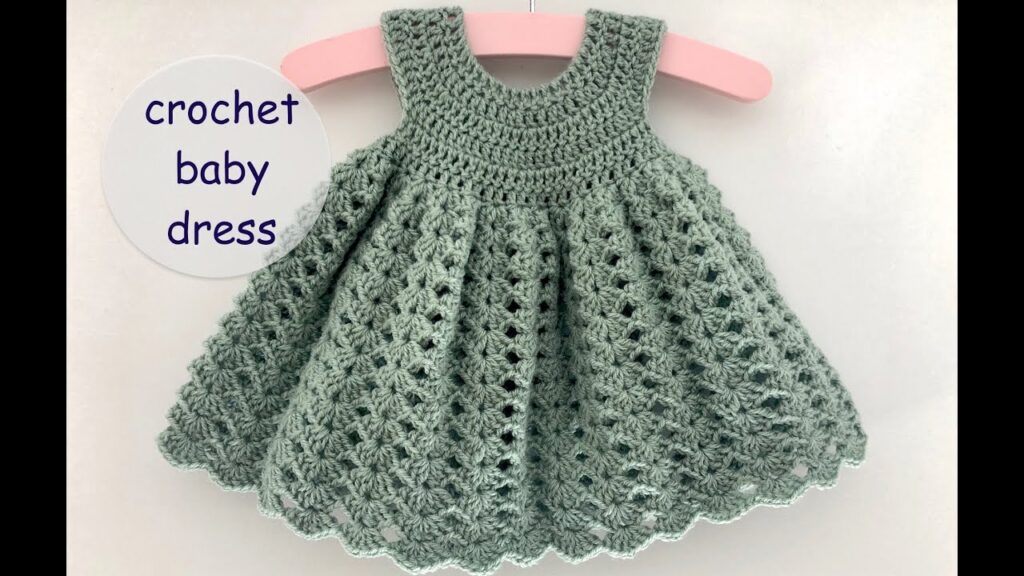
Crocheting baby clothes can be an incredibly rewarding experience, especially when creating a charming dress for your little one or as a thoughtful gift. In this tutorial, we’ll walk through the steps to crochet an adorable baby dress. With some yarn, a crochet hook, and a bit of patience, you’ll have a precious garment that’s sure to become a cherished keepsake.
Materials Needed:
- Yarn: Choose a soft, baby-friendly yarn in your preferred color.
- Crochet Hook: Select a hook size appropriate for your yarn choice.
- Scissors
- Yarn Needle
- Buttons or Embellishments (optional)
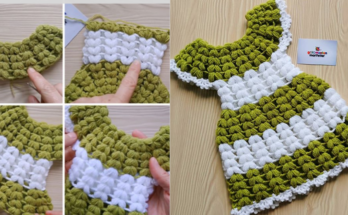
Pattern: Step 1: Creating the Bodice
- Foundation Chain: Start with a foundation chain of 50 stitches. This will form the base for the bodice.
- Row 1-5 (or as desired): Work in double crochet (dc) stitches across each row until the piece reaches the desired width for the bodice. Remember to chain 2 at the beginning of each row, which counts as the first dc stitch.
- Armhole Creation: Once the bodice reaches the desired length, create armholes by skipping a certain number of stitches in the middle (this will vary based on the size you’re making). Join the ends to form the bodice, leaving gaps for the arms.
- Shoulder Straps: Crochet two straps, each consisting of a chain of stitches long enough to comfortably rest on the baby’s shoulders. Attach these straps to the front and back of the bodice.
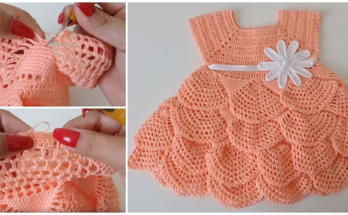
Step 2: Skirt
- Start Skirt: Begin working on the skirt by attaching the yarn at the bottom of the bodice.
- Increase Rounds: Increase the number of stitches gradually as you move downward to create a flared skirt. This can be achieved by adding a few extra stitches evenly across each round. Continue this until the skirt reaches the desired length.
- Final Round(s): Work final rounds in a decorative stitch pattern (e.g., shell stitch, lace pattern) for an added touch.
Step 3: Finishing Touches
- Edging: Add a decorative edge along the neckline, armholes, and bottom hem for a polished look.
- Embellishments: Consider adding buttons, ribbons, or other embellishments to the bodice or skirt for extra charm.
Step 4: Finishing Off
- Fasten Off: Secure your yarn and neatly weave in any loose ends using a yarn needle.
- Blocking (optional): Wet blocking or steam blocking can help even out stitches and give the dress a more professional finish.
Conclusion: Voila! You’ve just created an adorable crochet baby dress! Whether it’s for your own little one or a special gift, this handmade garment is sure to be treasured. Feel free to experiment with colors, stitches, and embellishments to make each dress unique. Crocheting baby clothes allows for creativity and personalization, making it a delightful and heartfelt craft.
Remember, the beauty of handmade items lies not just in their appearance but in the love and care woven into every stitch.
Happy crocheting!