Introduction:
Crocheting is a delightful hobby that allows you to create practical and beautiful items with just a hook and some yarn. In this blog post, we’ll walk you through the process of crocheting a quick and easy lighter holder, perfect for keeping your lighter safe and accessible. Whether you’re a beginner or an experienced crocheter, this project is suitable for all skill levels. So grab your crochet hook and let’s get started on this fun and functional project!
Skill Level: Beginner
Materials Needed:
- Worsted weight yarn in your preferred color(s)
- Crochet hook (size H/5mm is recommended for worsted weight yarn)
- Scissors
- Yarn needle
- Lighter (to measure size)
Abbreviations:
- ch: chain
- sc: single crochet
- st(s): stitch(es)
- sl st: slip stitch

Pattern: 1
Step 1: Start with a Slip Knot
To begin, create a slip knot with your yarn. Insert the crochet hook into the loop and tighten the knot securely around the hook.
Step 2: Crochet the Foundation Chain
Chain 20 stitches using the yarn and hook. This chain will form the base of your lighter holder.
Step 3: Single Crochet in the Round
Join the last chain to the first chain with a slip stitch to form a circle. Be careful not to twist the chain. Now, you’ll work in rounds to create the body of the lighter holder.
Round 1: Chain 1 (does not count as a stitch), single crochet in each chain around. Join with a slip stitch to the first single crochet. (20 stitches)
Round 2-8: Repeat Round 1 (20 stitches)
Step 4: Crochet the Button Flap
The button flap will keep your lighter securely in place.
Row 1: Chain 1, single crochet in the next 5 stitches.
Row 2: Chain 1, turn your work. Single crochet in the next 5 stitches.
Row 3: Chain 1, turn your work. Single crochet in the next 5 stitches.
Row 4: Chain 1, turn your work. Single crochet in the next 5 stitches.
Row 5: Chain 1, turn your work. Single crochet in the next 5 stitches.
Row 6: Chain 1, turn your work. Single crochet in the next 5 stitches.
Step 5: Create the Buttonhole
Row 7: Chain 1, turn your work. Single crochet in the first 2 stitches, chain 1, skip 1 stitch, single crochet in the last 2 stitches.
Step 6: Finish the Flap
Row 8: Chain 1, turn your work. Single crochet in each stitch and chain space across.
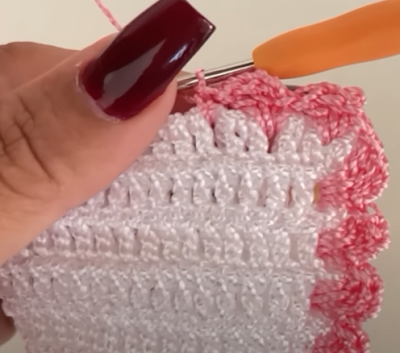
Step 7: Final Round and Edging
Single crochet around the entire holder, working 3 single crochets in each corner. This will give the holder a neat and finished look.
Step 8: Fasten Off and Weave in Ends
Cut the yarn, leaving a tail. Pull the tail through the last loop and tighten to secure it. Weave in any remaining yarn ends using a yarn needle to ensure your work looks tidy.
Step 9: Attach the Button
Sew the button securely to the front of the holder, aligning it with the buttonhole.

Pattern: 2
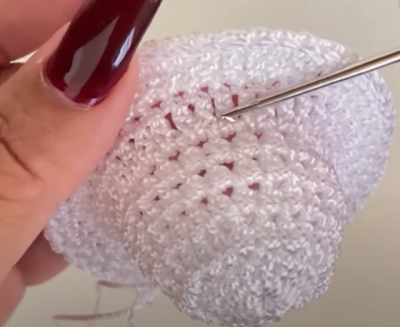
Step 1: Starting Circle
- Make a magic circle (or ch 4 and join with a sl st to form a ring).
- Round 1: Ch 1 (does not count as a st), work 6 sc into the ring. Join with a sl st to the first sc. (6 sts)
Step 2: Increasing the Circle
3. Round 2: Ch 1 (does not count as a st), work 2 sc in each st around. Join with a sl st to the first sc. (12 sts)
Step 3: Continue Increasing
4. Round 3: Ch 1 (does not count as a st), work 1 sc in the next st, work 2 sc in the next st – repeat from * to * around. Join with a sl st to the first sc. (18 sts)
- Round 4: Ch 1 (does not count as a st), work 1 sc in each of the next 2 sts, work 2 sc in the next st – repeat from * to * around. Join with a sl st to the first sc. (24 sts)
Step 4: Crocheting the Body
6. Round 5: Ch 1 (does not count as a st), work 1 sc in each st around. Join with a sl st to the first sc. (24 sts)
- Rounds 6-15: Repeat Round 5. This will create a tube-like structure that fits the lighter snugly.
Step 5: Closing the Top
8. Round 16: Ch 1 (does not count as a st), work 1 sc in each of the next 2 sts, sc2tog (single crochet two stitches together) – repeat from * to * around. Join with a sl st to the first sc. (18 sts)
- Round 17: Ch 1 (does not count as a st), sc2tog – repeat from * to * around. Join with a sl st to the first sc. (9 sts)
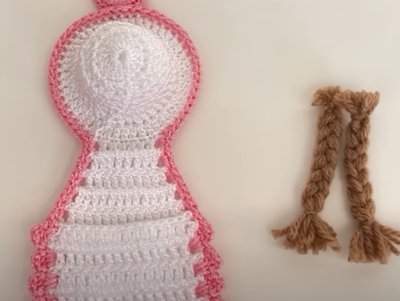
Step 6: Finishing
10. Fasten off, leaving a long tail for sewing.
1. Weave the yarn tail through the remaining stitches and pull tight to close the top of the holder.
2. Secure and weave in any loose ends with a yarn needle.
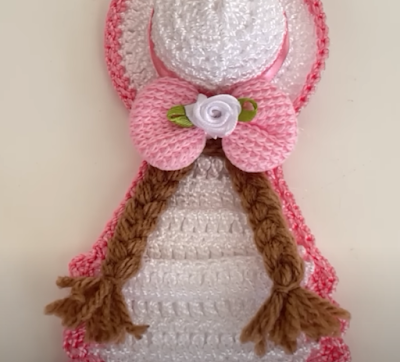
Conclusion:
Congratulations! You’ve successfully crocheted a quick and easy lighter holder. With your new creation, your lighter will always be within reach and protected. Customize your lighter holder with different yarn colors and buttons to make it uniquely yours. Happy crocheting!